Adding Additional Data
You can add new columns for the additional data you need. These columns will appear in the Staffinc Suite’s Client Portal and also in the Staffinc Work app.
Steps to Create Additional Data Columns:
1. Access the Additional Data Menu
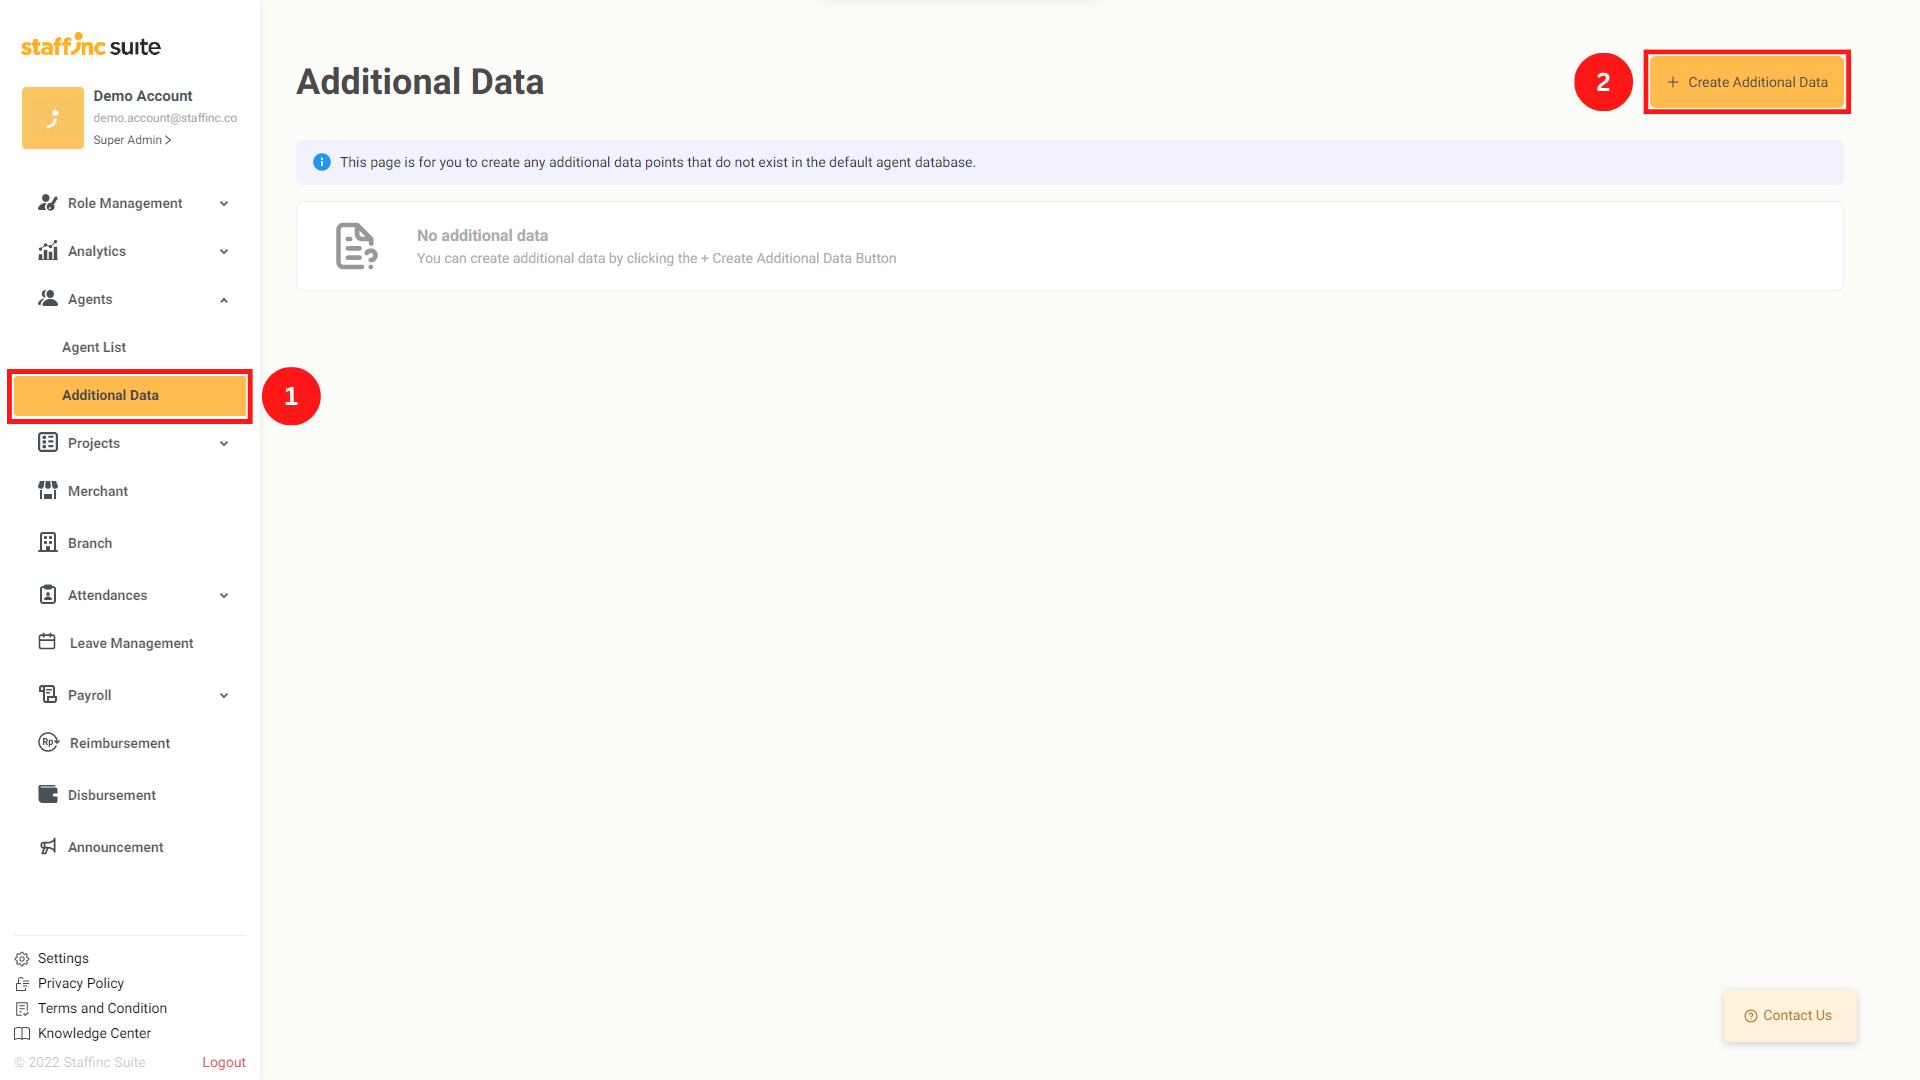
- Go to the Agents > Additional Data menu.
- Click Create Additional Data.
2. Fill in the Required Fields
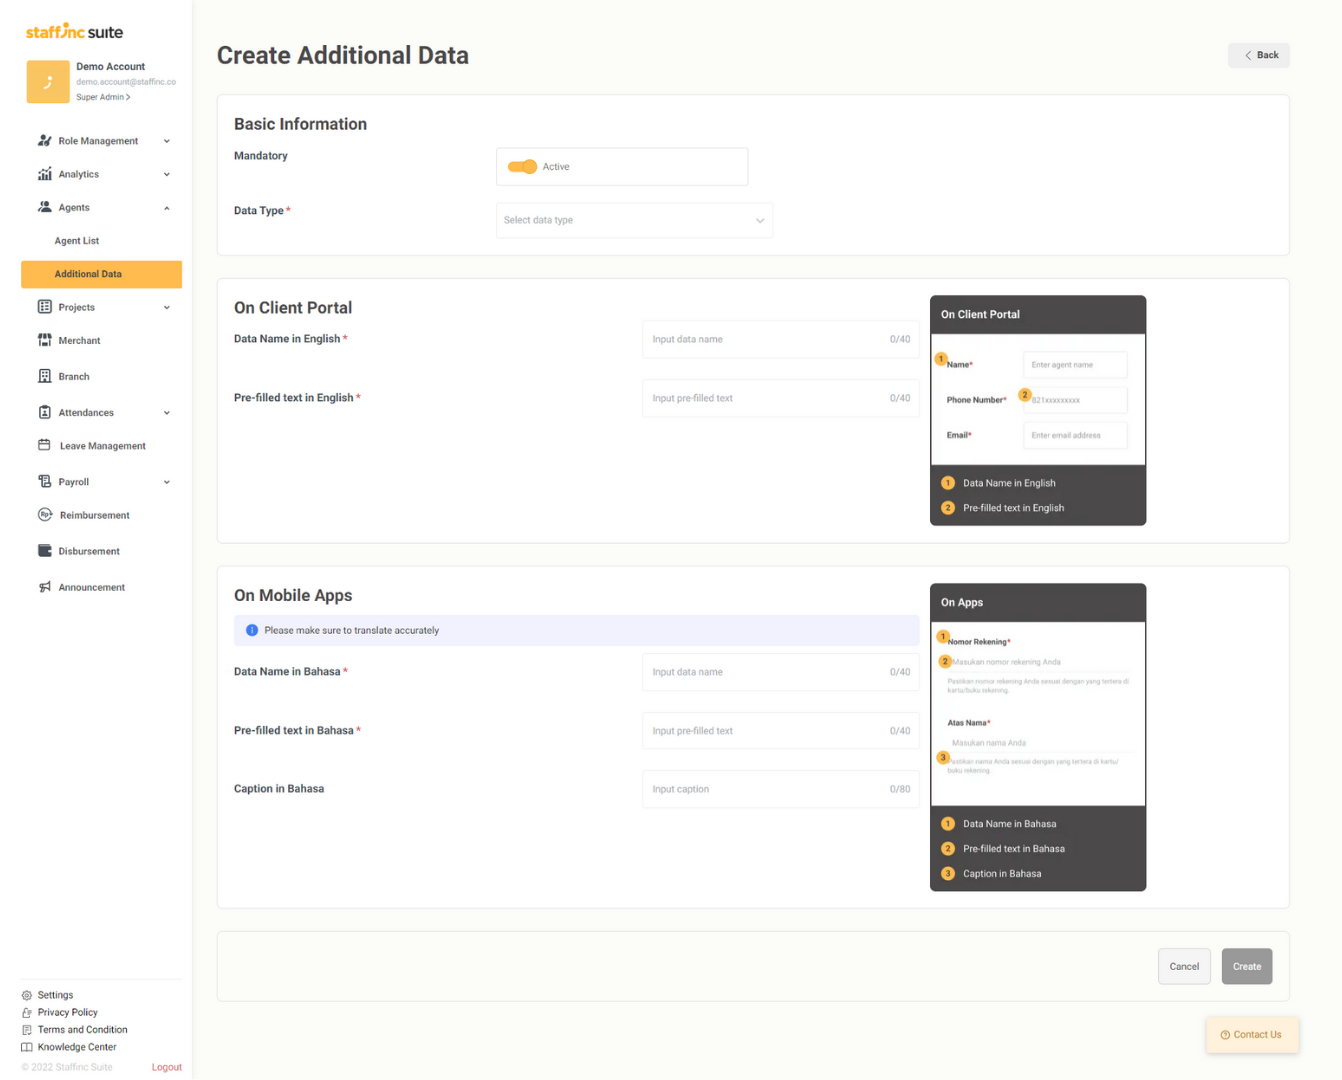
- You will find several fields that need to be filled out.
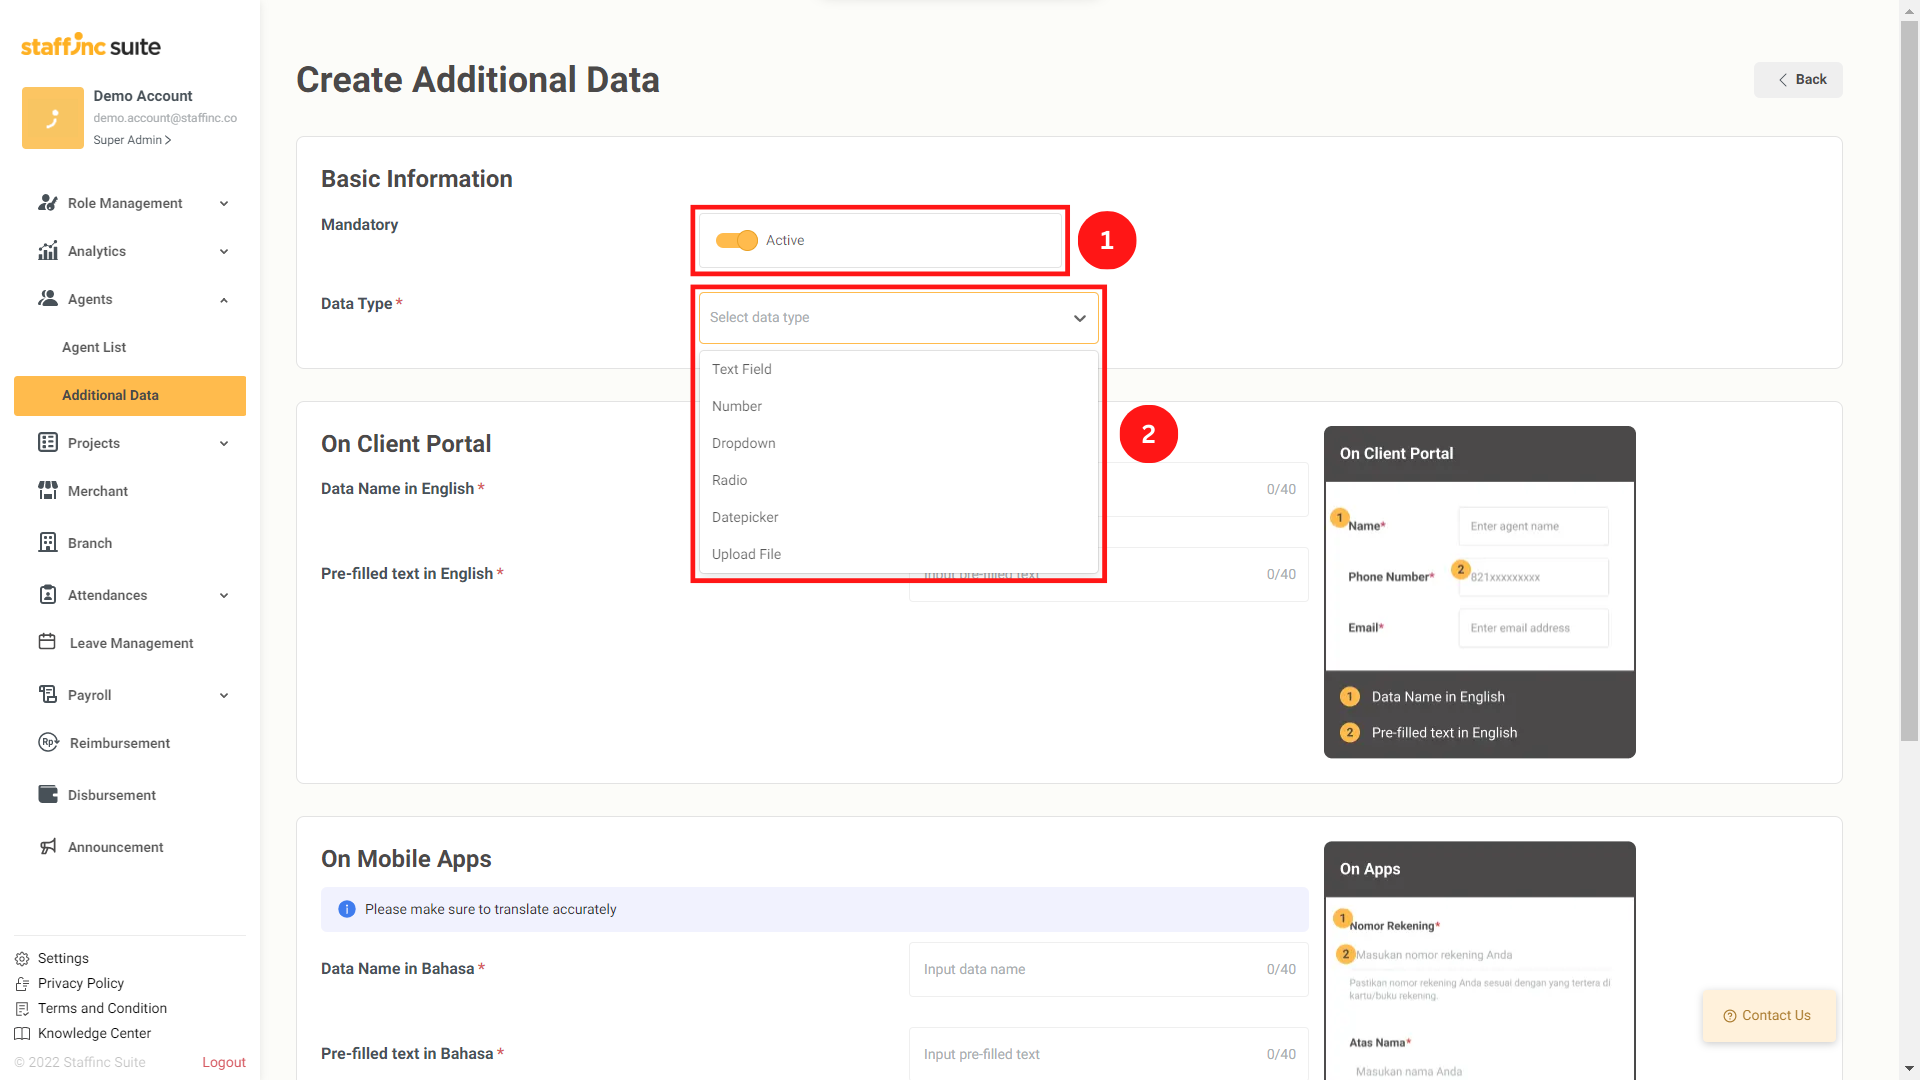
3. Basic Information Settings
- In the Basic Information submenu, you will find two settings:
- 1. Mandatory: Specify whether the data is mandatory or not.
- 2. Data Type: Choose the type of data you want to fill in, such as text, dropdown, or file upload.
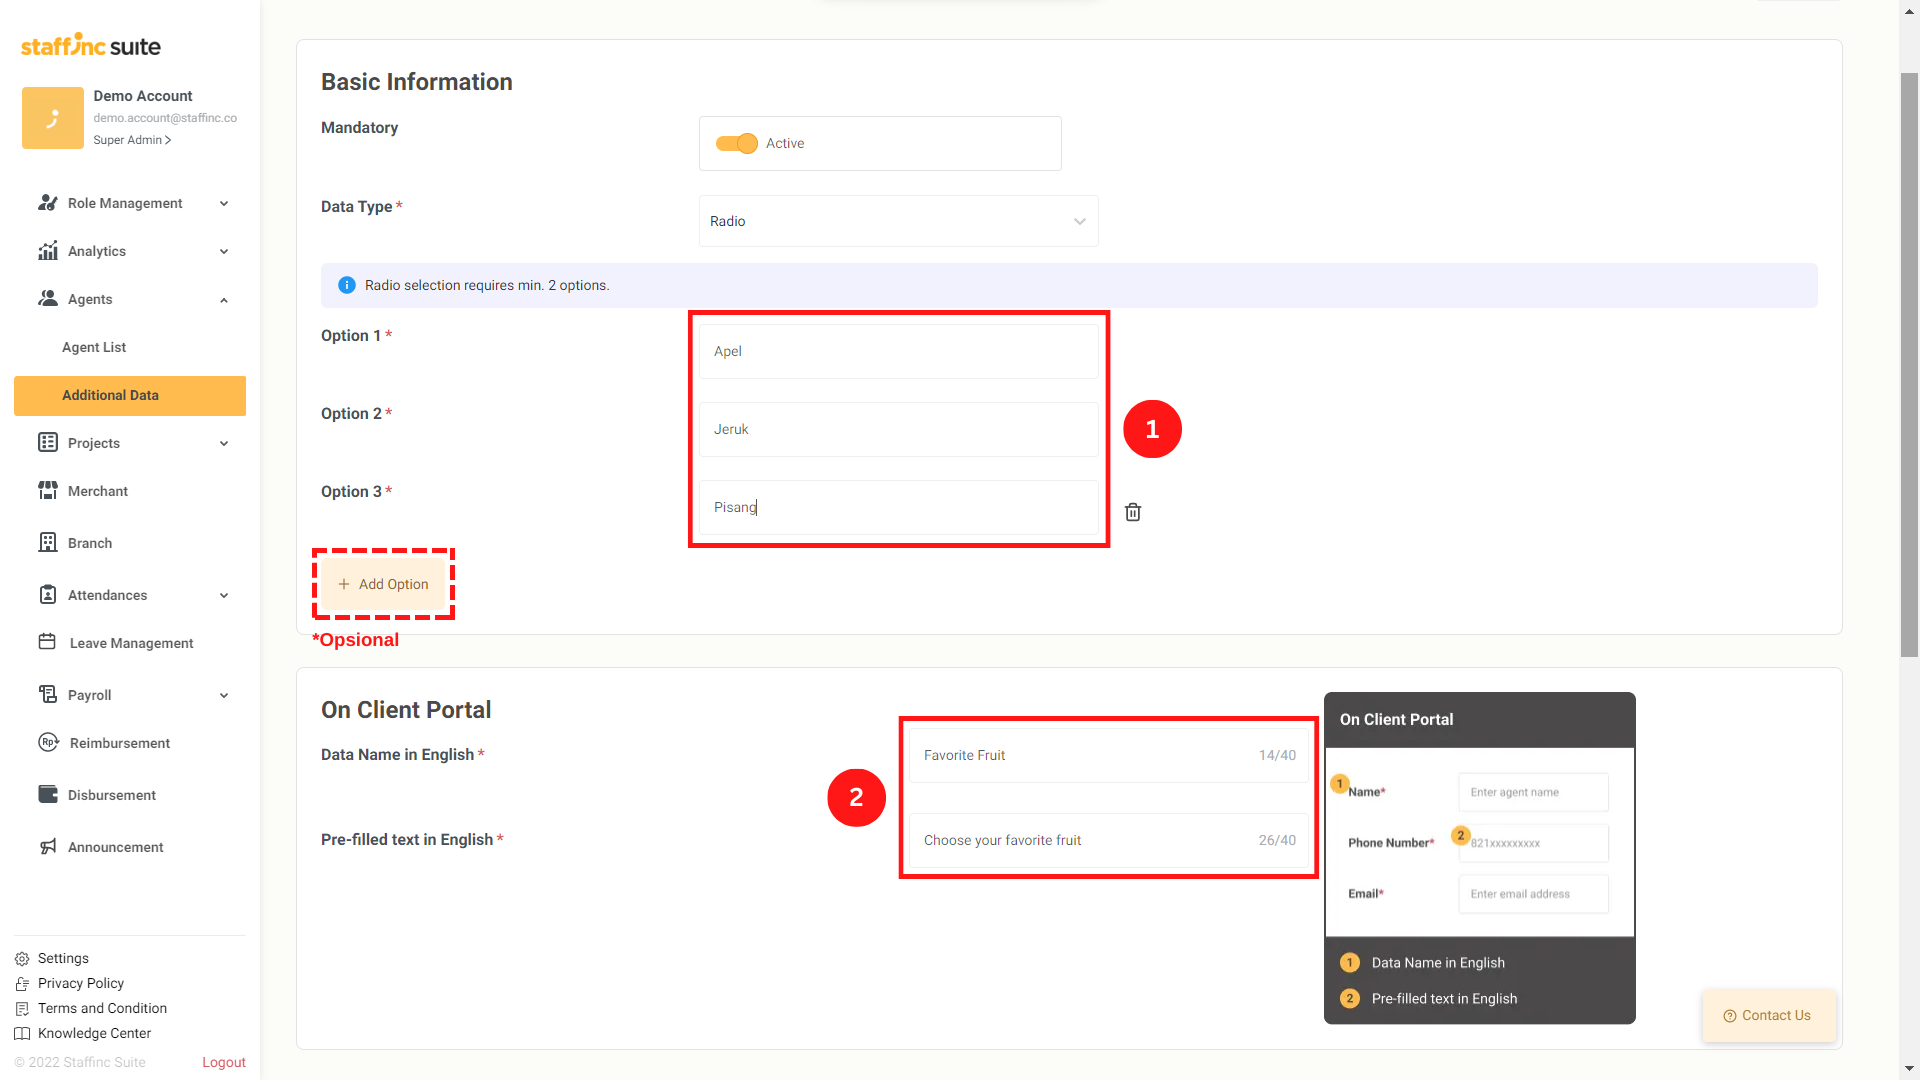
4. Example of Filling in Data Type
- If you select Data Types such as Radio or Dropdown, fill in the options that can be selected. You can add more than 3 options if needed and also delete options by clicking the trash icon next to them.
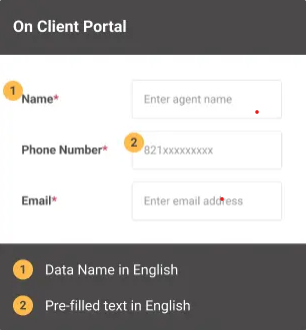
5. Filling in the Submenu On Client Portal
- It is recommended to fill in the Data Name in English and Pre-filled text in English using English.
- Data Name in English: Name of the column to be filled.
- Pre-filled text in English: Example if the column is to be filled.
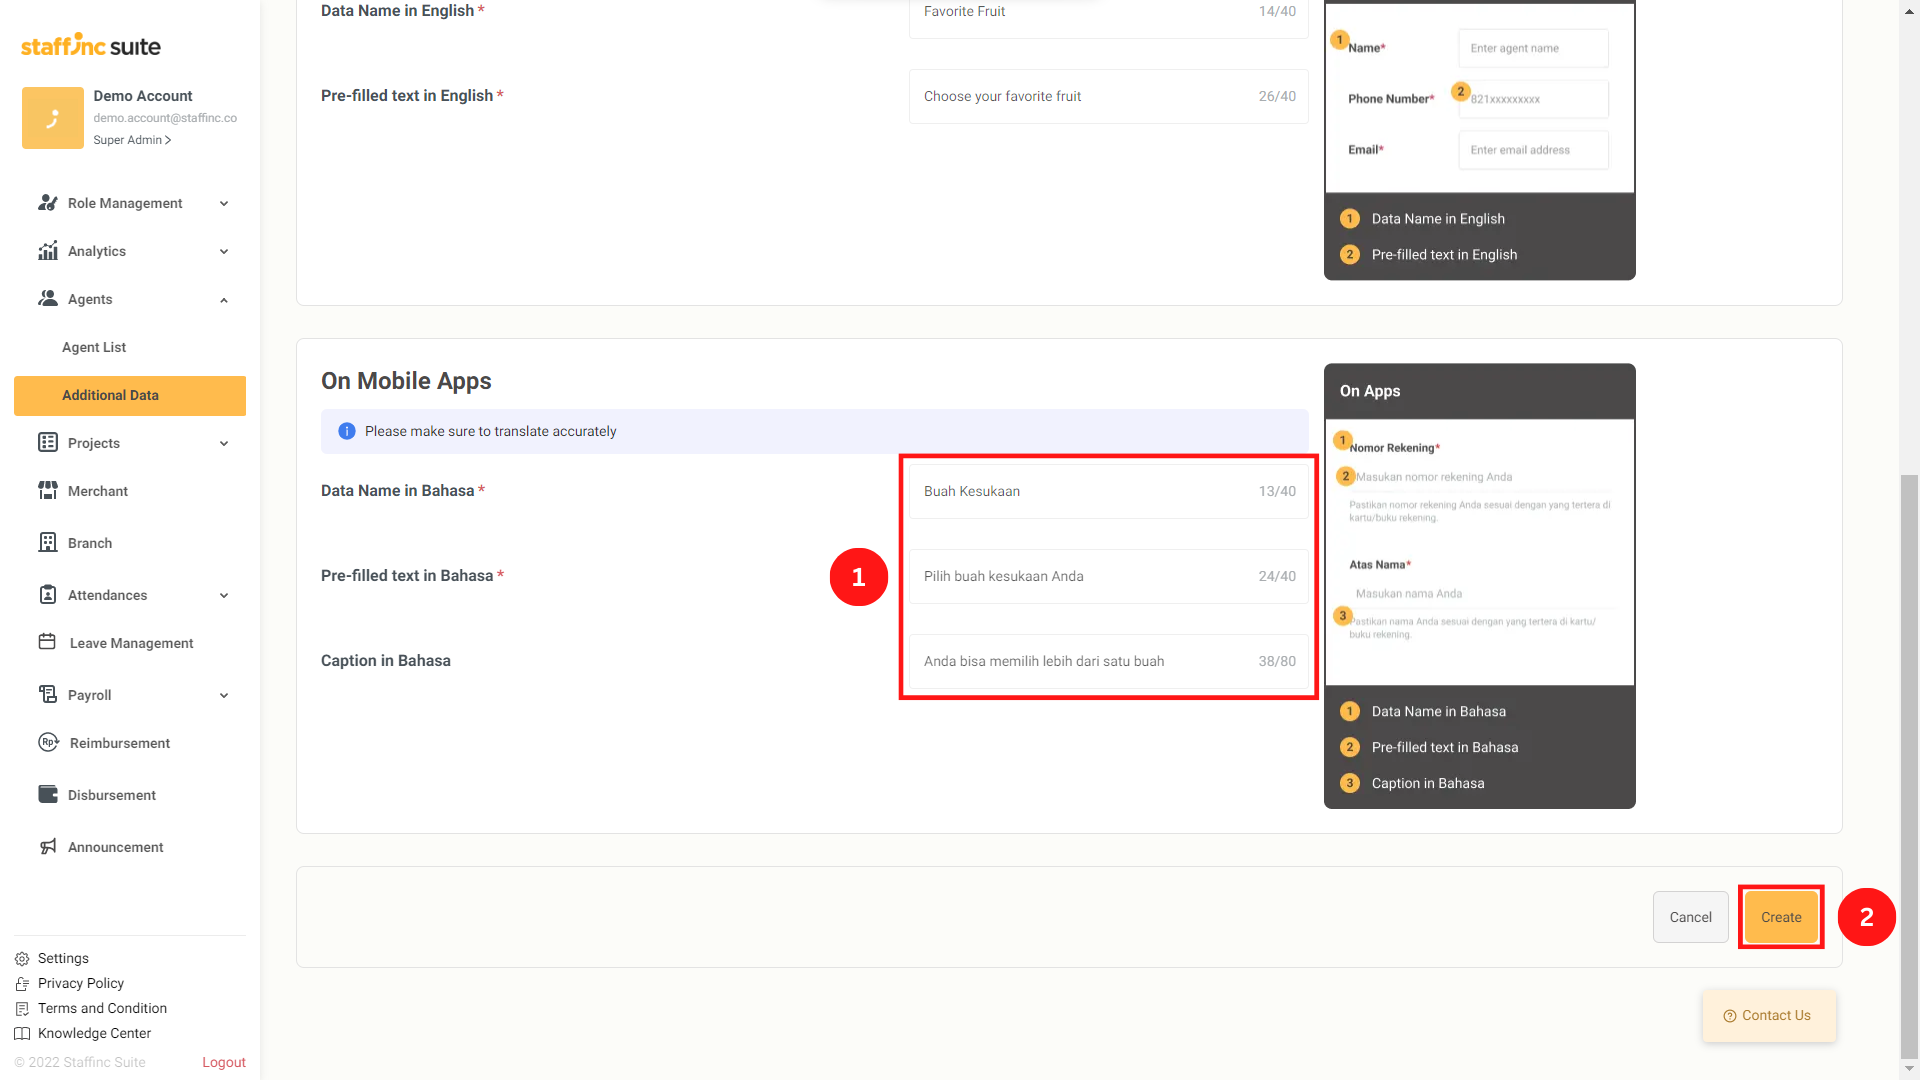
6. Filling in the Submenu On Mobile Apps
- The method of filling in columns in this submenu is the same as in the On Client Portal submenu, but using Bahasa Indonesia. This submenu will appear in the Staffinc Work app and will be filled out by the workers.
7. Save Additional Data
-
Once you have completed filling in all the data, click the Create button.
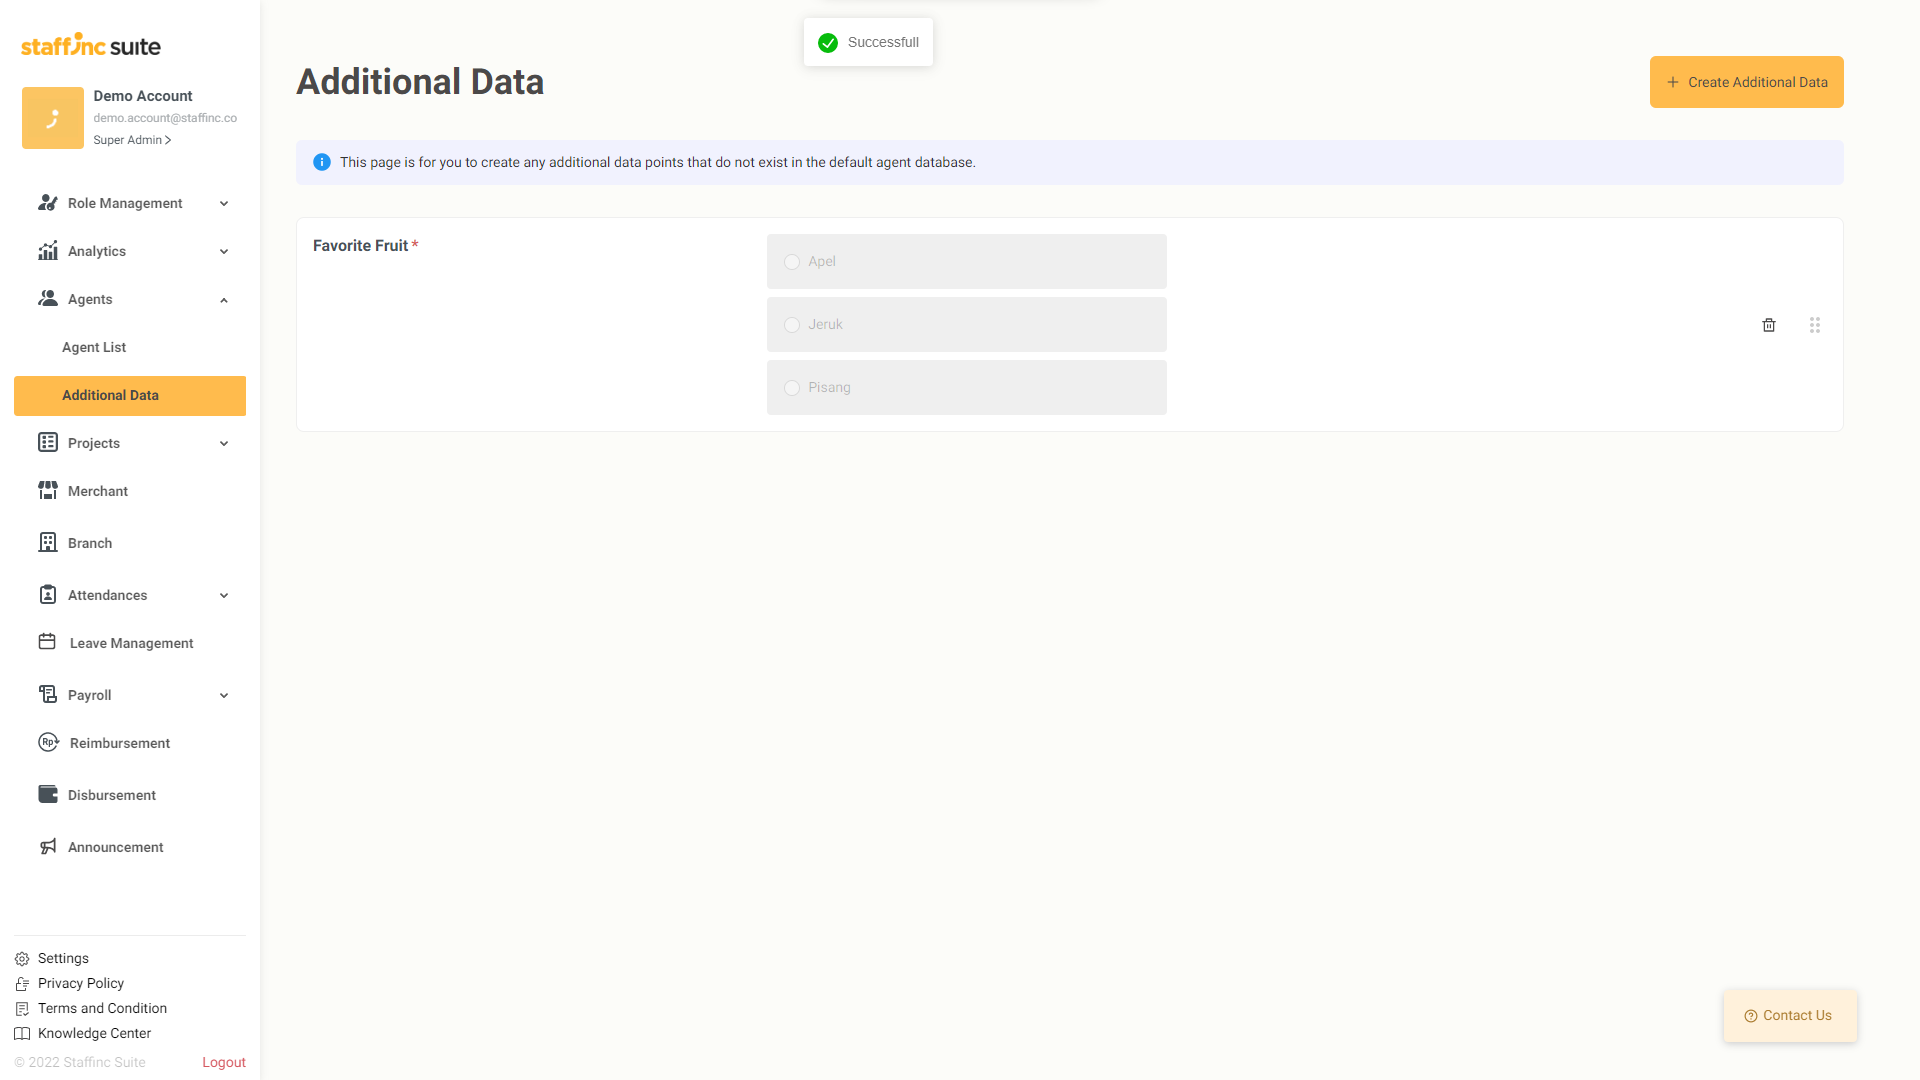
-
The additional data you created will appear in the Additional Data menu.
-
You can find the menu you created when adding new worker data or when editing worker information.
By following the above steps, you can easily add new columns for the additional data you need. If you have further questions, feel free to contact our support team.