Data Submission Validation
Once you have learned how to check the data submitted by the workers, the next step is to validate this data. You can approve or reject each data point. Here are the steps:
1. Access the Submission Column
- In the Submission column, you can see the data submitted by the workers.
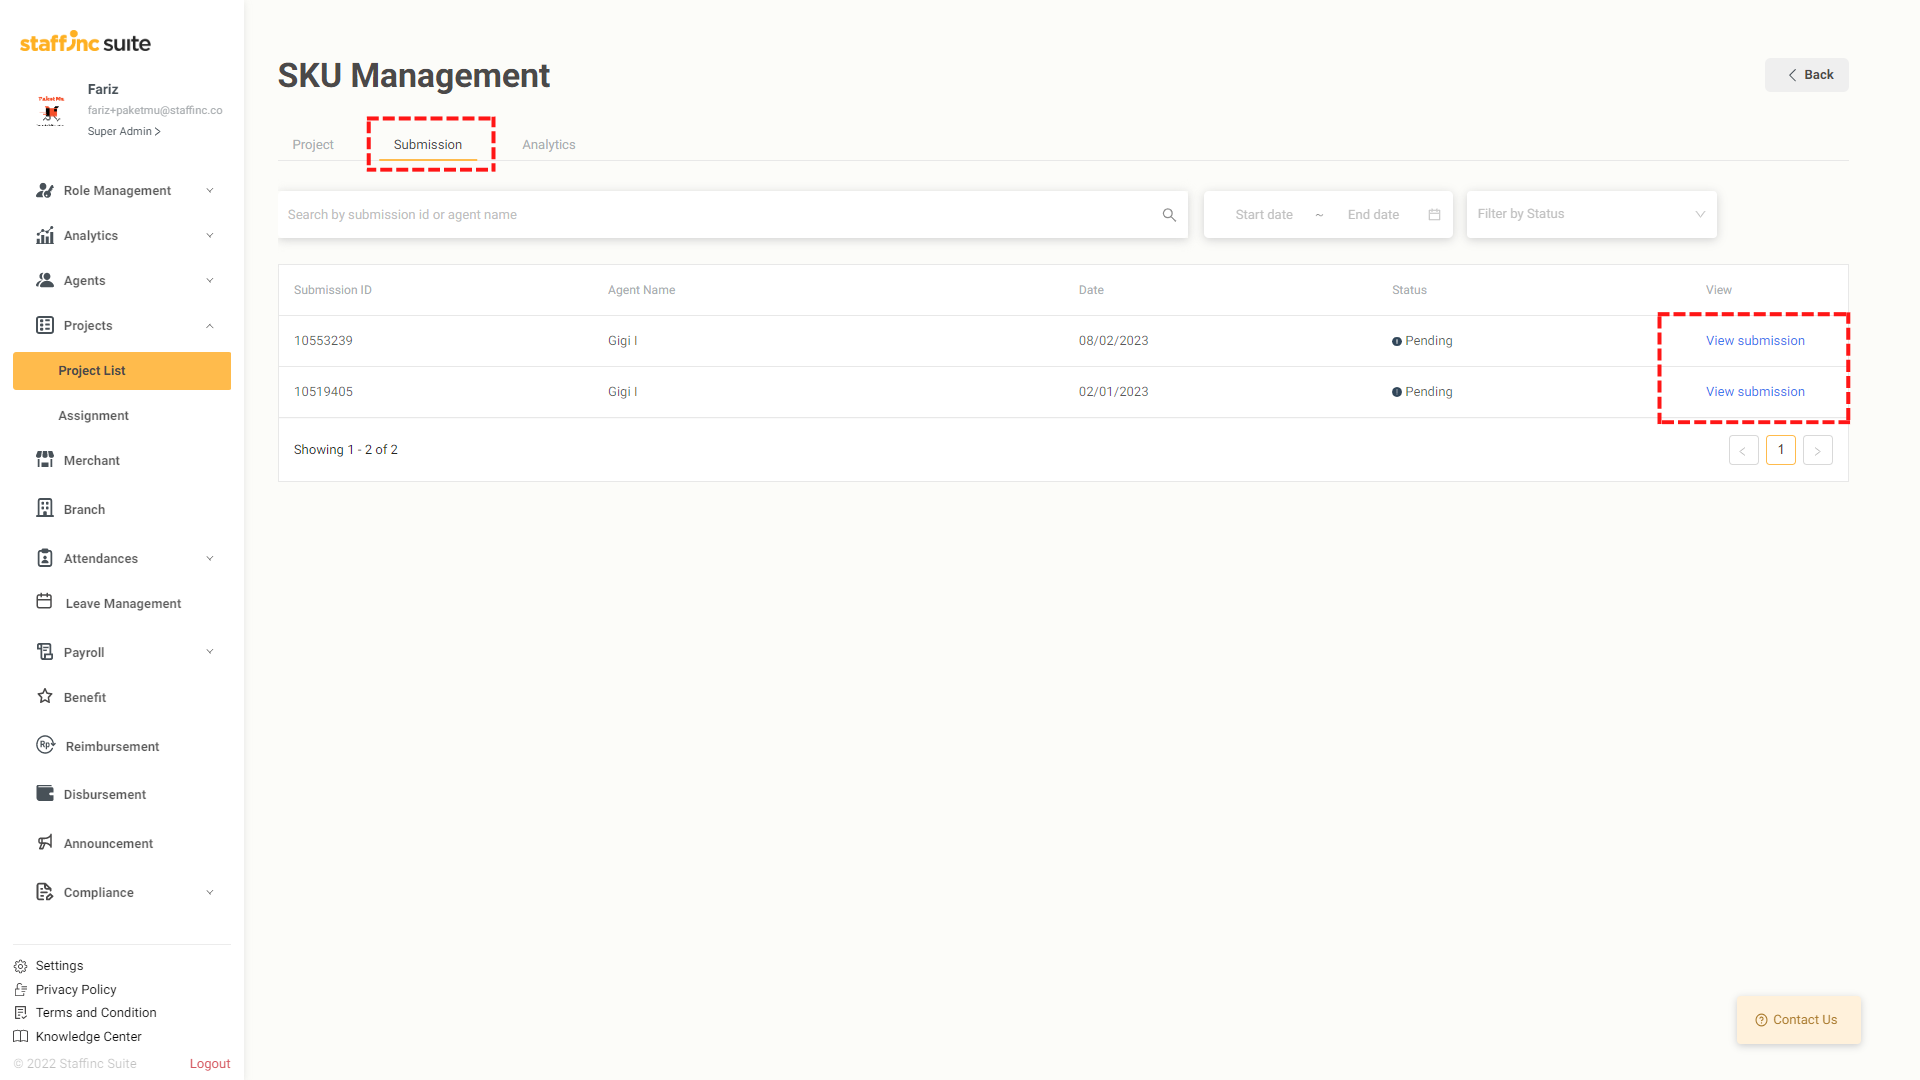
2. View Submission Details
- Click View Submission to check the data.
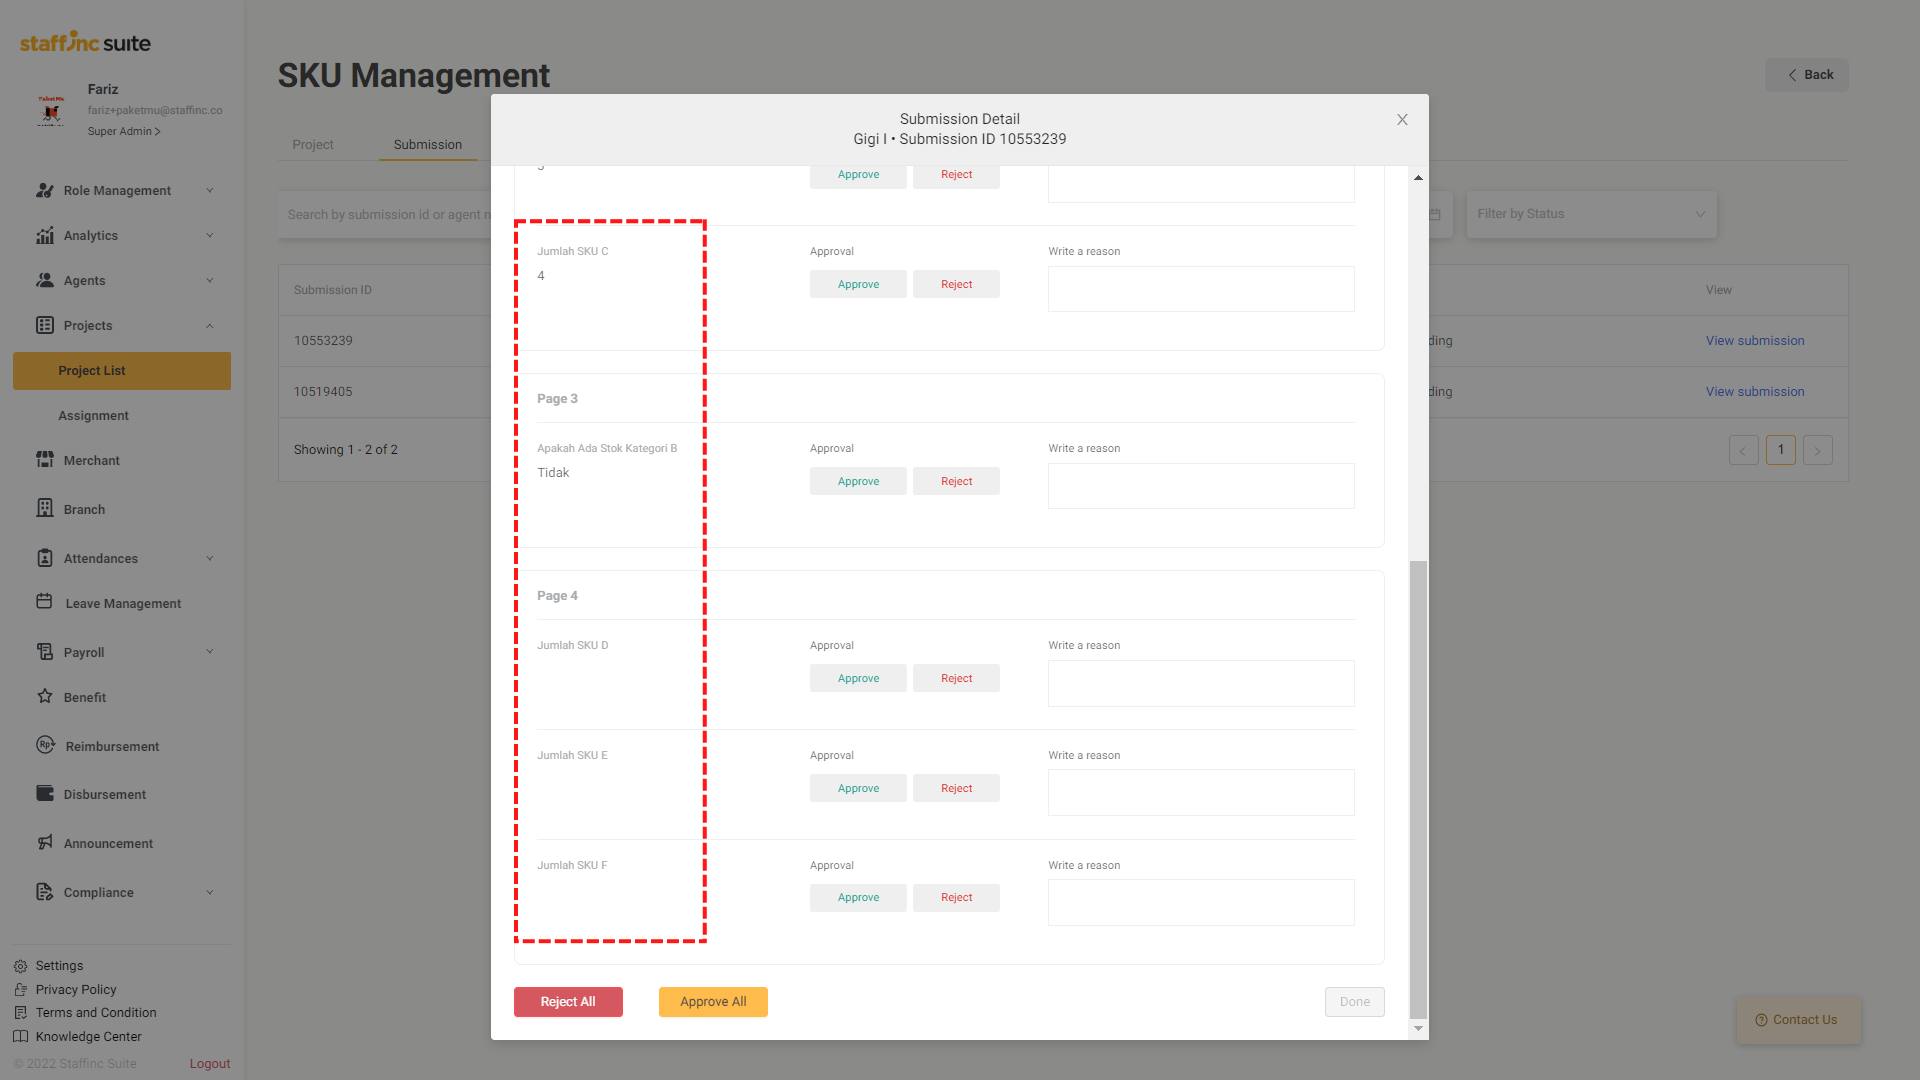
3. Data Checking
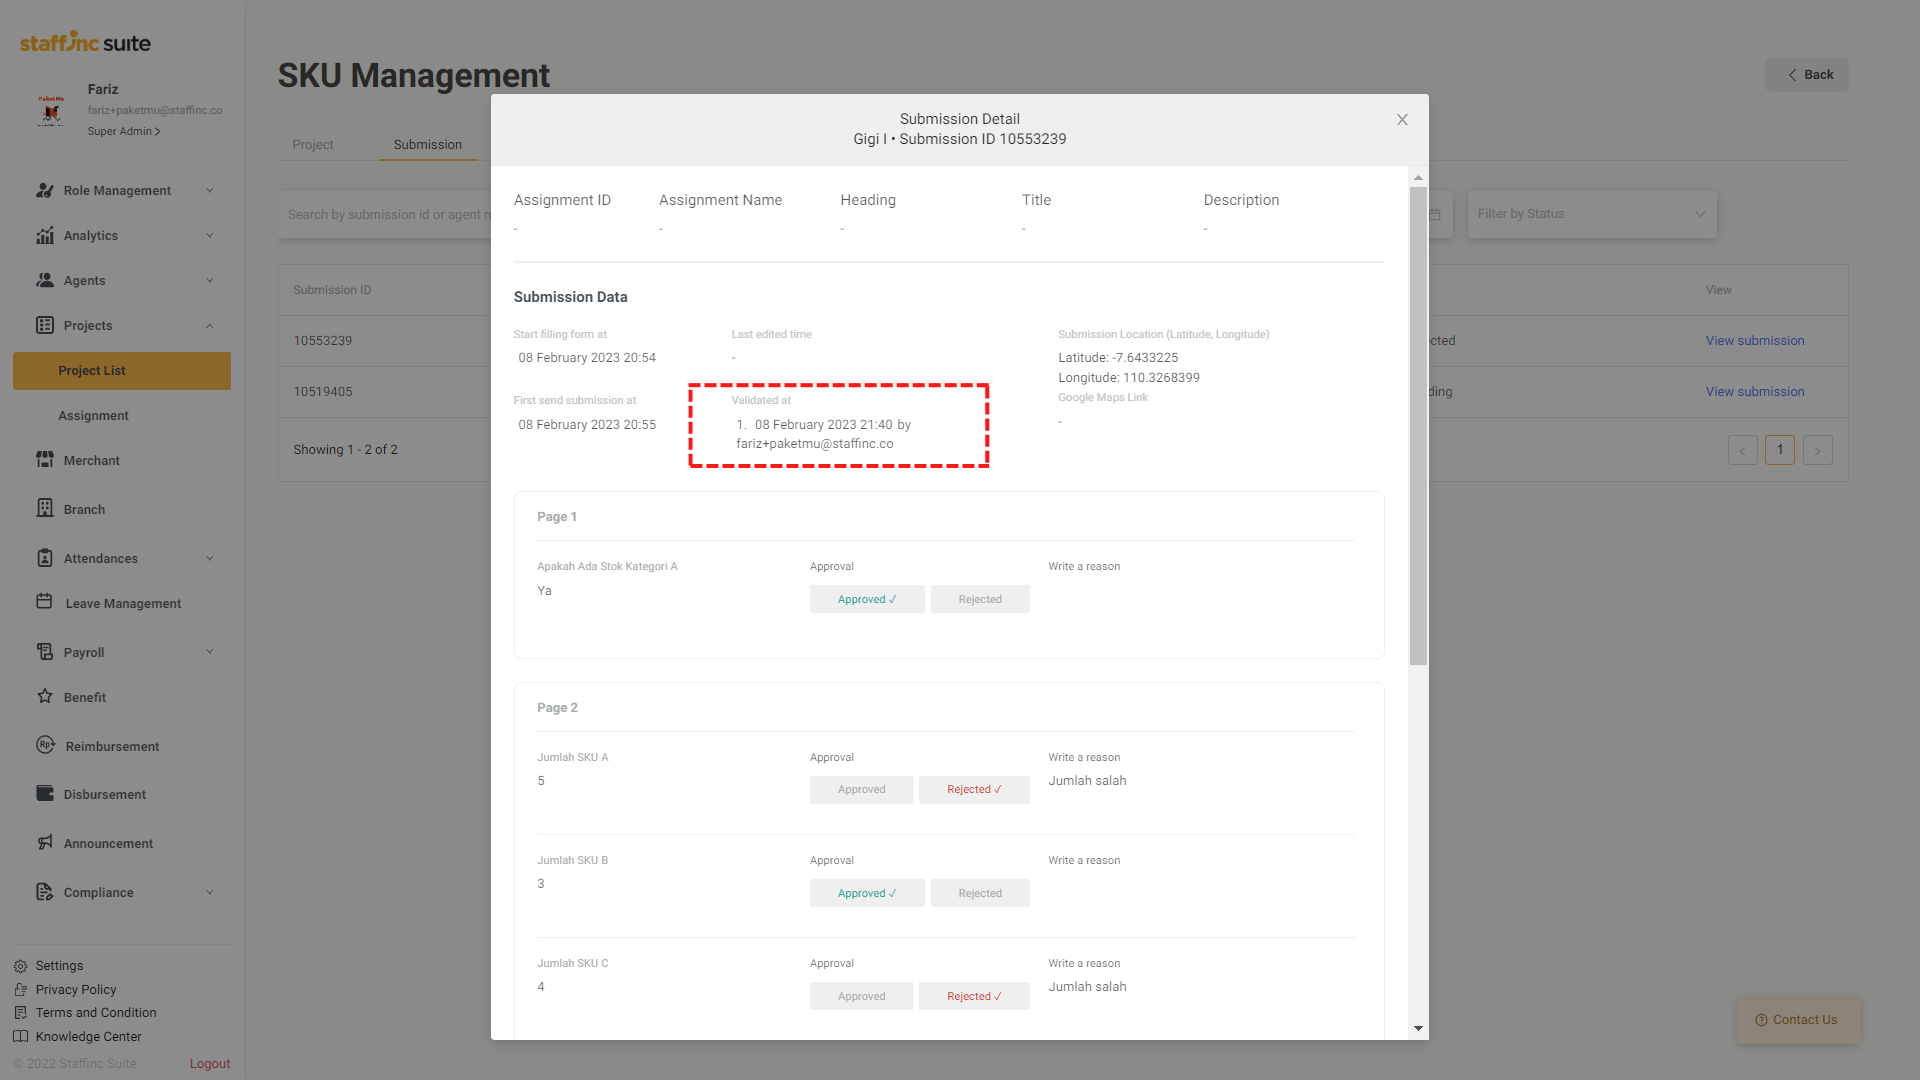
-
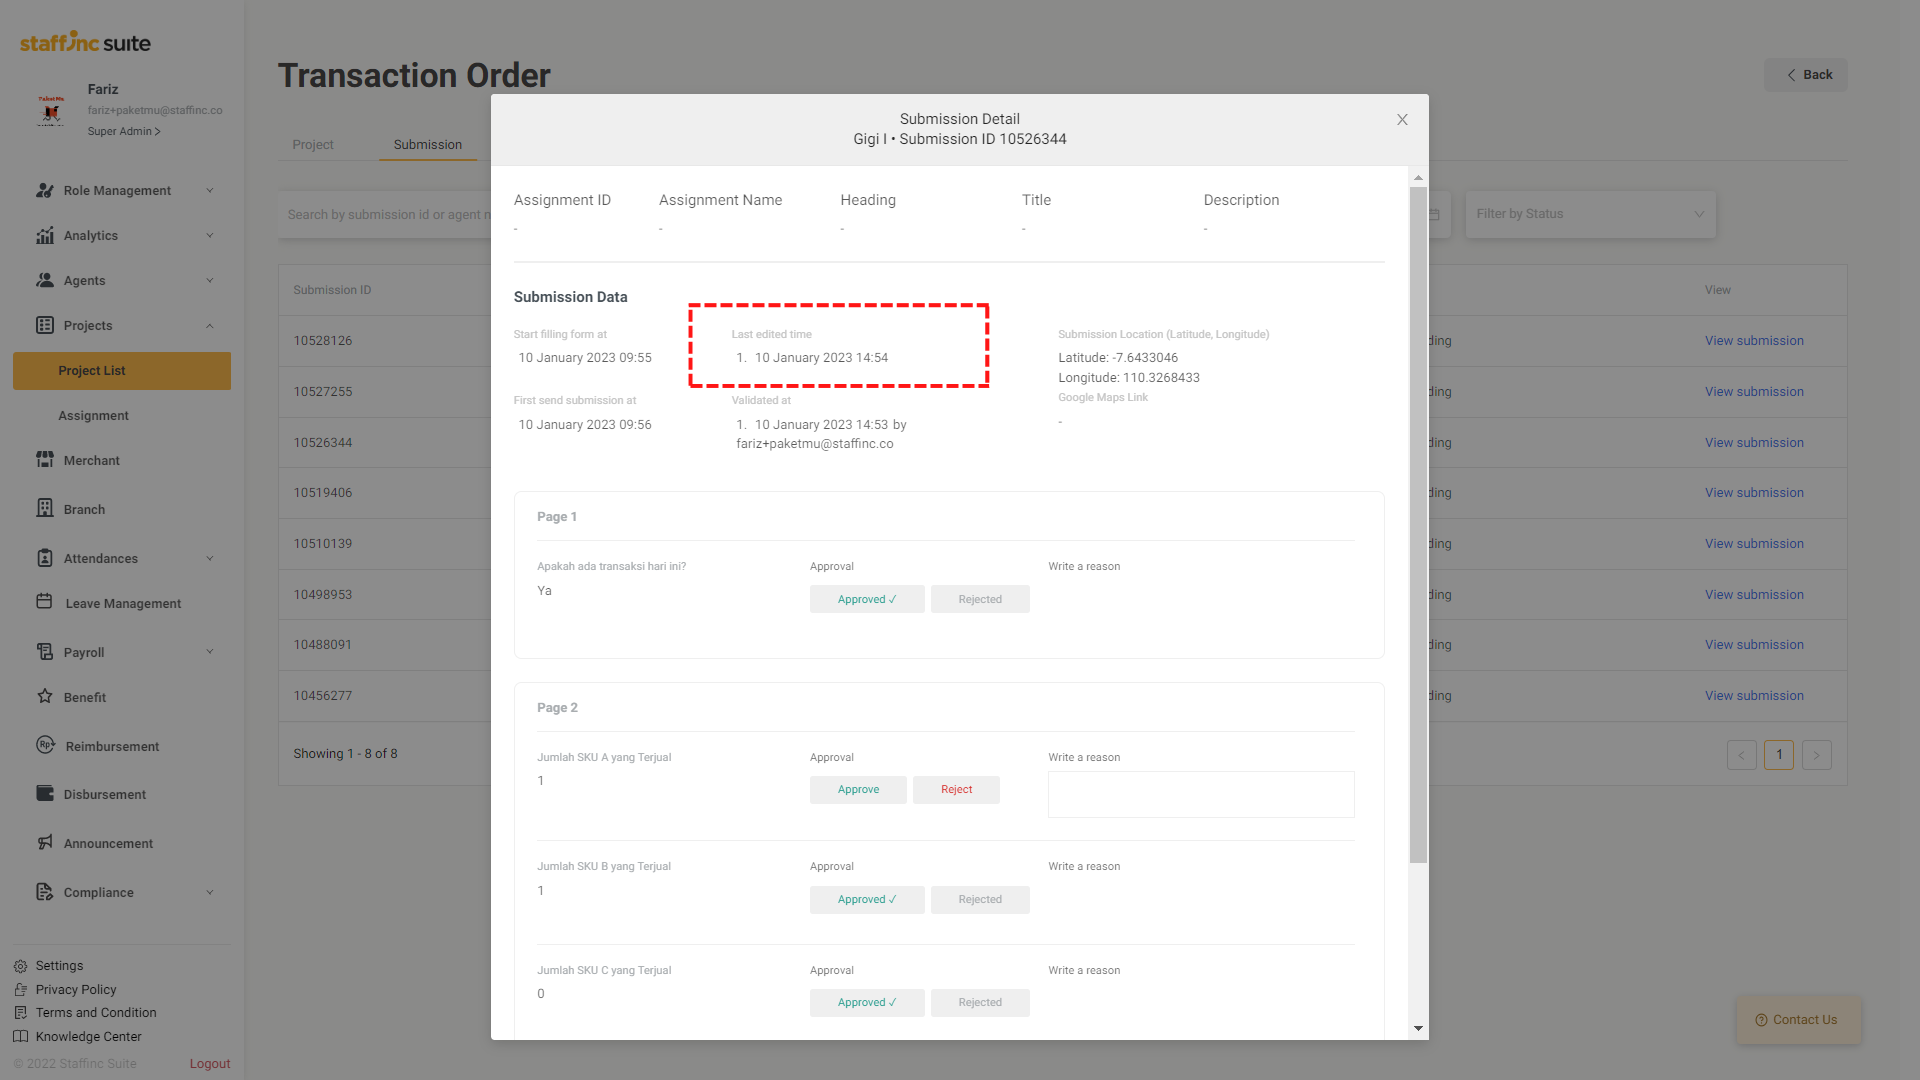
Once inside the selected data, you can see the data submitted by the workers, including information about the date and location of the submission.

-
On the left side, you will see the answers submitted by the workers.
4. Correct and Validate Data
- After checking, you can correct the submitted information. Click Reject on the answers you find incorrect, then provide a reason for rejection in the column on the right.
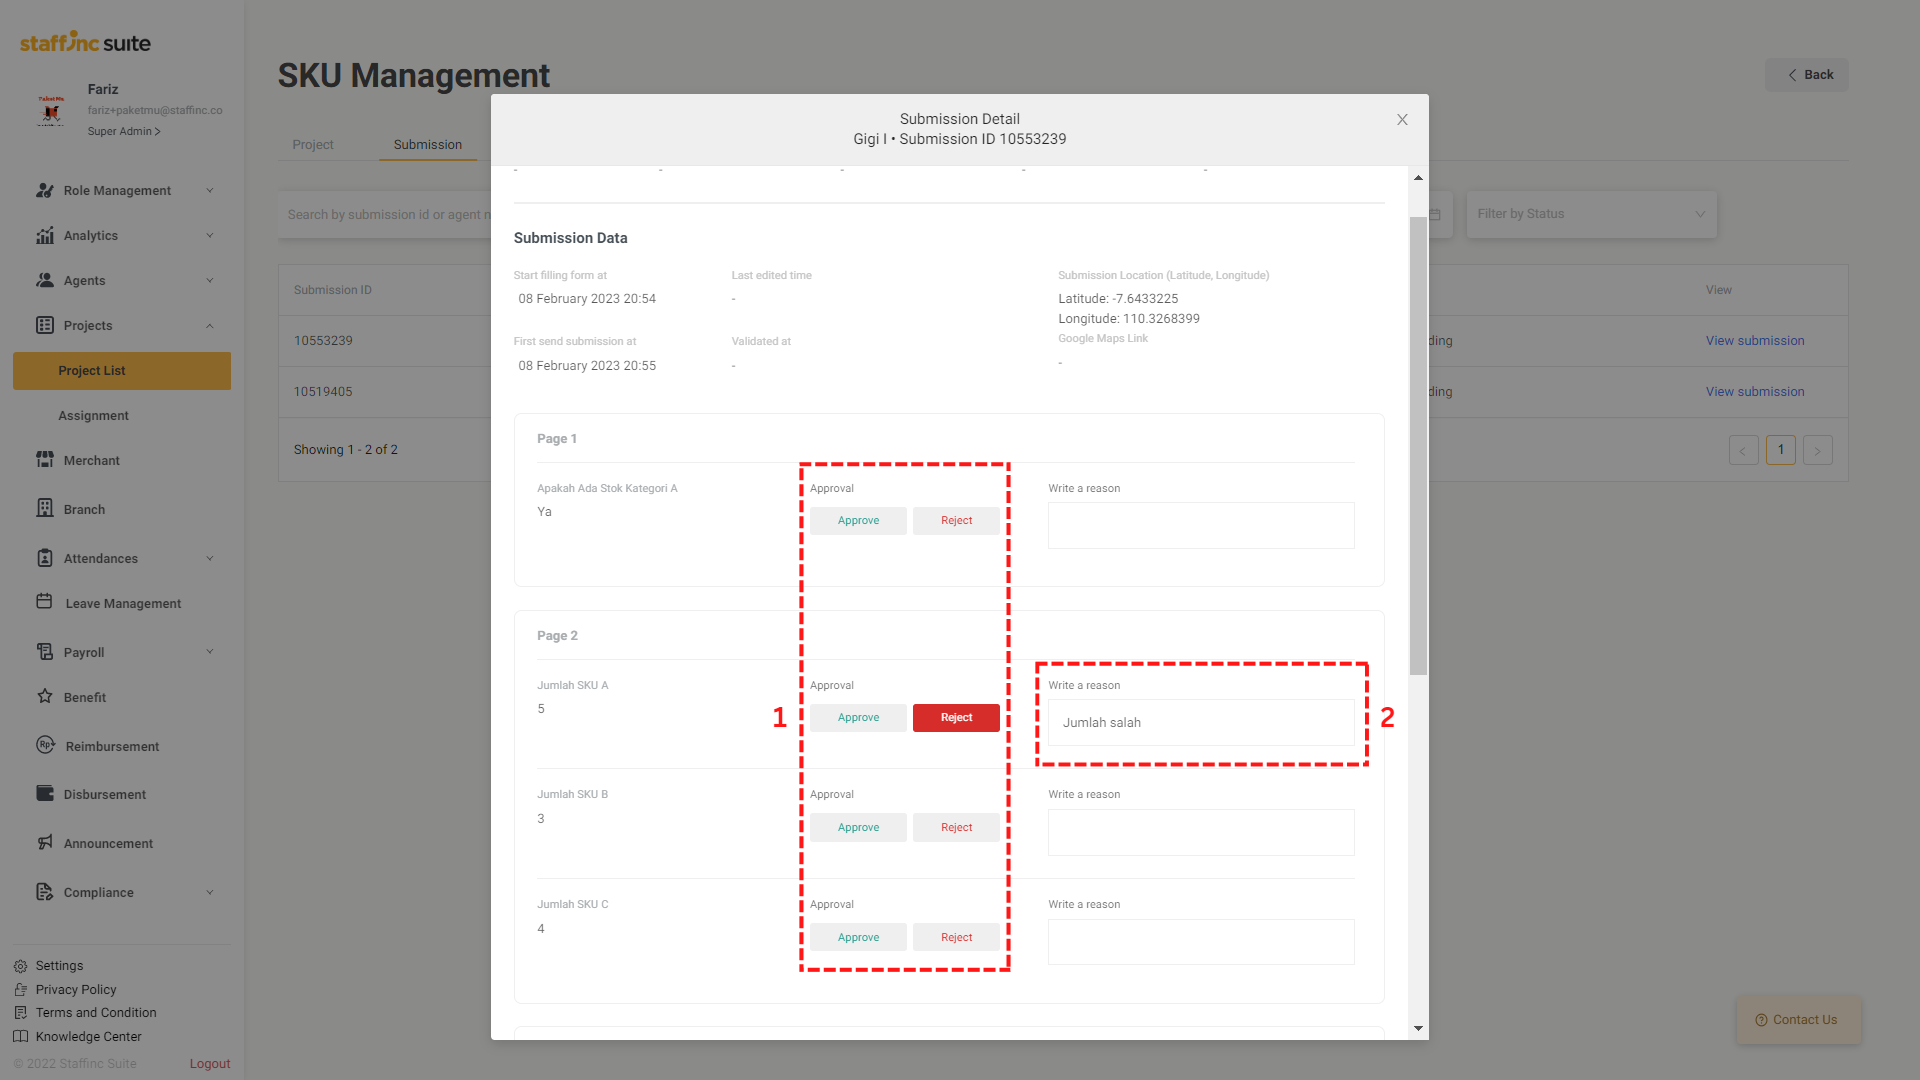
💡
When rejecting a data point, make sure to click Approve on other data points to enable the Save button.
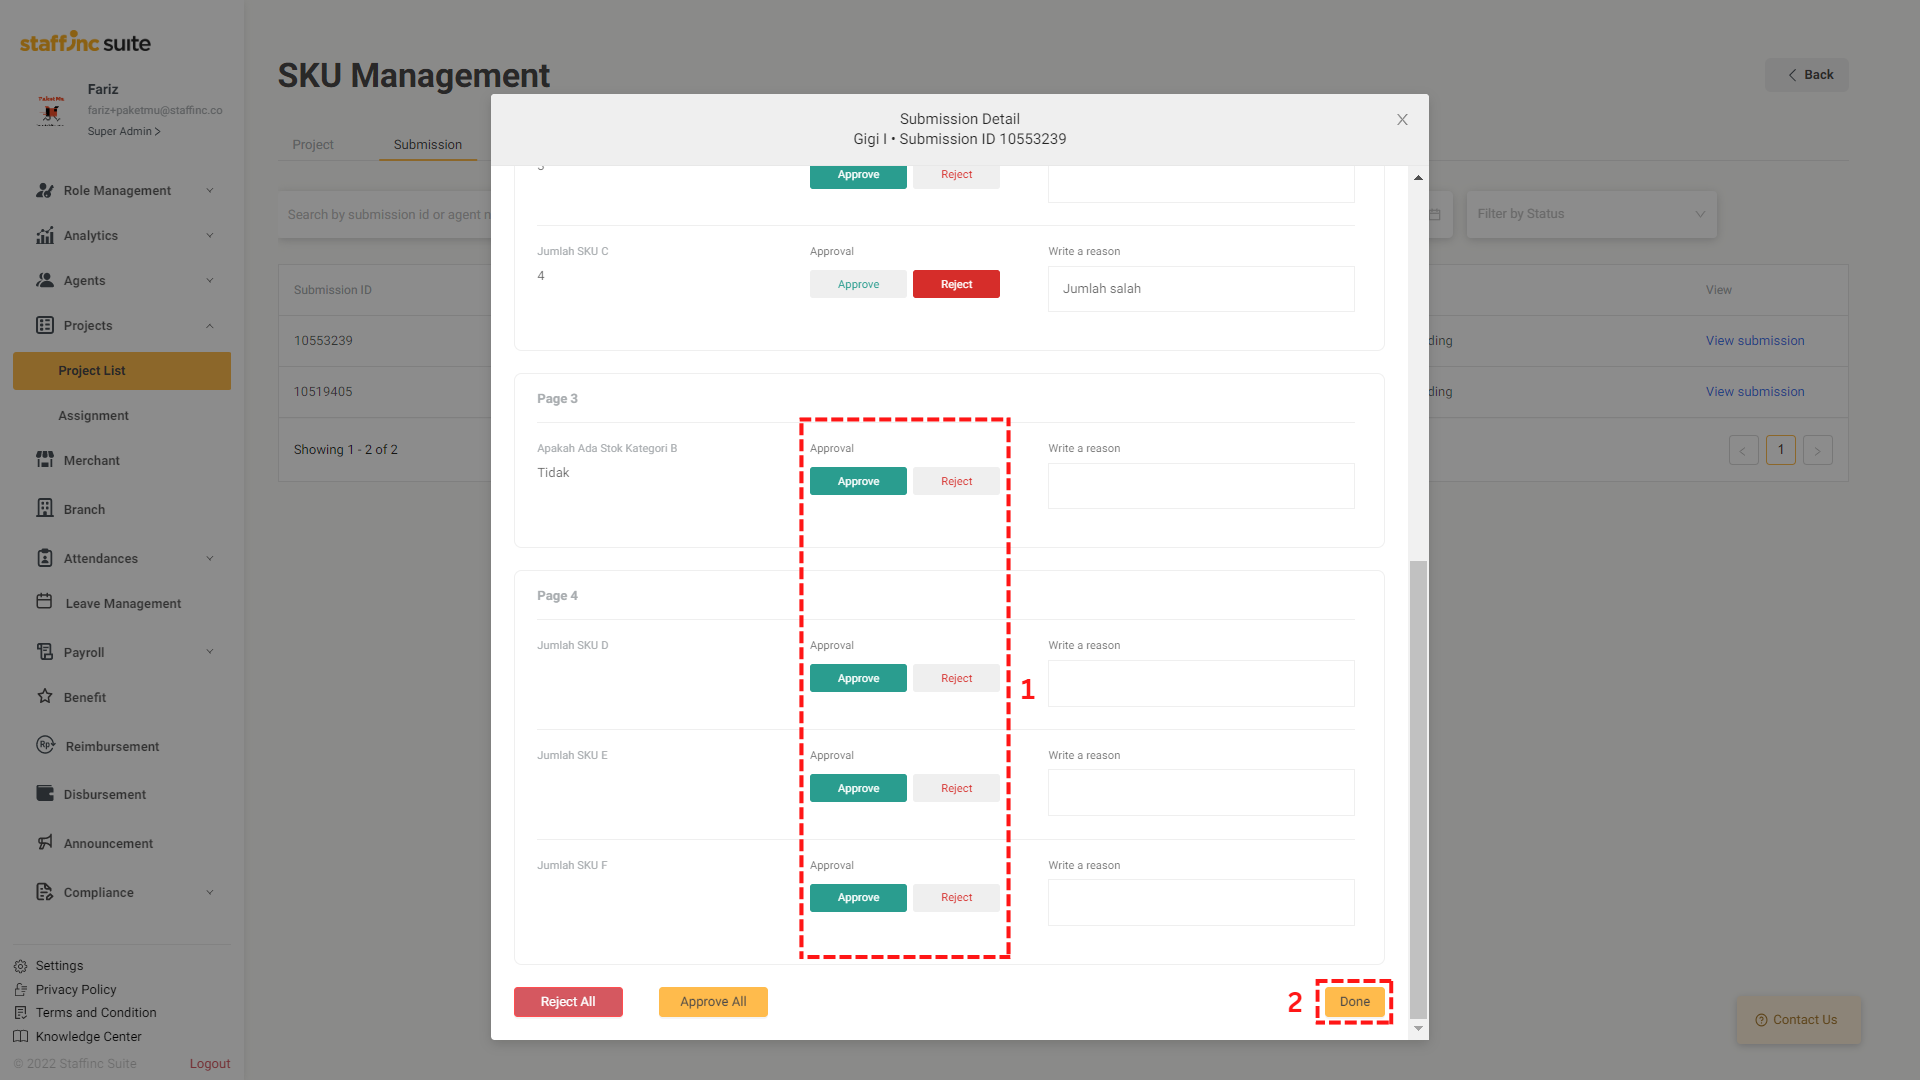
5. Save Validation
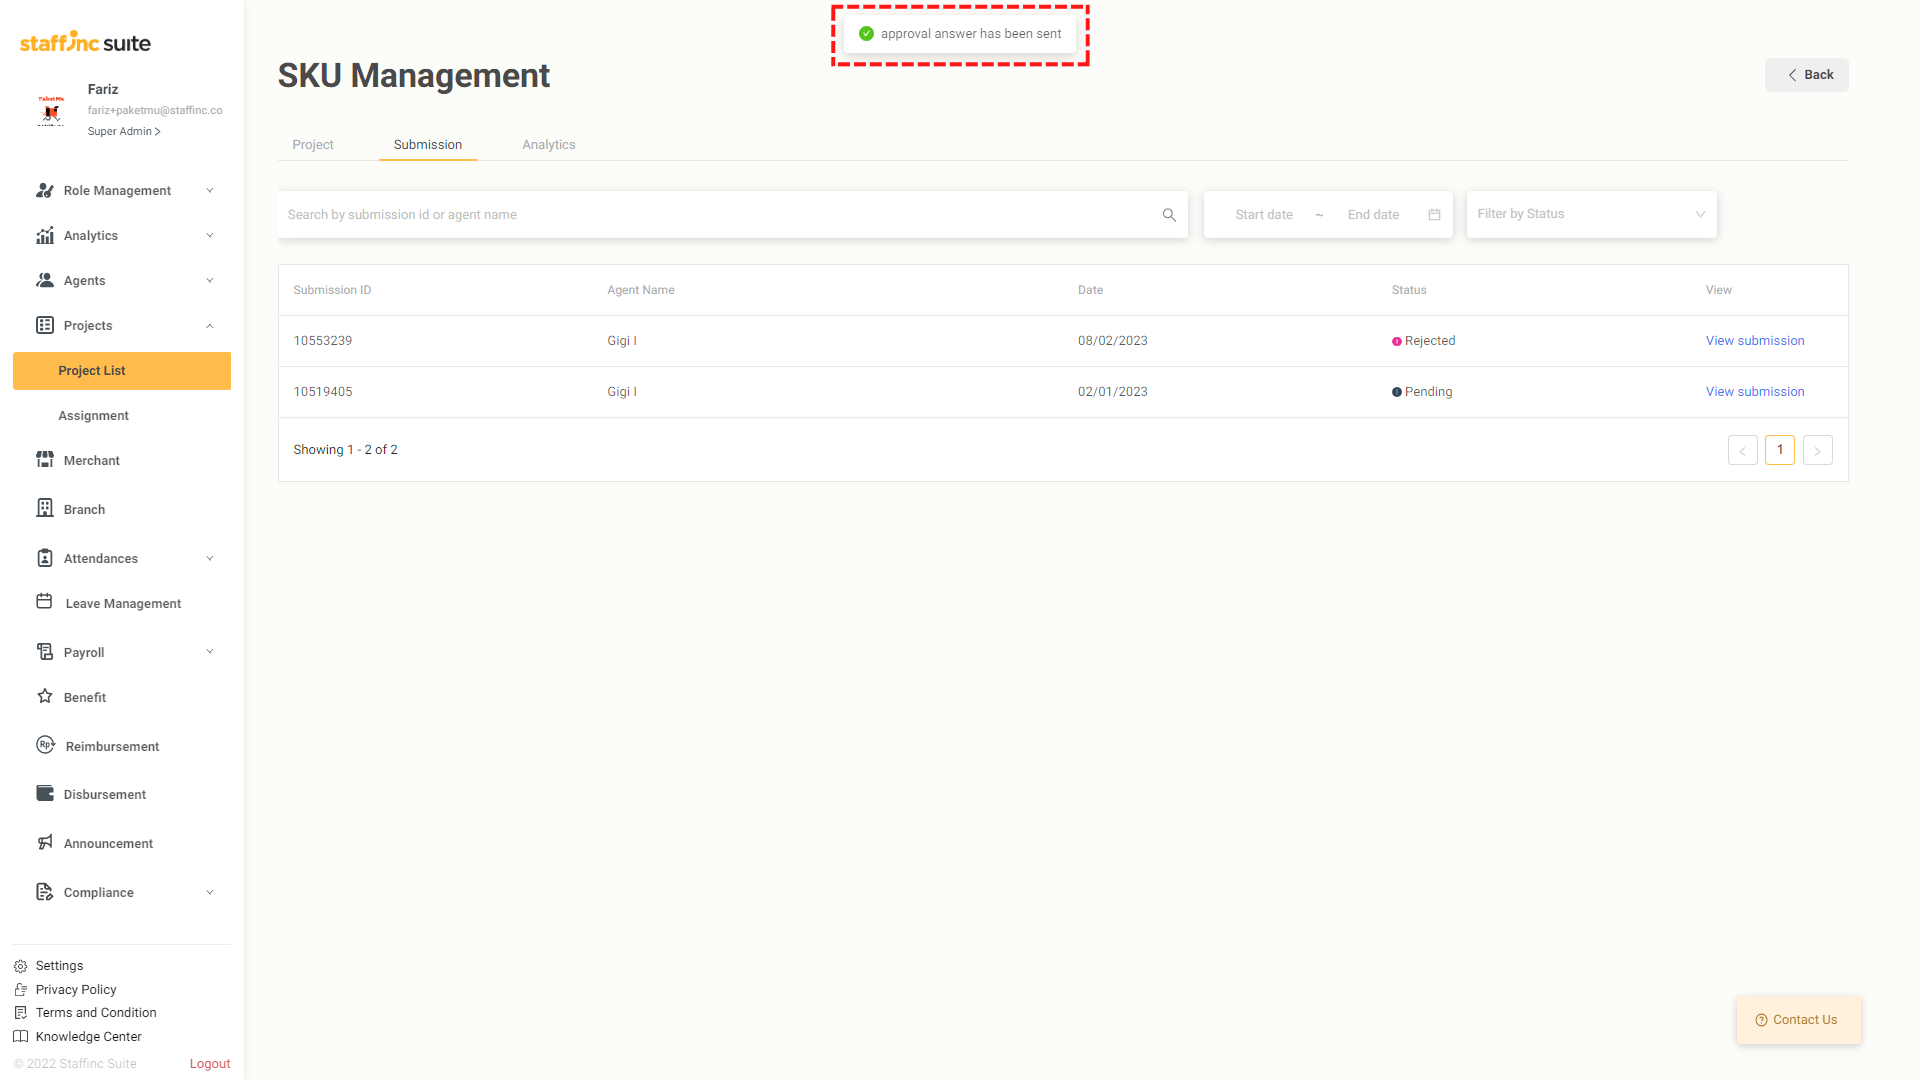
- After all data points that need validation have been addressed (approve/reject), click Save. A pop-up will appear at the top as a notification.
6. Validation Information
- You can see information on when the data was validated.
By following the above steps, you can easily validate the data submitted by the workers. If you have further questions, feel free to contact our support team.