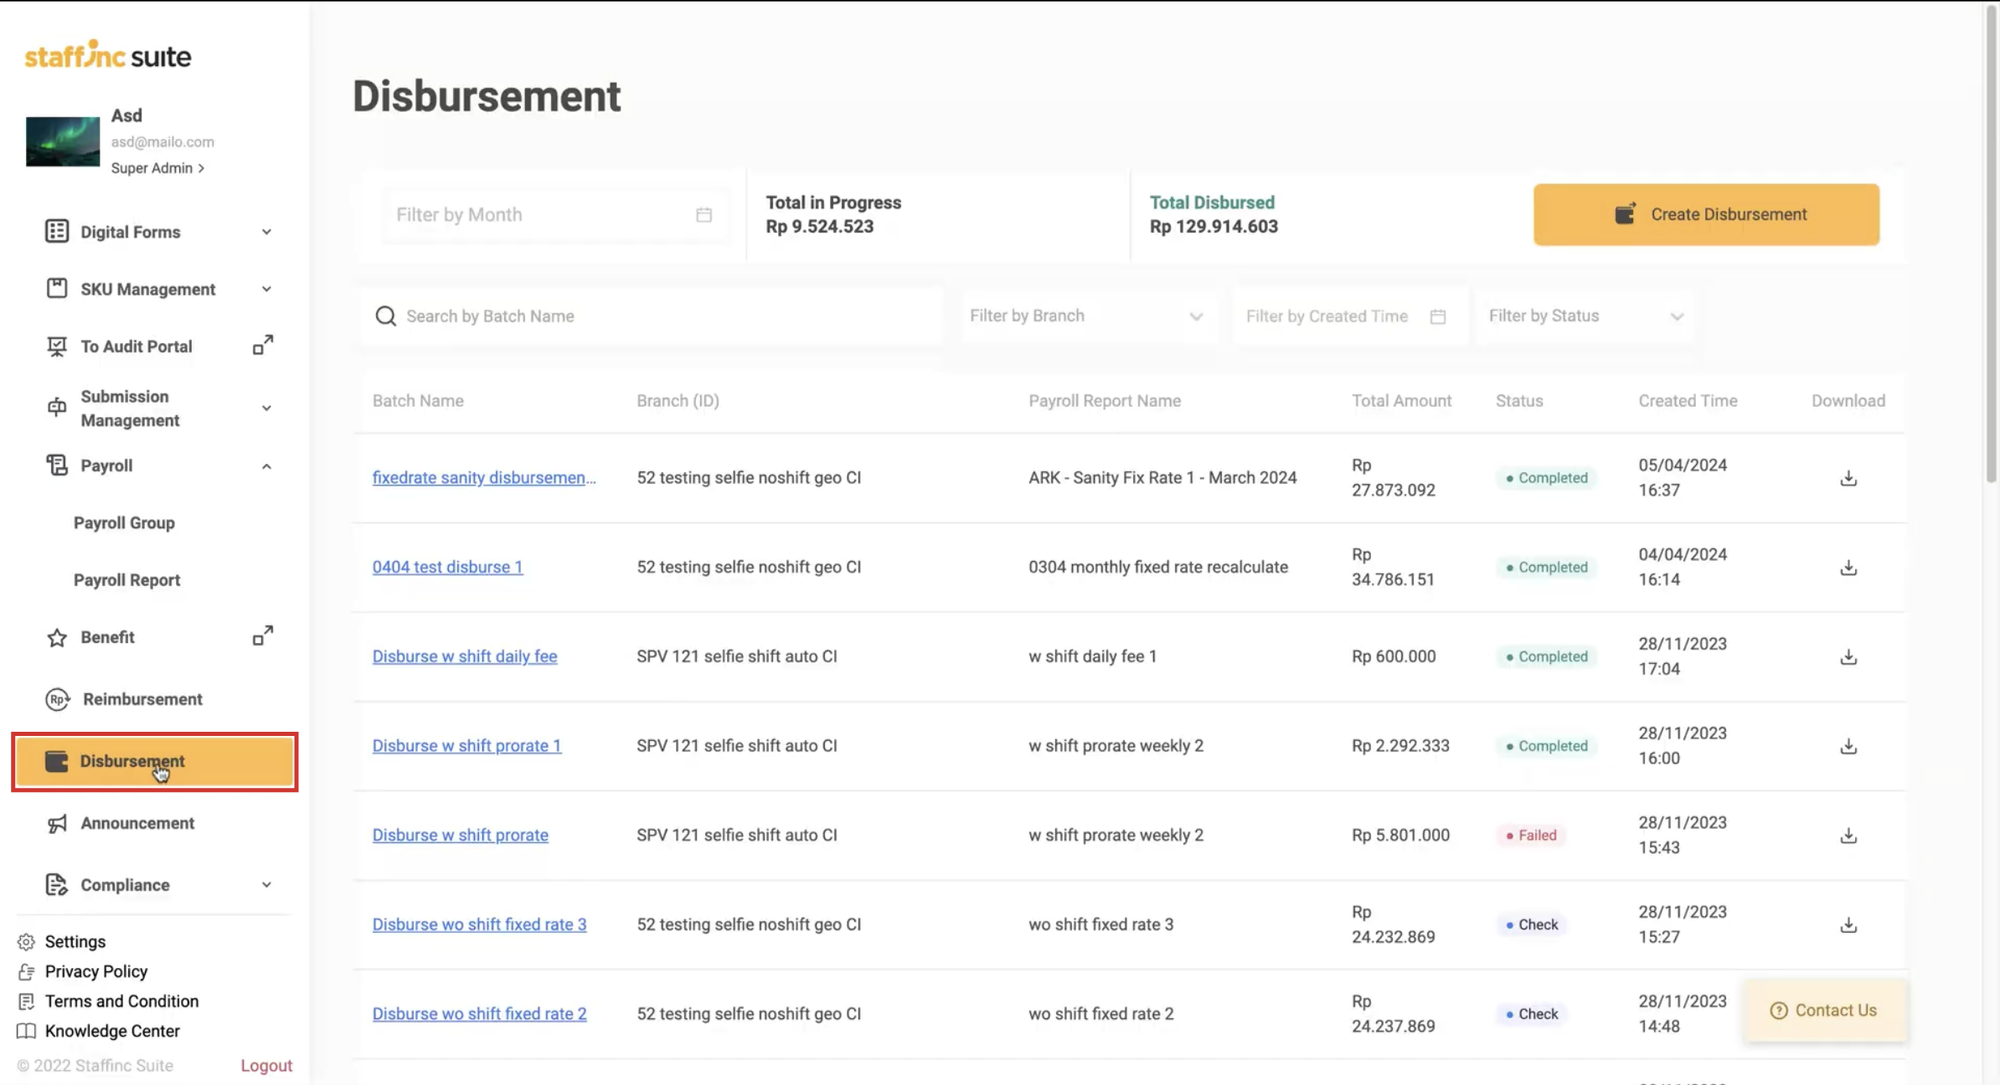
Payroll Disbursement
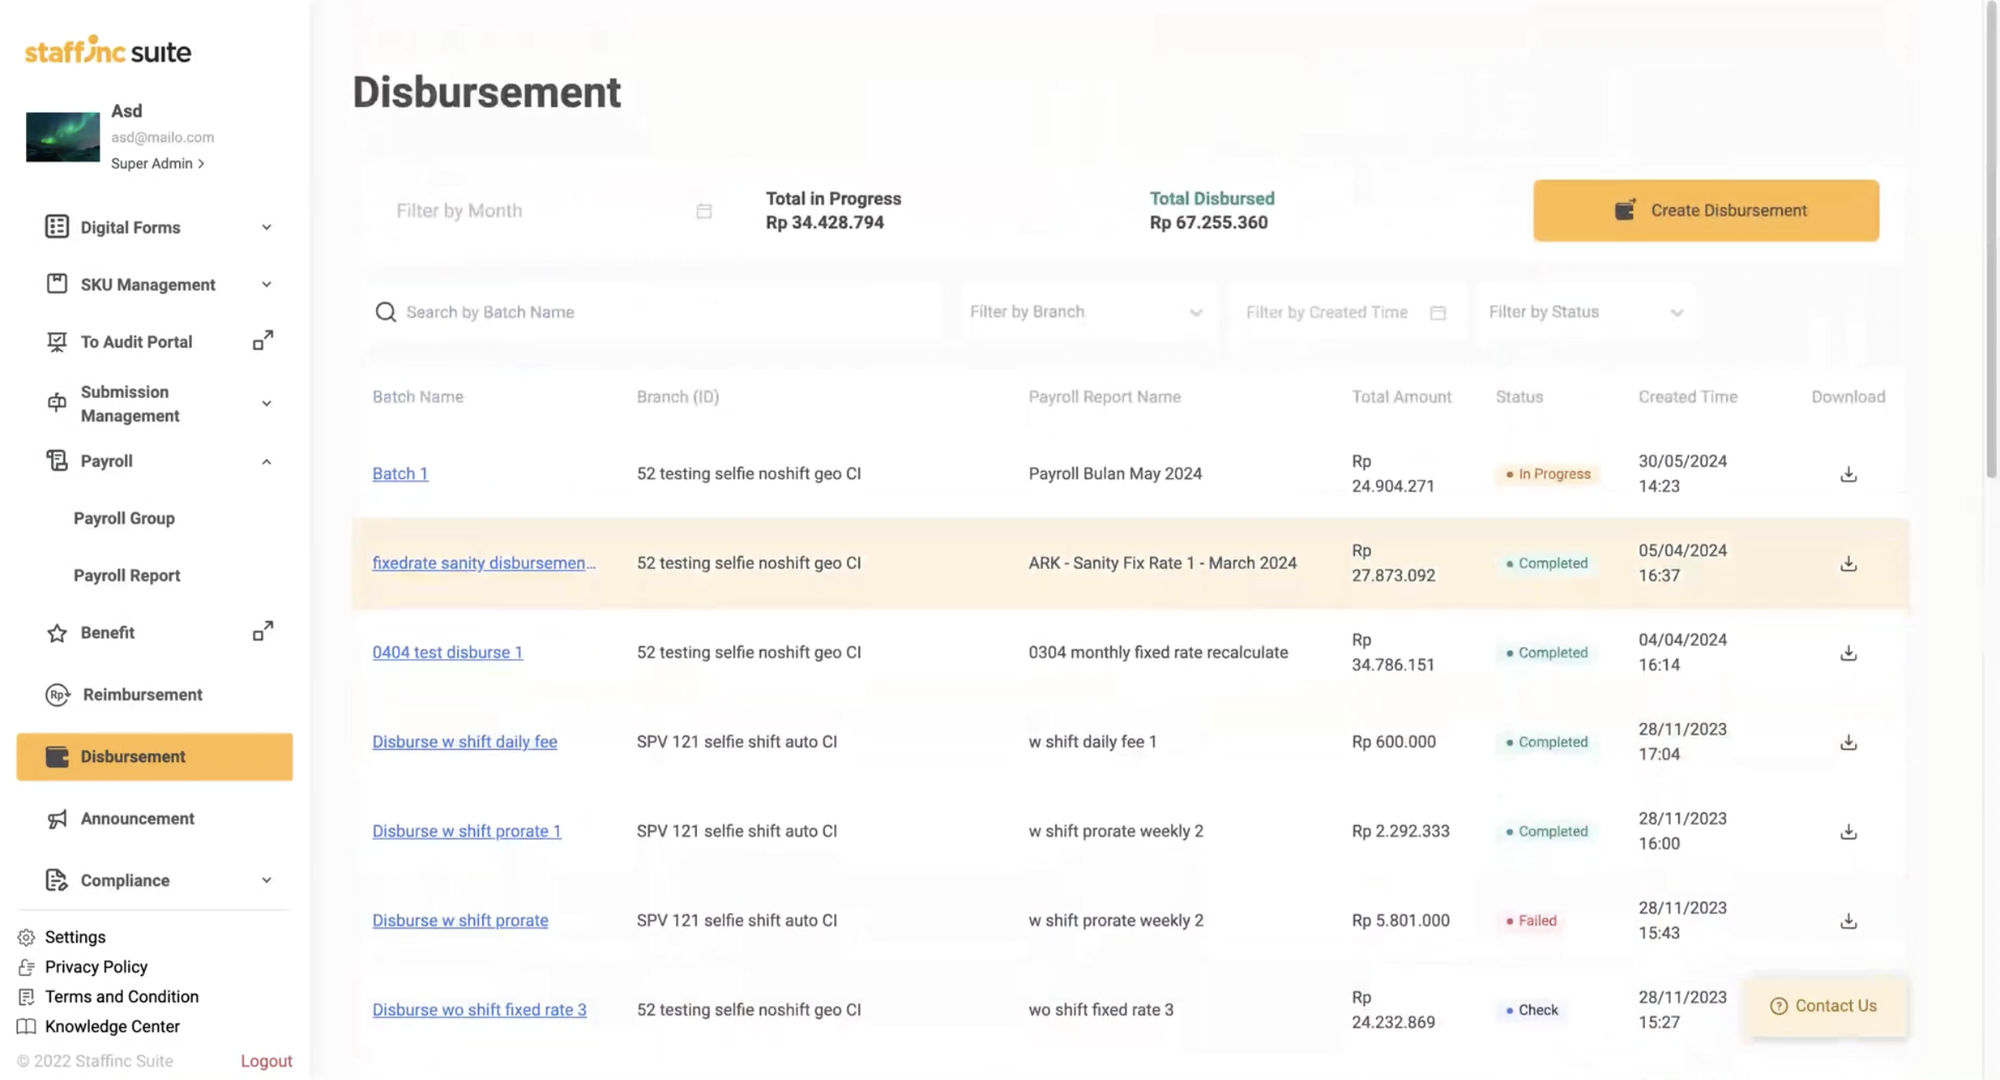
Payroll Disbursement or salary payment is the process of paying employees after all salary or payroll components have been calculated and approved. On the disbursement page, you can use search and filter features to find the list of created disbursement batches.
Filtering and Displaying Data

- Filter by Month: Select the desired month to display the list of disbursement batches created in that month.
- Search by Batch Name: Search for disbursement batches by their name.
- Filter by Branch: Select a branch to display the list of disbursement batches related to that branch.
- Filter by Created Time: Specify the creation time of the disbursement batch to filter data.
- Filter by Status: Choose a status to display the list of disbursement batches based on their status (e.g., completed, failed, check, rejected).
Disbursement Status
- In Progress: The disbursement is awaiting review from the internal Staffinc team.
- Completed: All payment data has been successfully sent to the bank accounts.
- Failed: All payment data failed to be sent to the bank accounts due to system or bank issues.
- Check: Some data was sent and some were not (partial).
- Rejected: The data was rejected by the internal Staffinc team.
Below are the steps to manage and disburse employee salaries:
Steps to Manage and Disburse Employee Salaries
1. Access Disbursement Menu
- Select the Disbursement Menu
2. Create a New Disbursement
All approved payroll reports, whether general or direct payroll, can be disbursed. This is necessary to fill the payroll report data in creating the disbursement.
-
Click the Create Disbursement button in the top right corner.
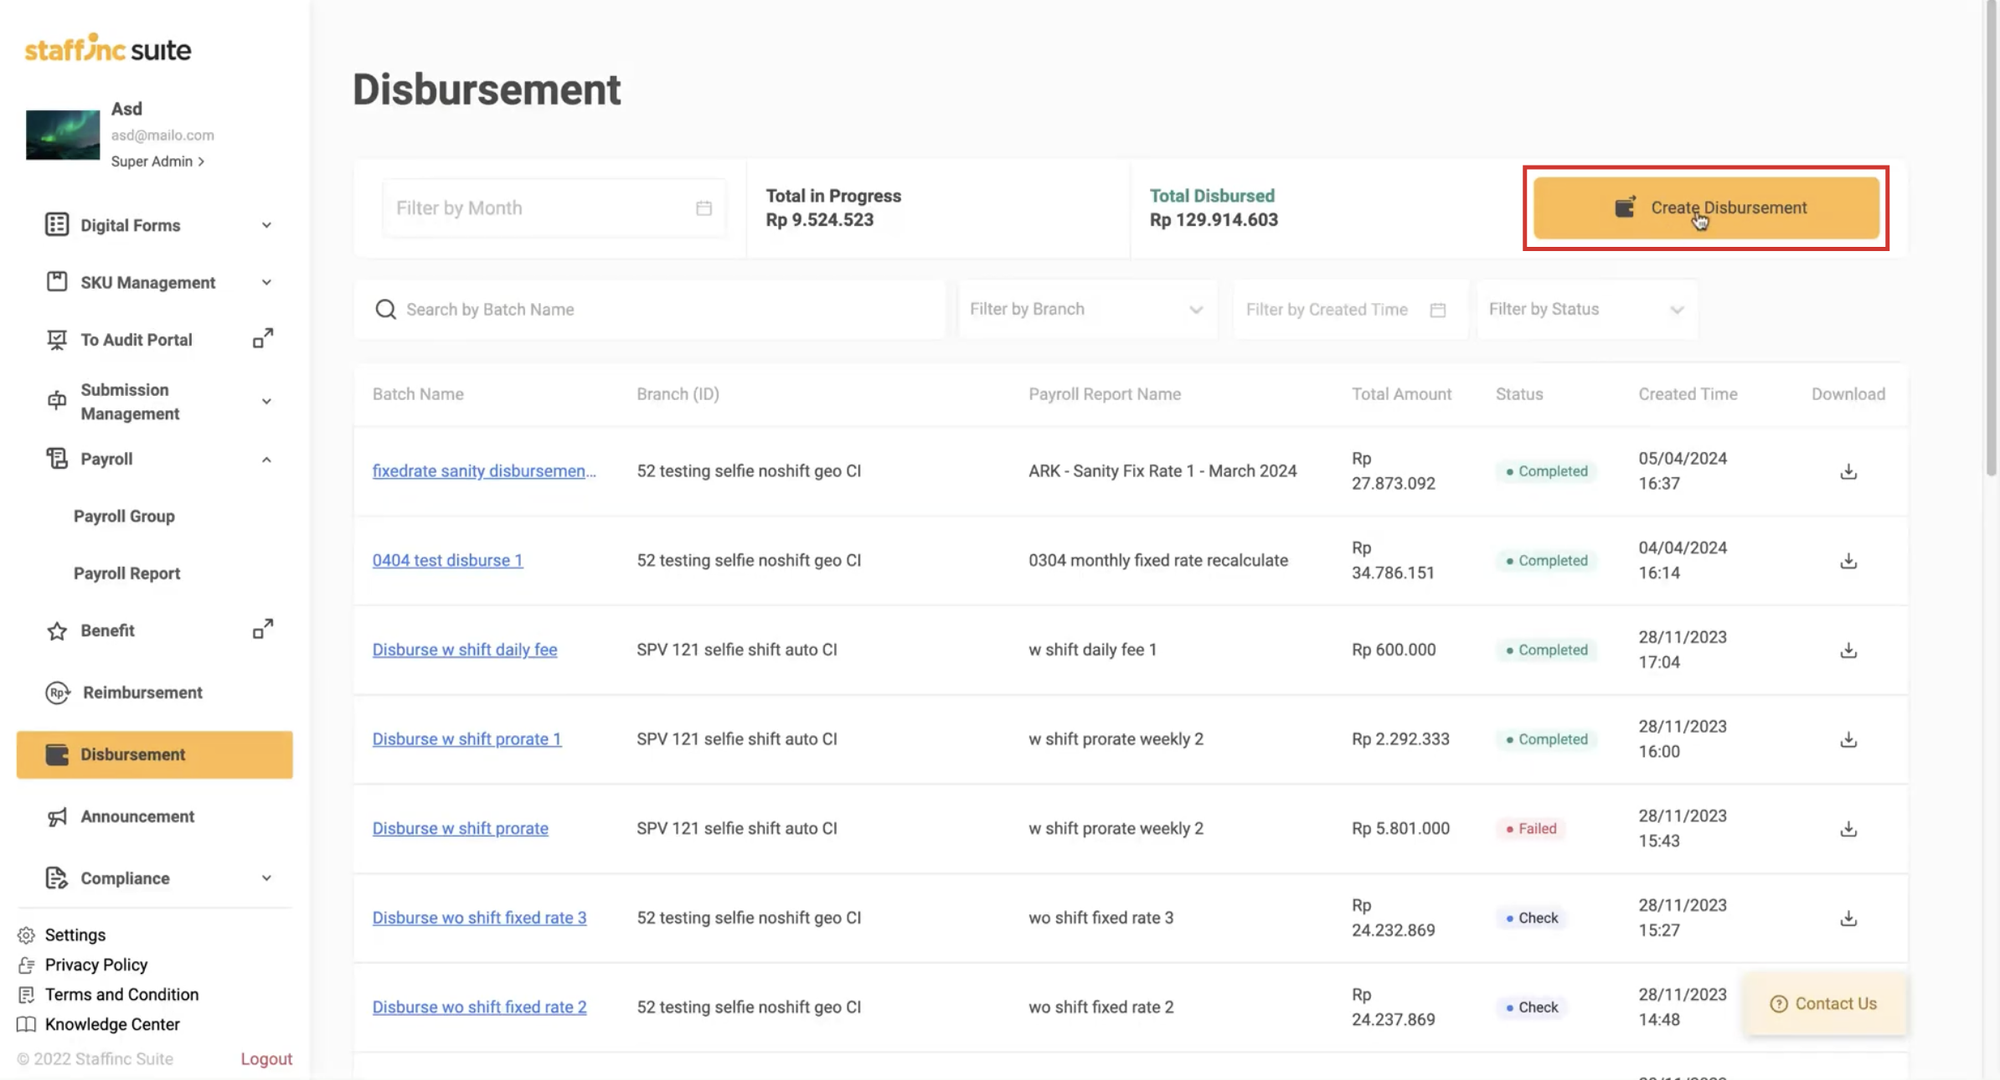
-
You will be directed to the Create Disbursement page.
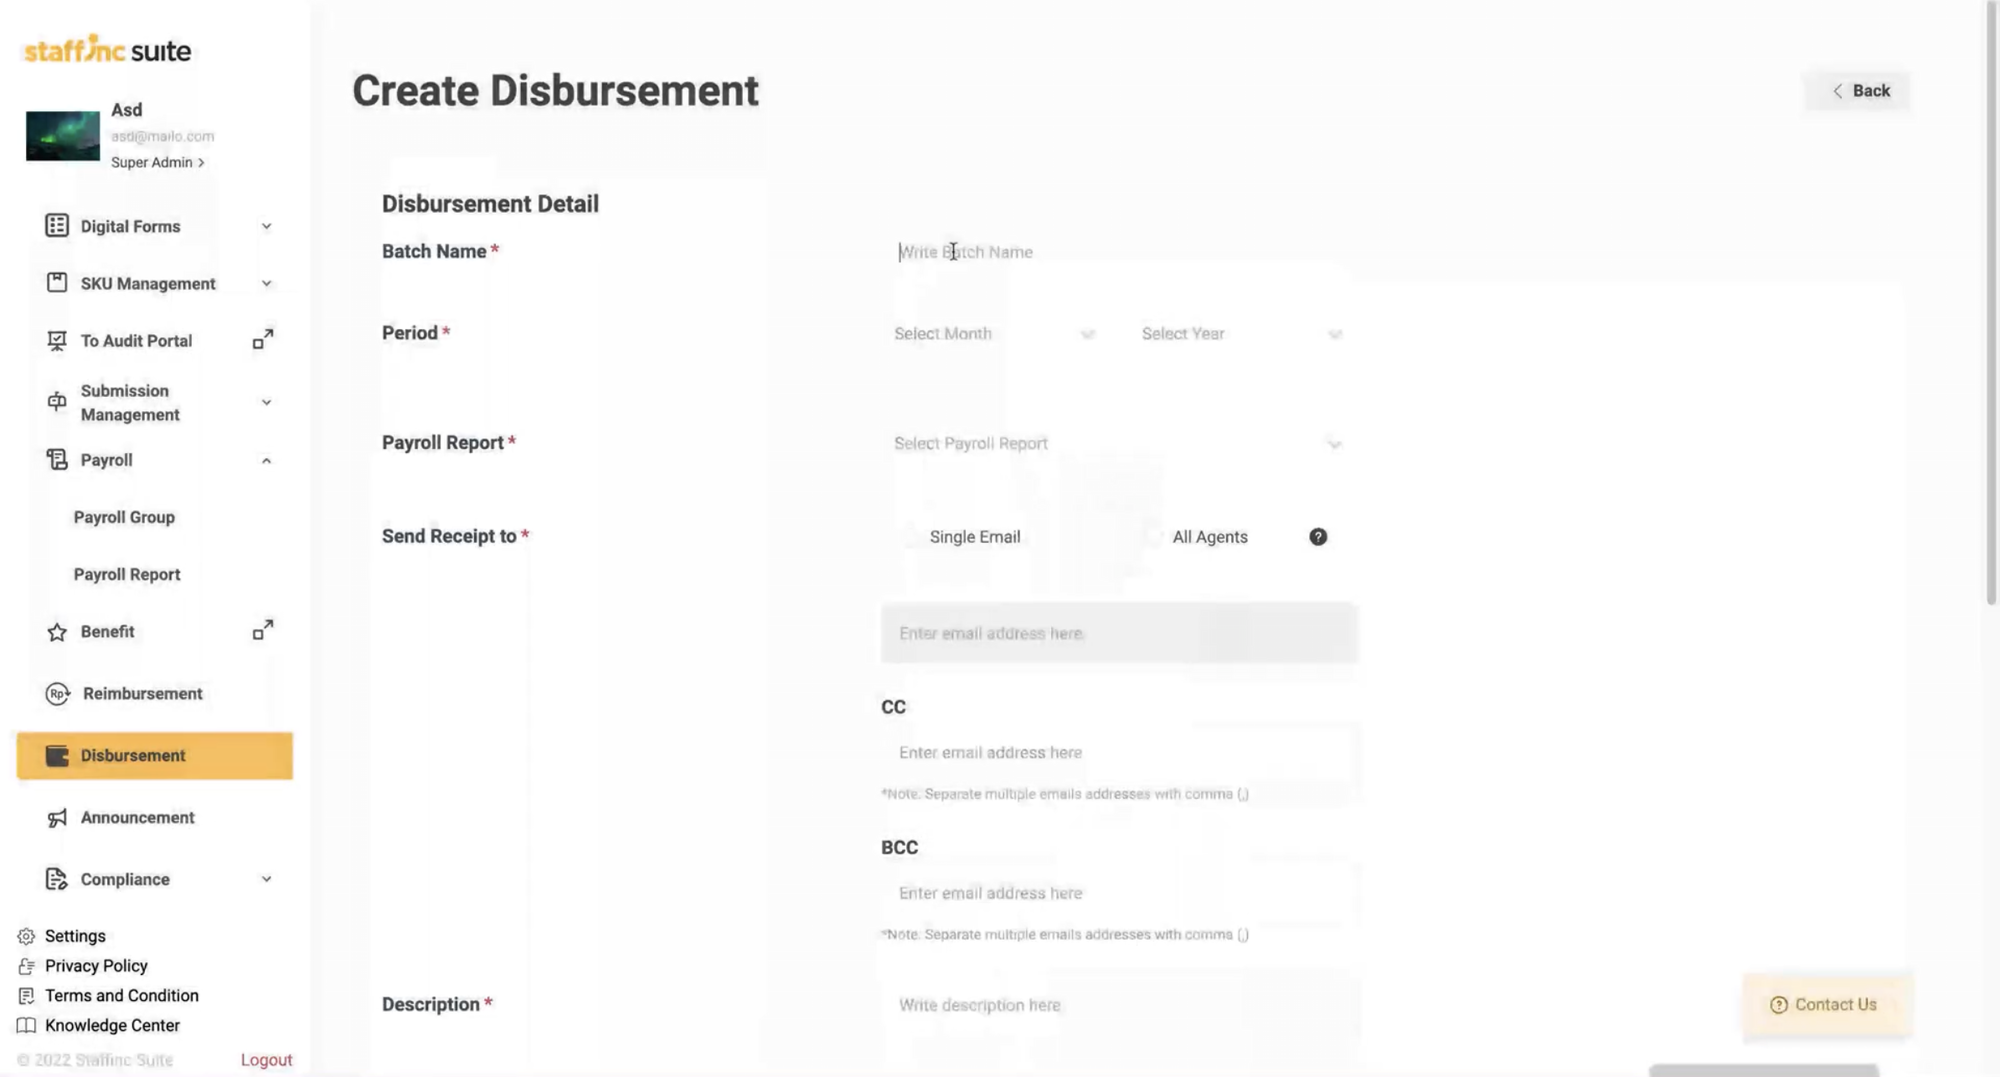
3. Fill in Disbursement Details
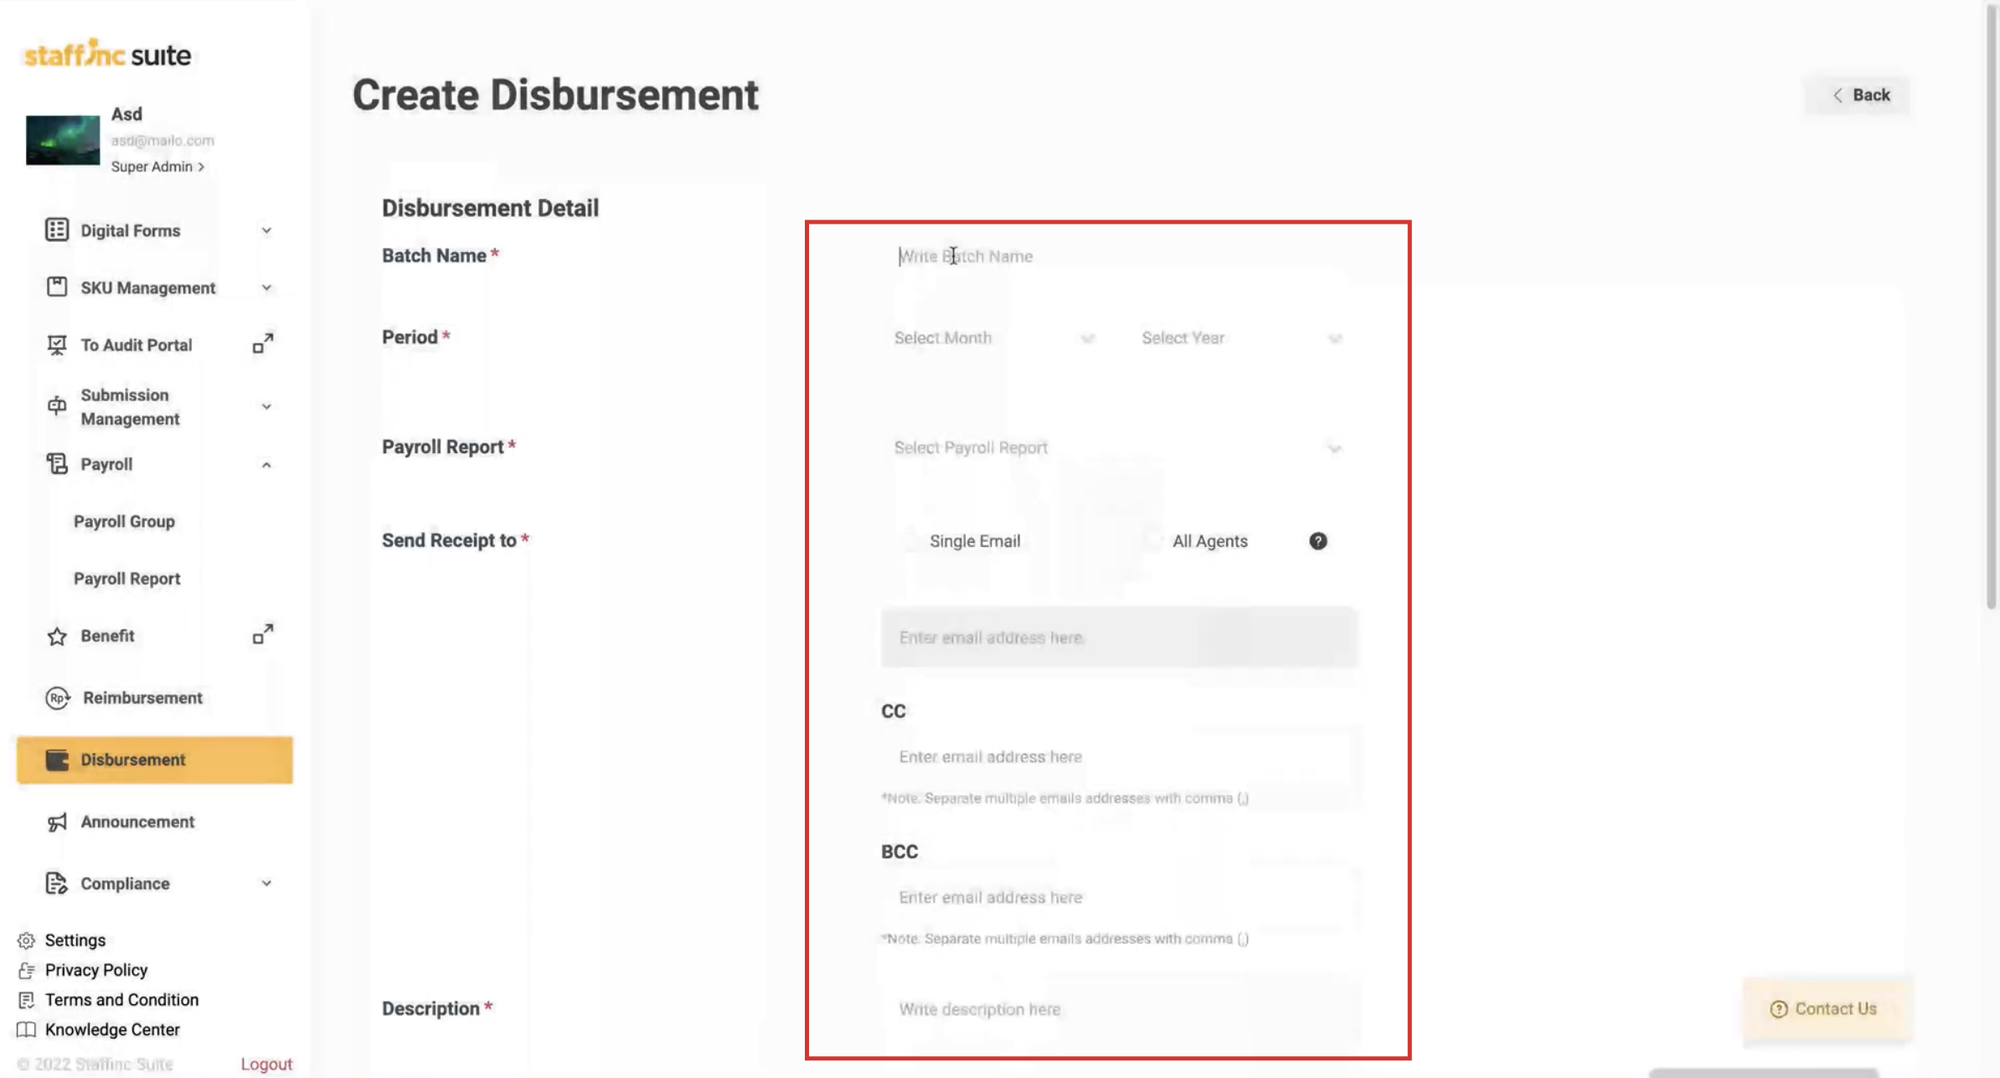
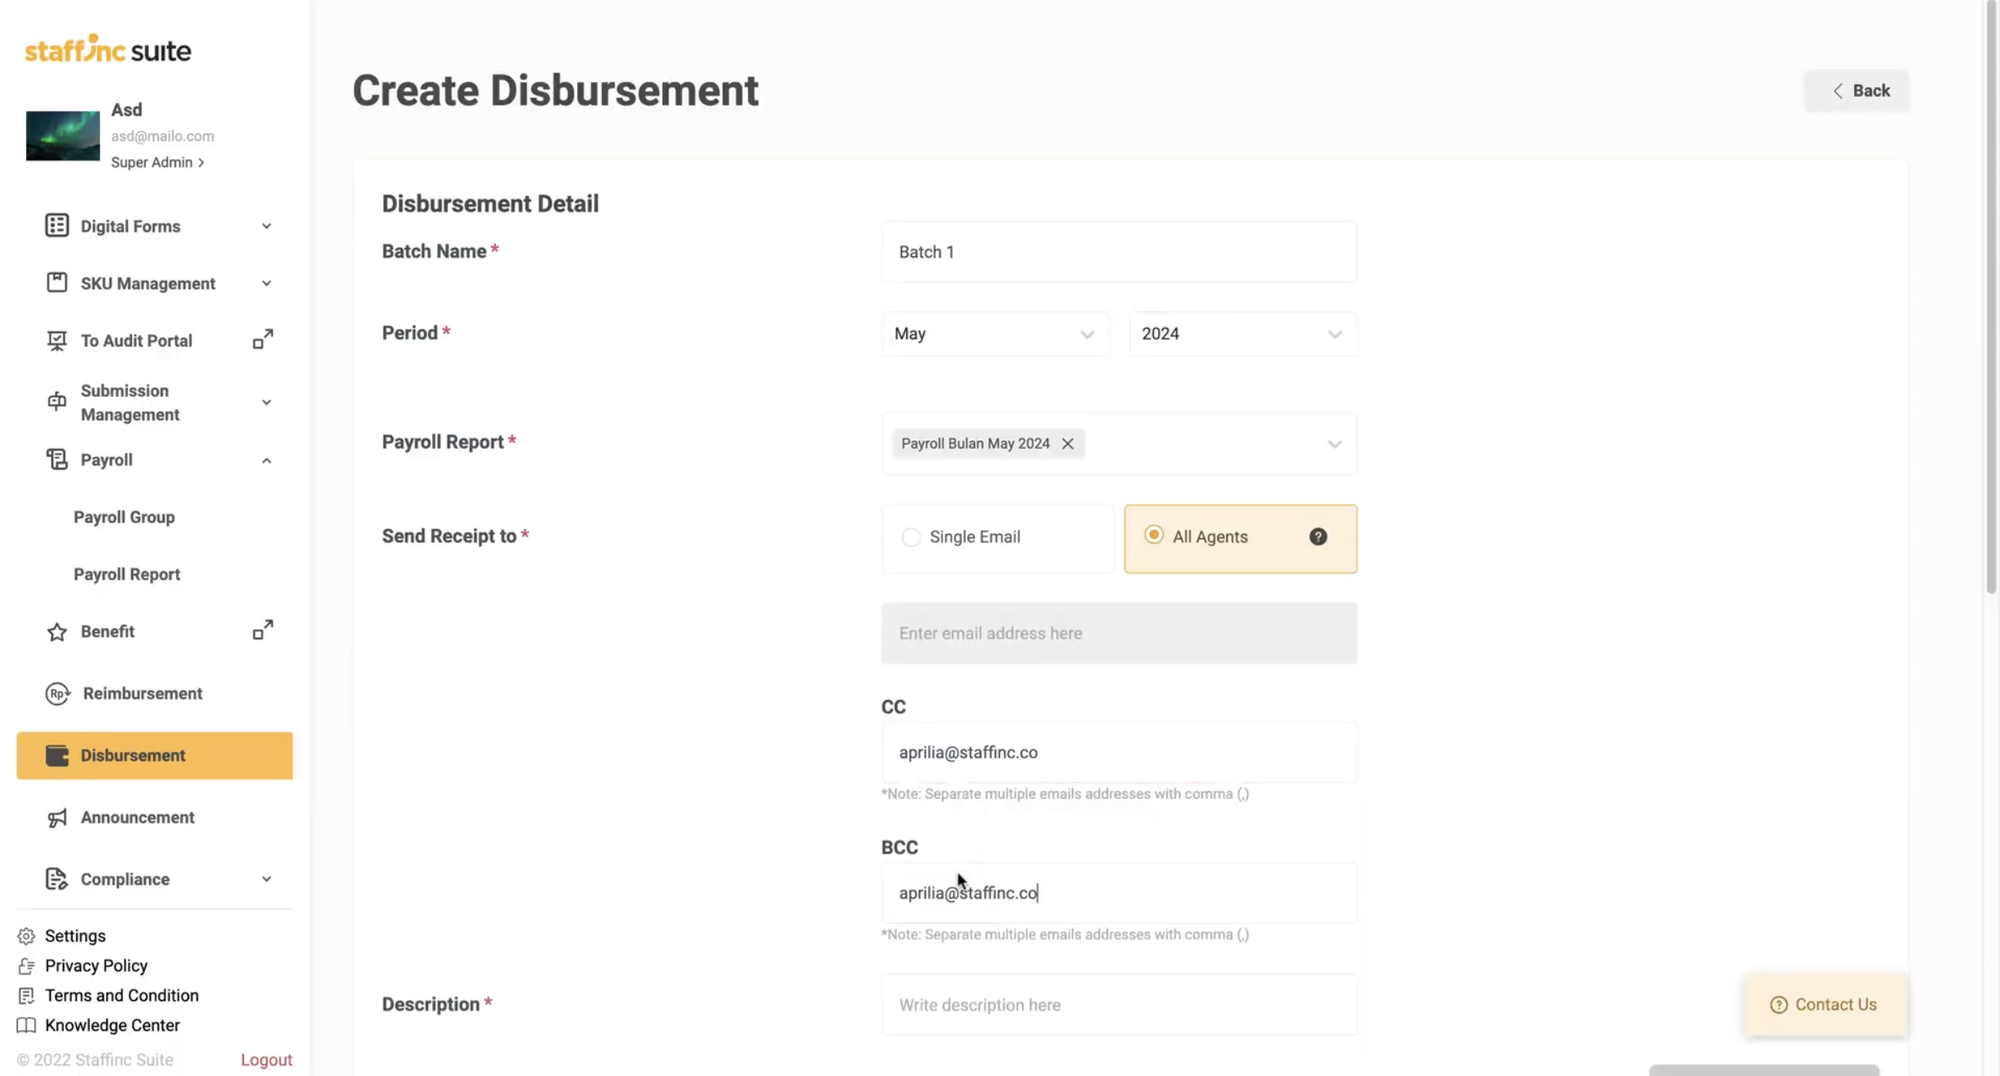
-
Batch Name: Enter a clear and descriptive batch name. For example, "January 2024 Salary Disbursement" or "Q1 Payment Batch". -
Period: Specify the payment period by selecting the month and year. -
Payroll Report: Attach or select the appropriate payroll report for that period. -
Send Receipt To: Enter the email address or contact information of the receipt recipient. For a single agent, add one email. If you choose all agents, you can add multiple emails in the cc and bcc fields. -
Description: Add a brief description of this salary disbursement.
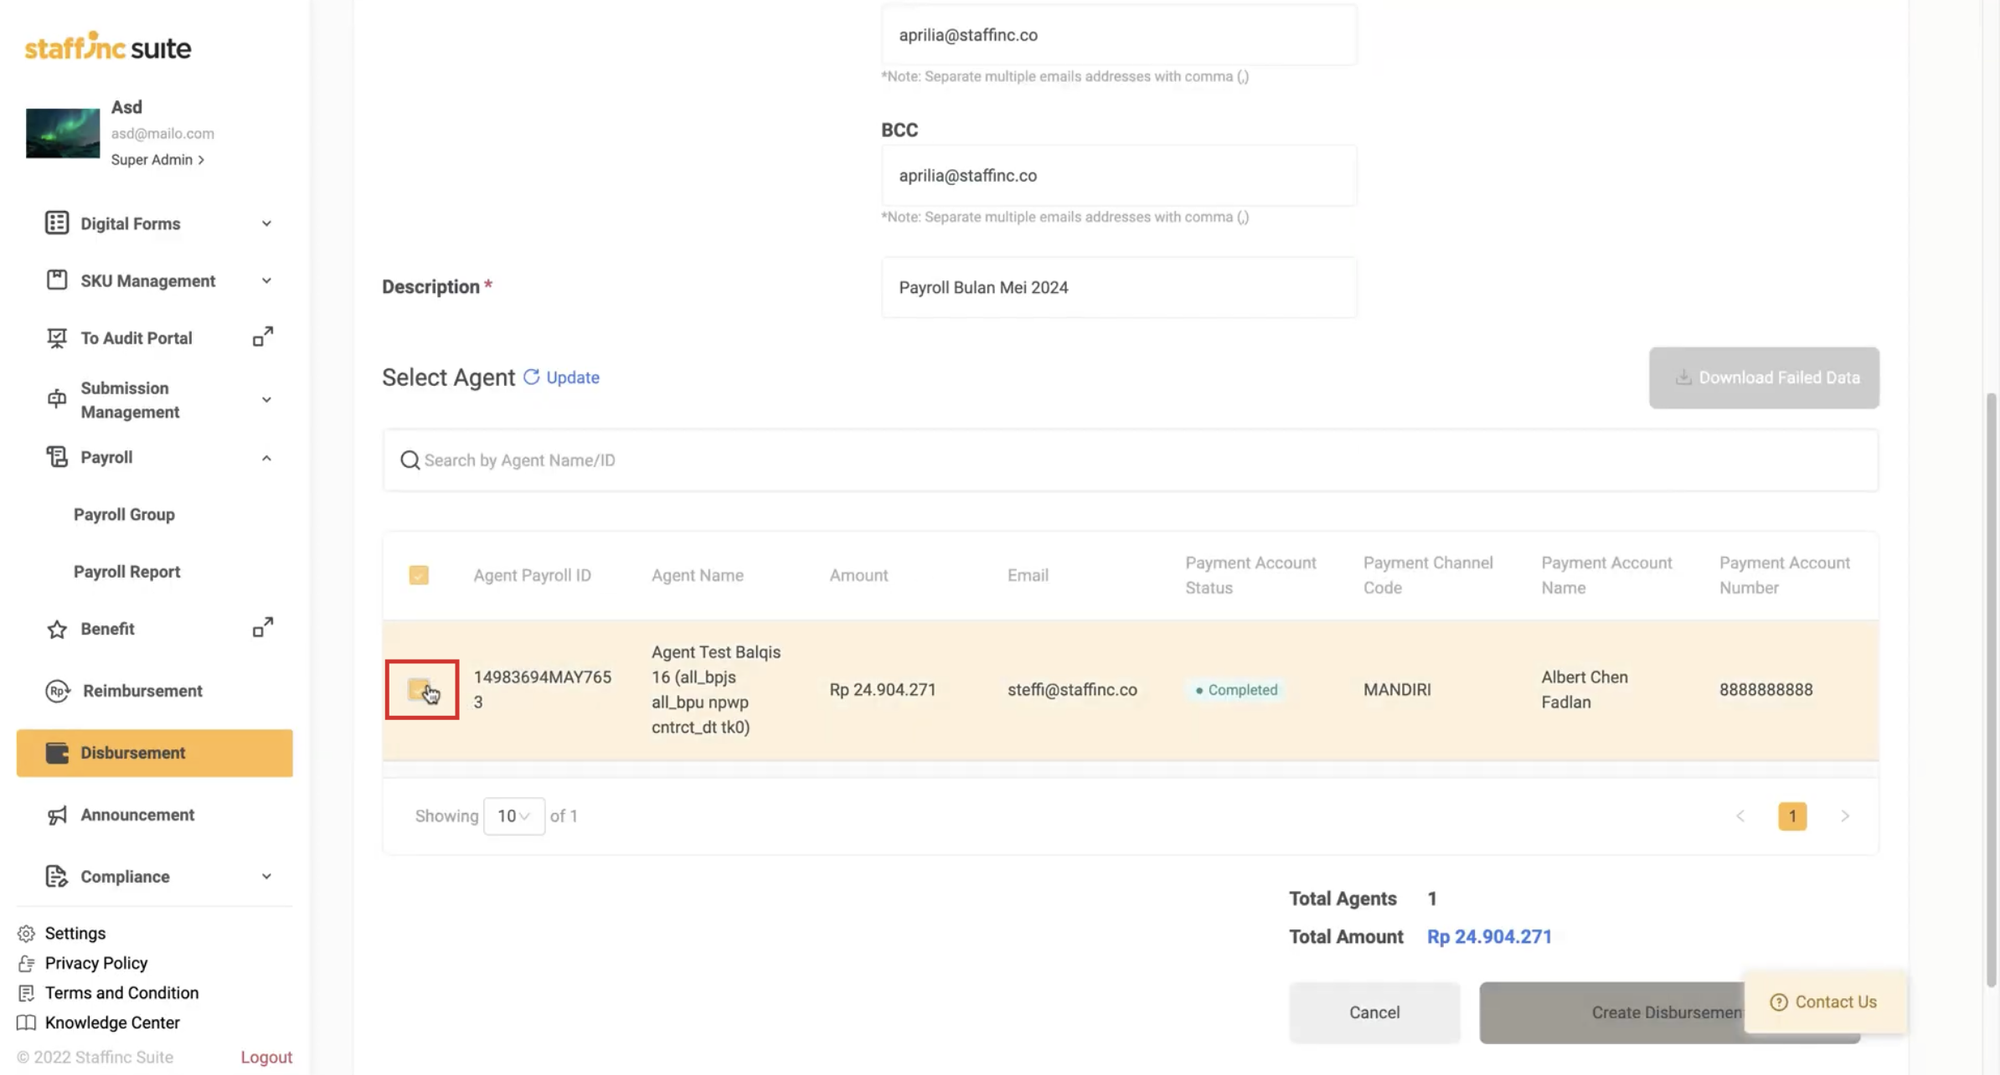
4. Select Agent
- Click to select the appropriate agent. You can choose one or more agents.
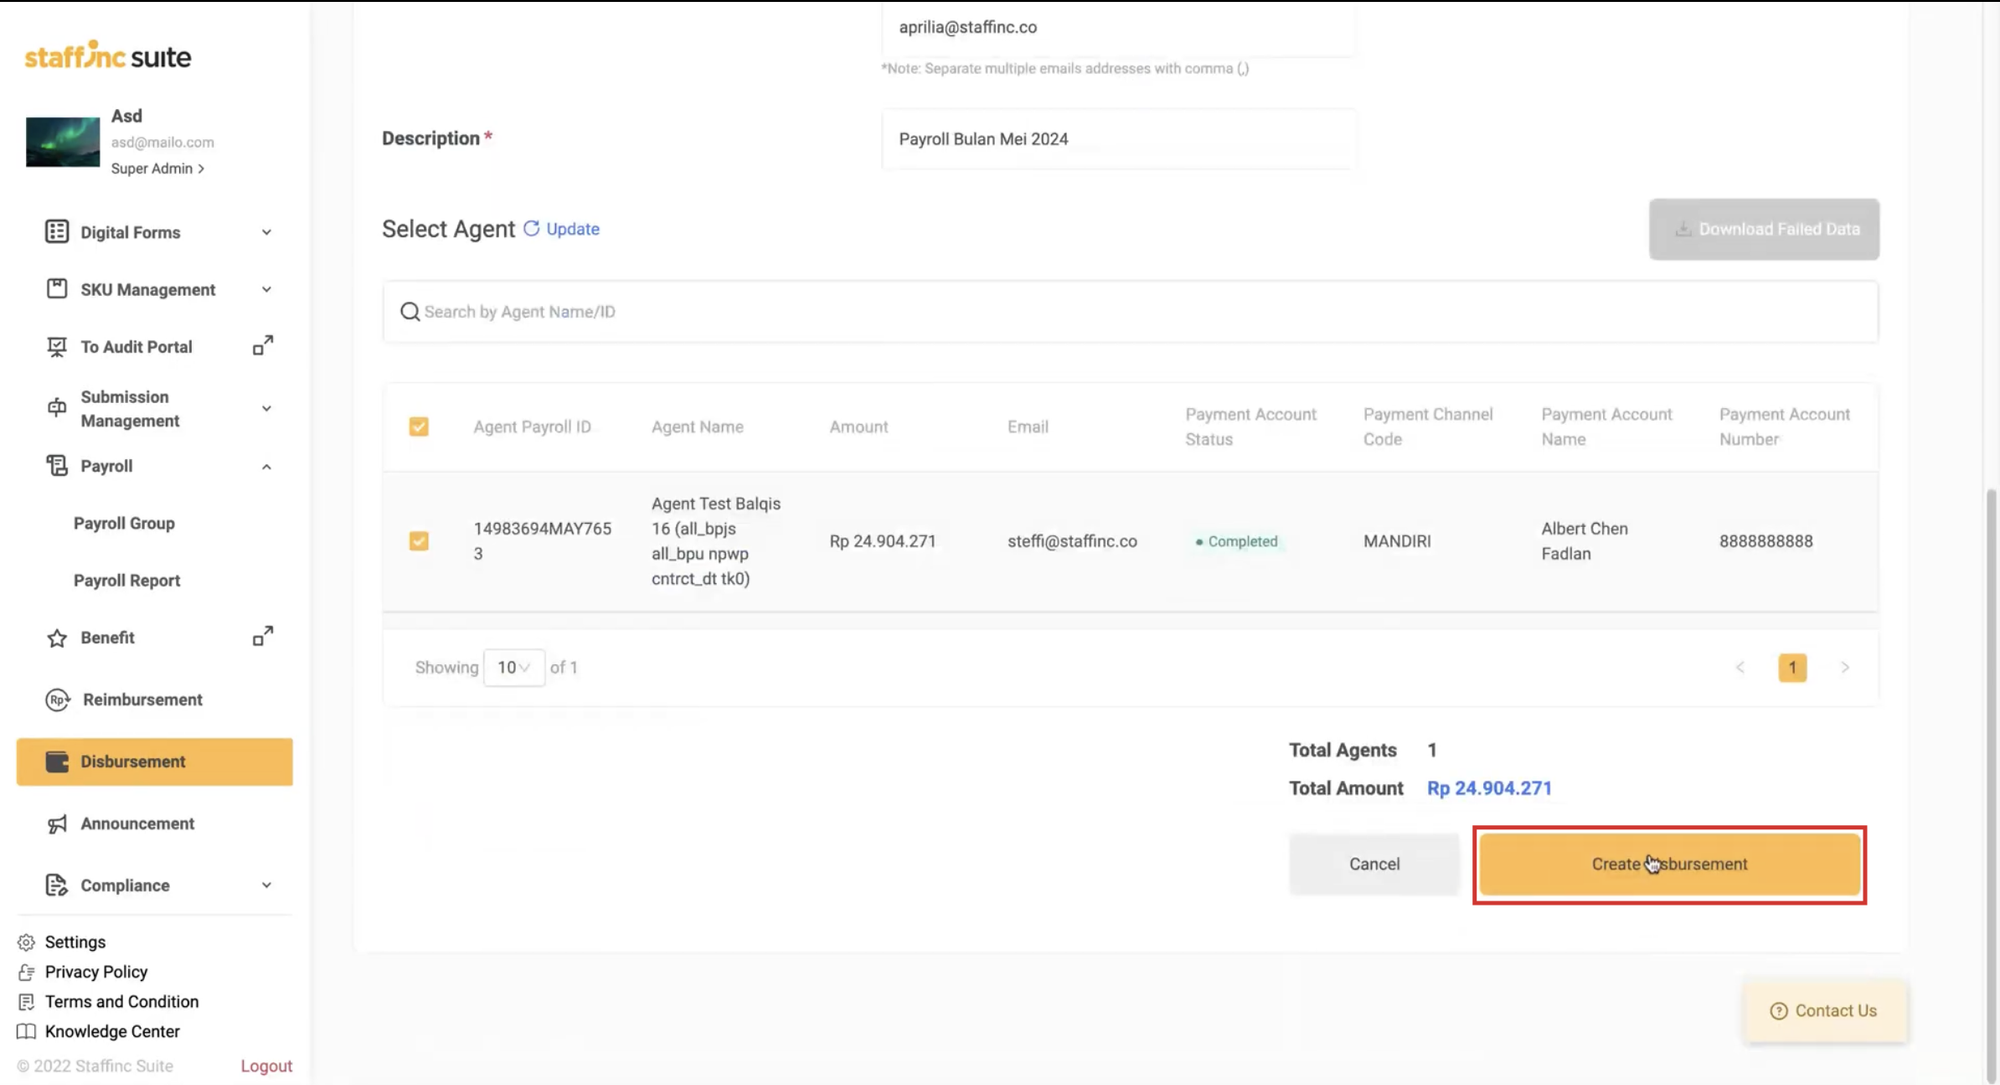
5. Create Disbursement
-
Click Create Disbursement.
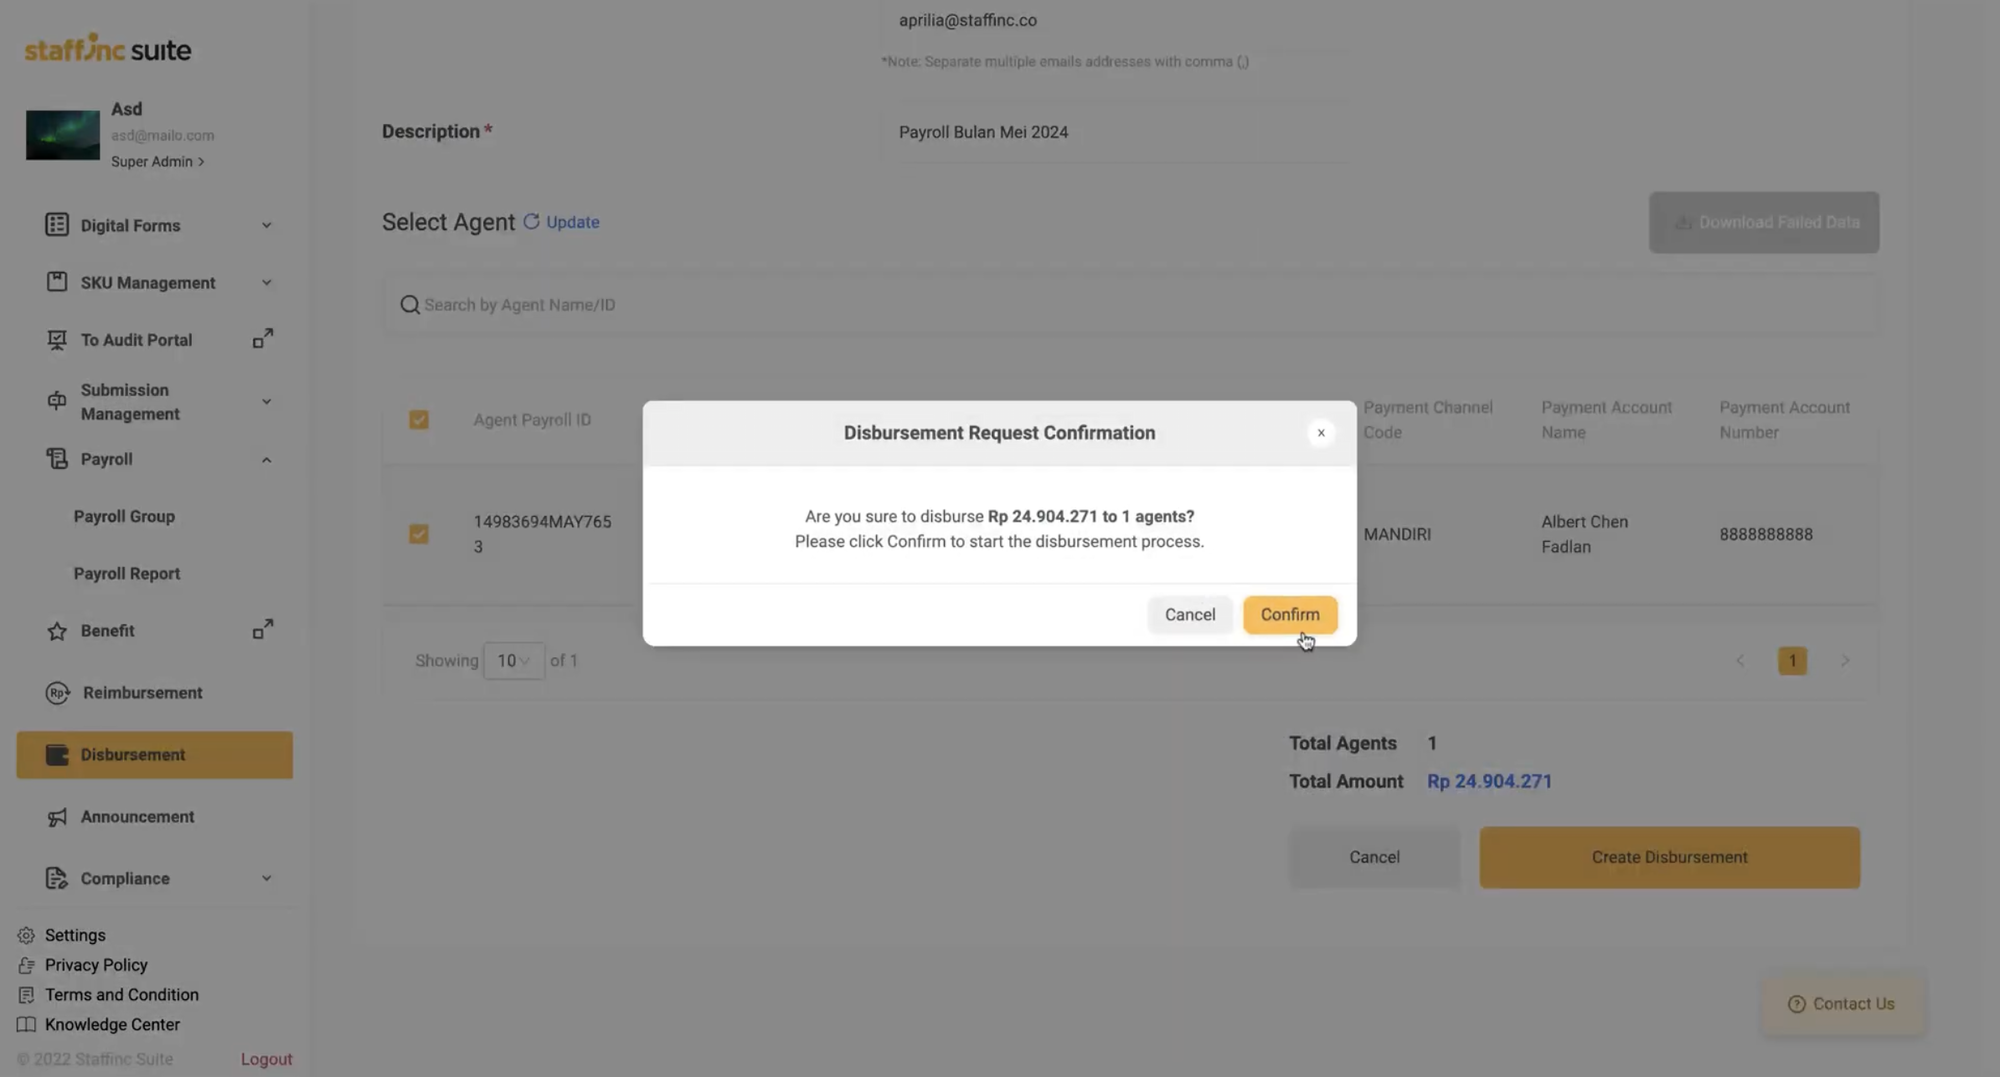
-
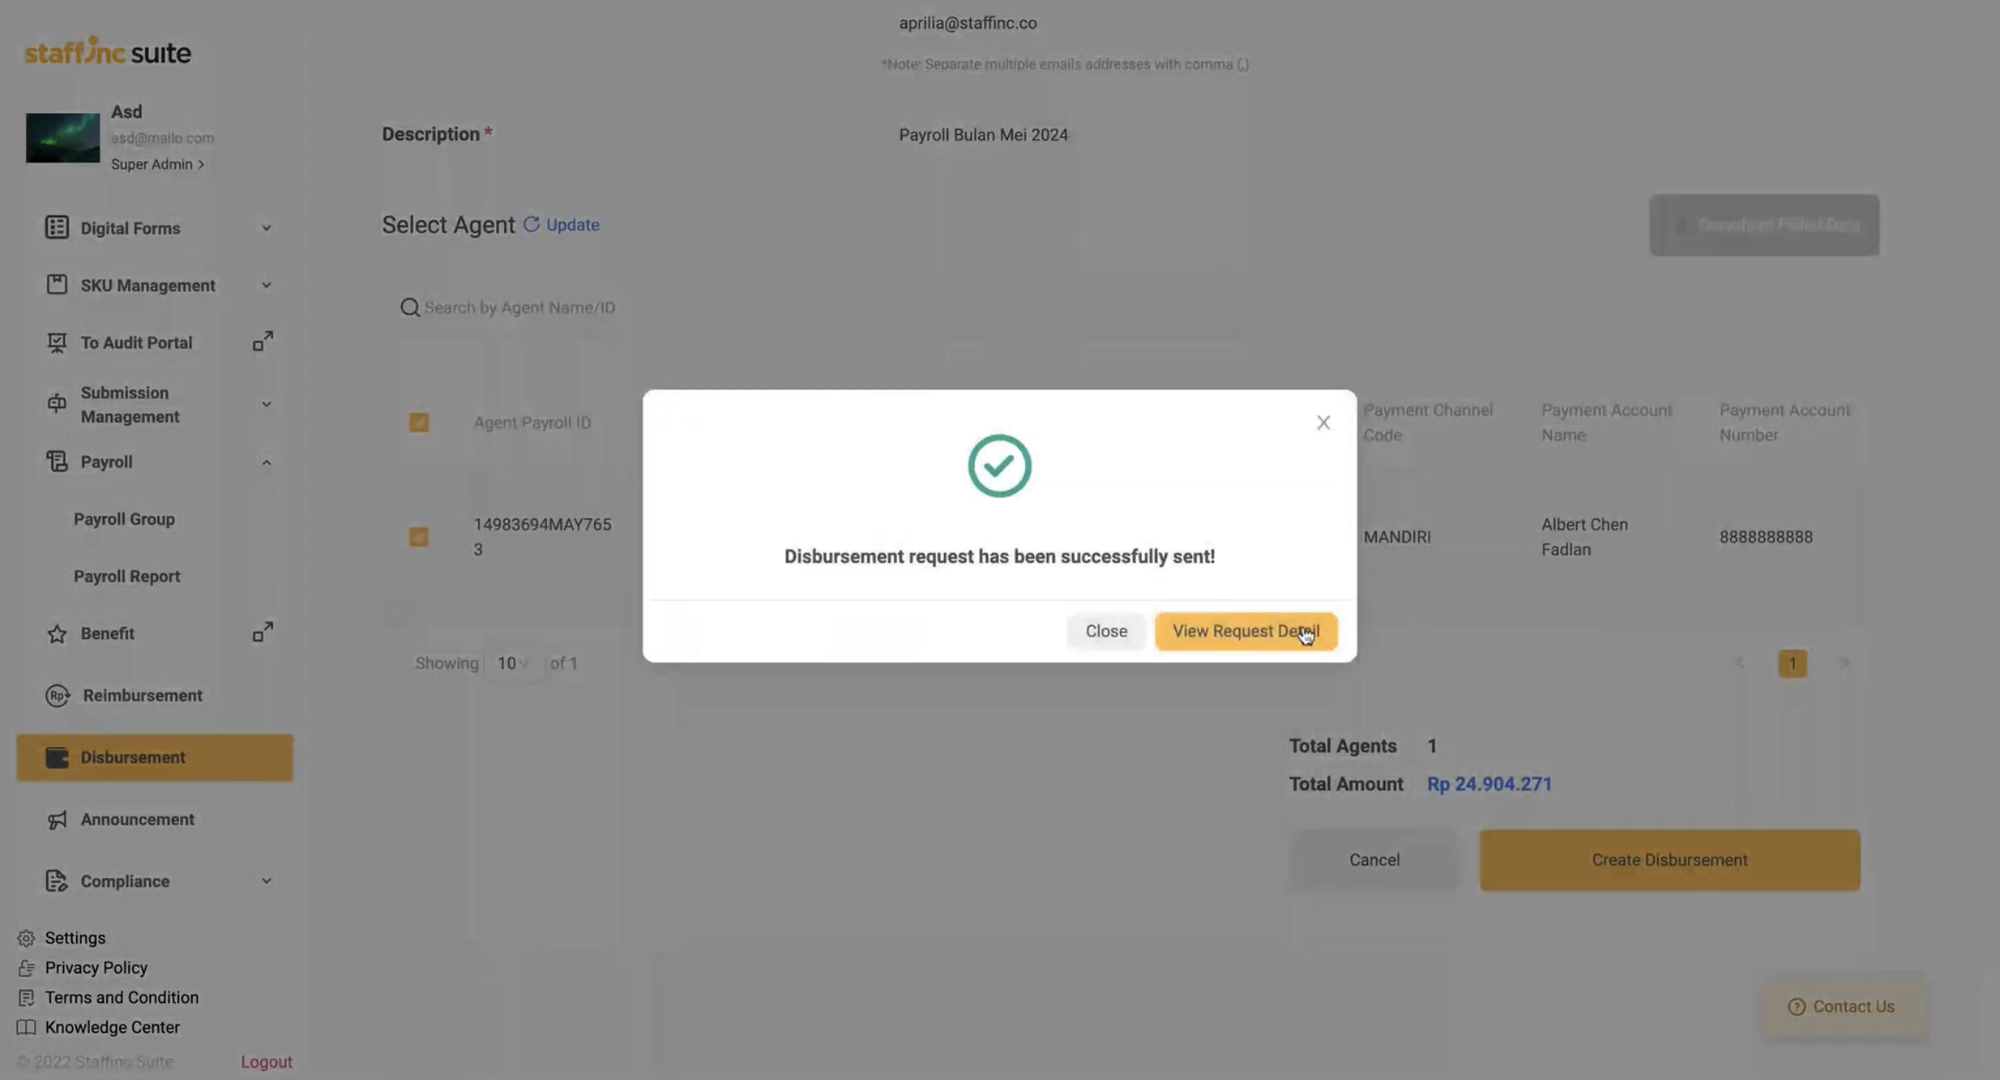
A Disbursement Request Confirmation pop-up will appear. Click Confirm.
-
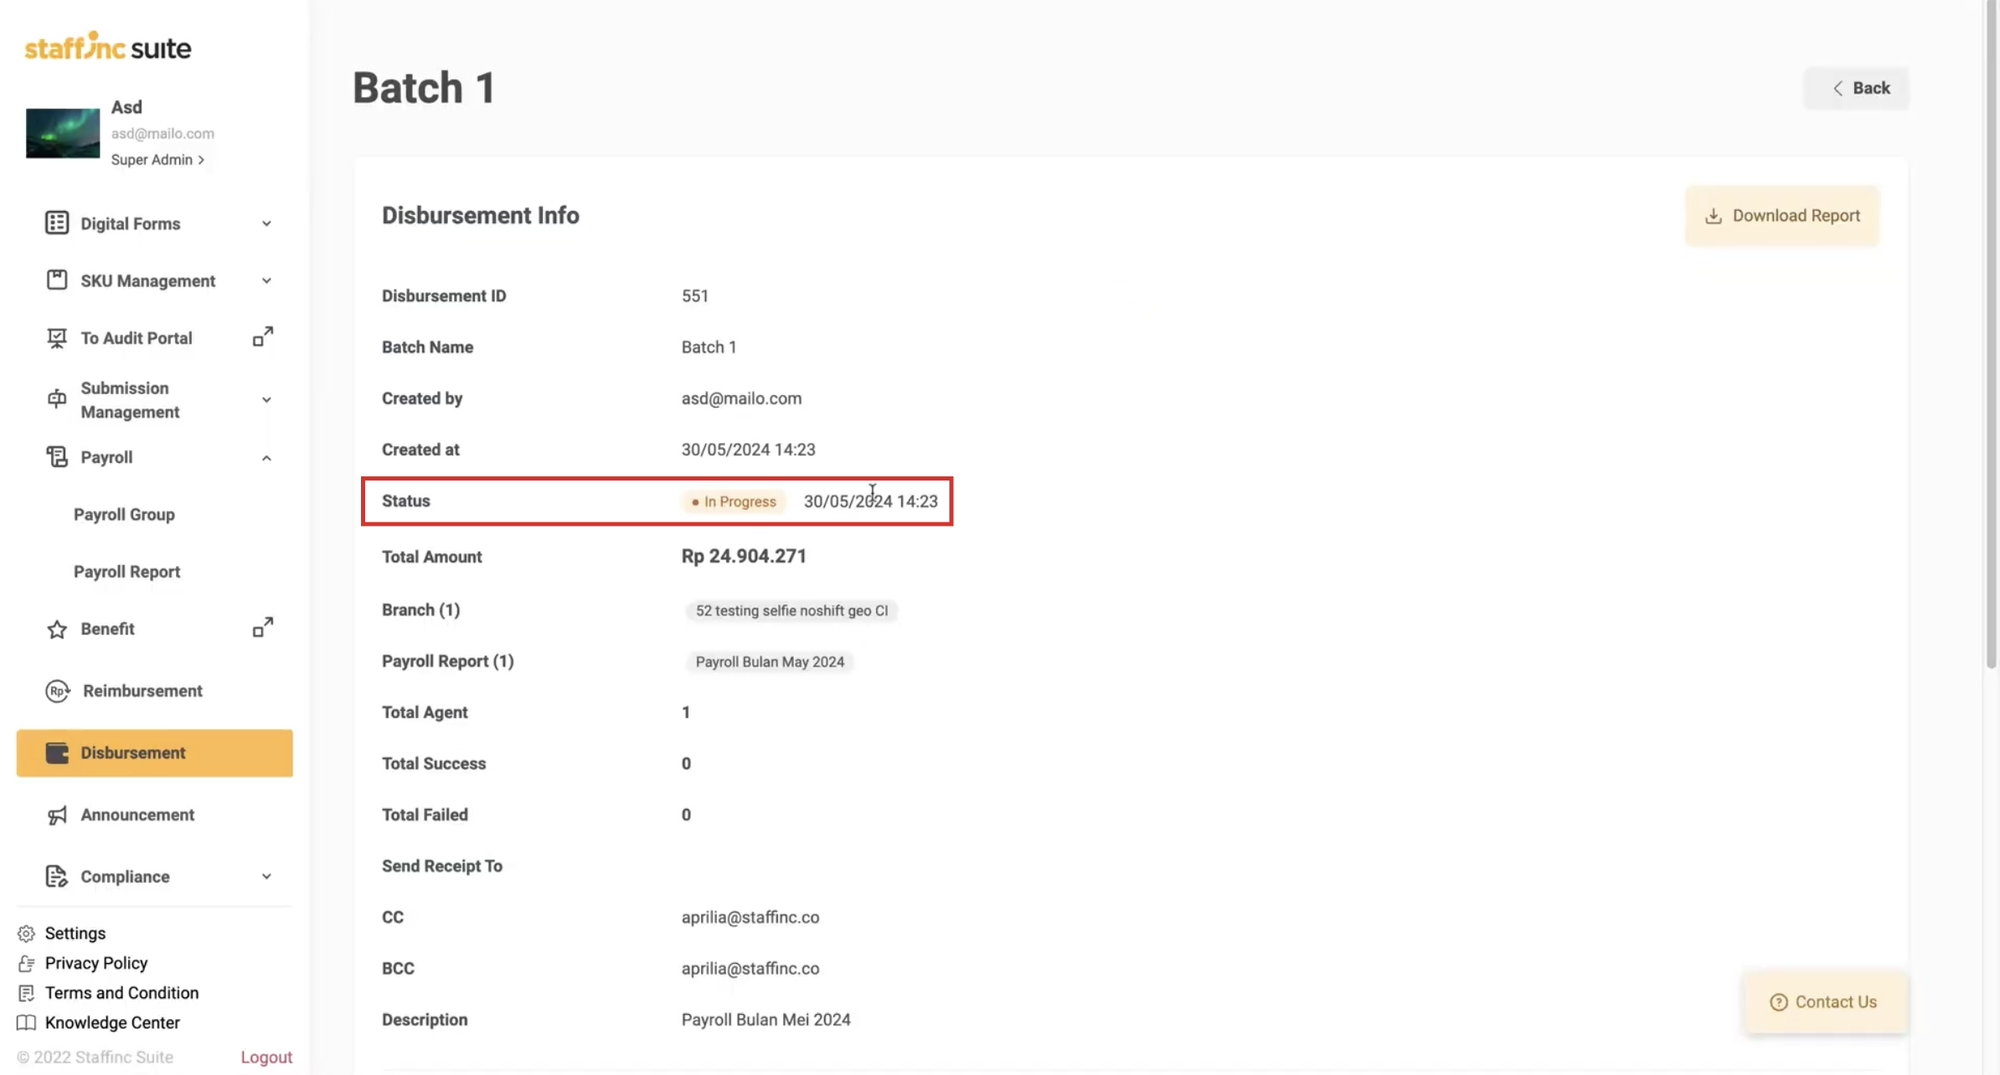
A Disbursement Successful Notification will appear. Click View Request Detail to see disbursement information.
-
The disbursement info will show the status as In Progress when it is newly created.
6. Return to Disbursement List
-
Click the Back button to return to the Disbursement List page.
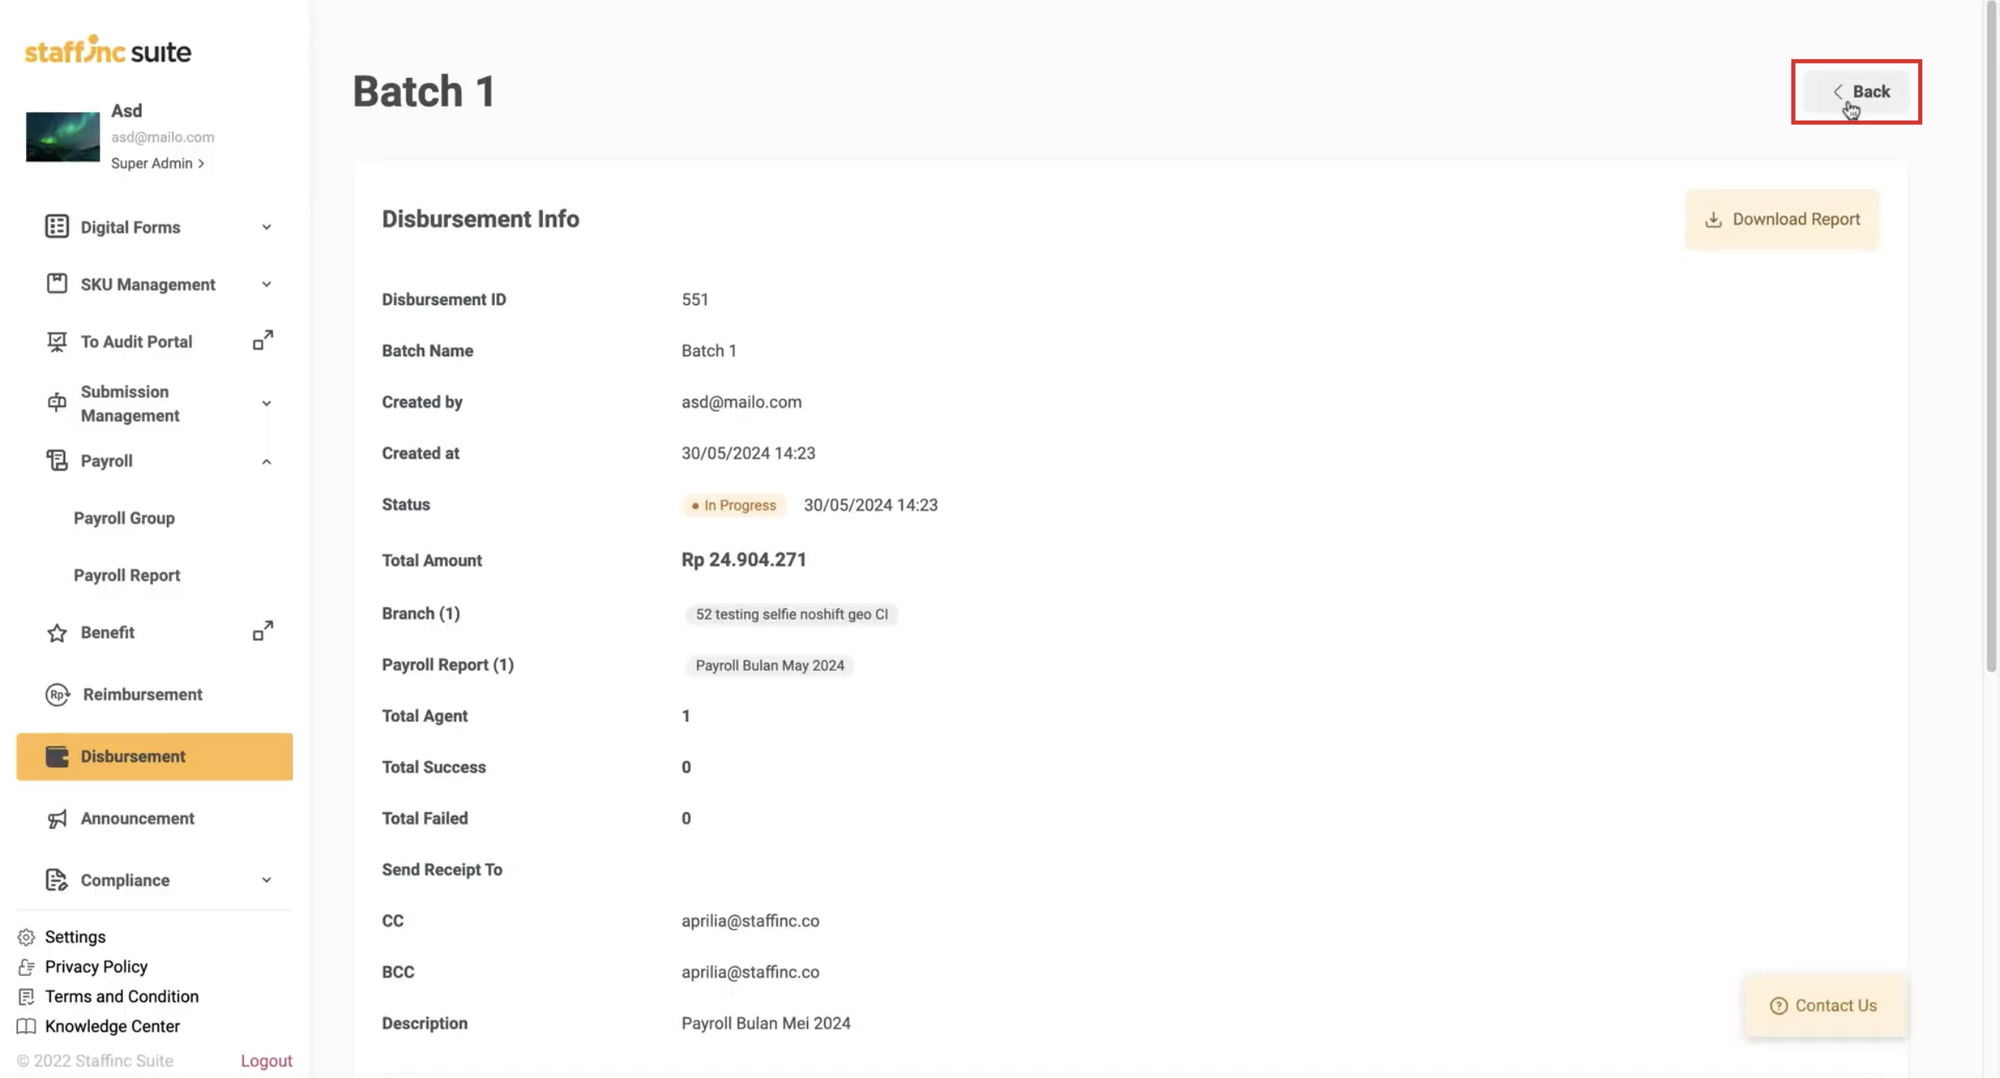
-
On this list, you can see the status of your disbursement.
Disbursement Status Process
- In Progress: The disbursement has just been created and is awaiting review from the internal Staffinc team.
- Completed: The disbursement has been approved by the internal Staffinc team, and the data has been registered with the bank. If all data is valid according to the bank, the payment data will be successfully sent to the accounts.
- Failed: The disbursement has been approved by the internal Staffinc team, but issues from the system or the bank may cause the payment to fail. The reason for the failed transaction can be seen in the remarks column at the end of the agent list. Here’s how to view details of failed data:

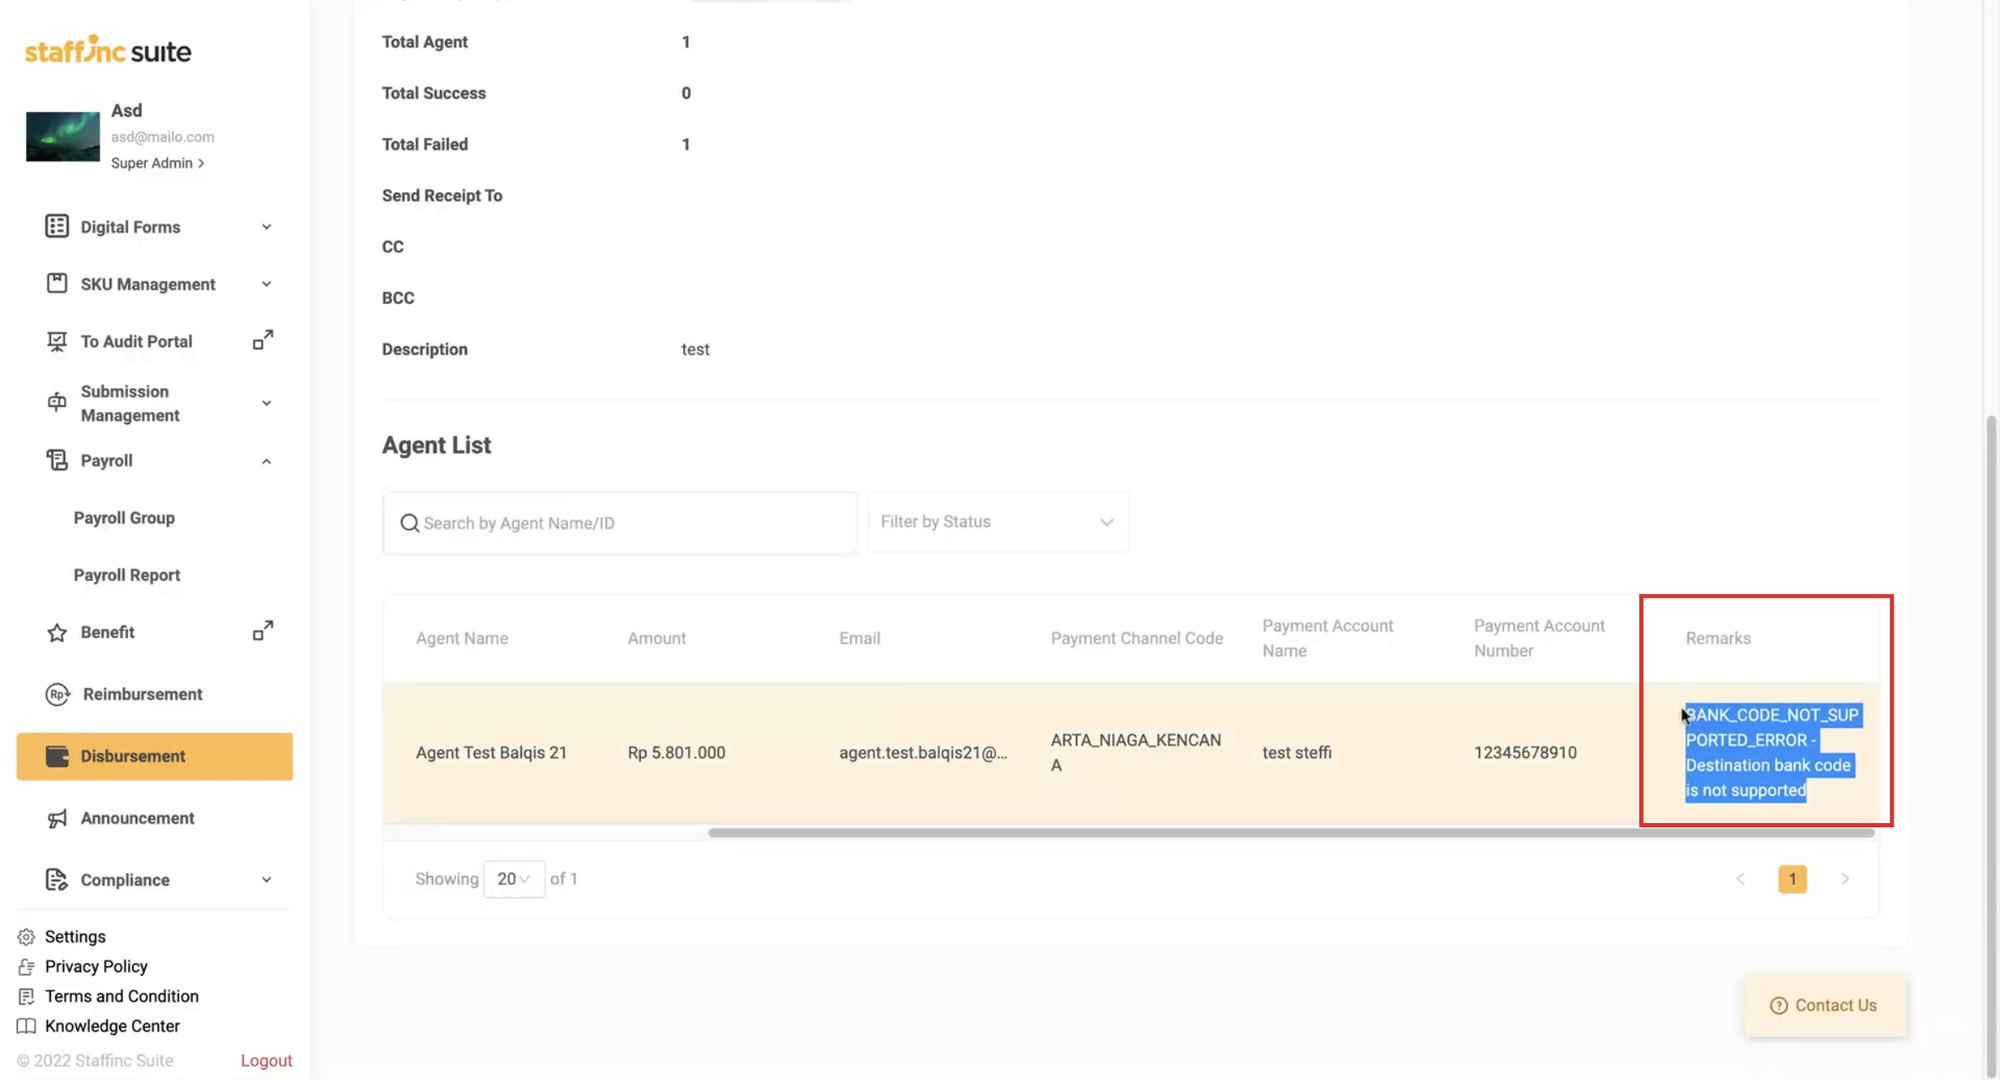
Failed Status Detail Remarks
By following the steps above, you can efficiently manage the salary disbursement process and ensure that all payments are made accurately and on time.