Edit Multiple Employee Additional Data
Employee Additional Data refers to data that can be added beyond the default data or specific data set by the employer. Here are the steps to edit additional employee data in bulk:
-
1. Access the Employee List Menu
- Open the application and navigate to the Employee > Employee List menu.
- Click +Import > Edit Employee Additional Data in the upper right corner.
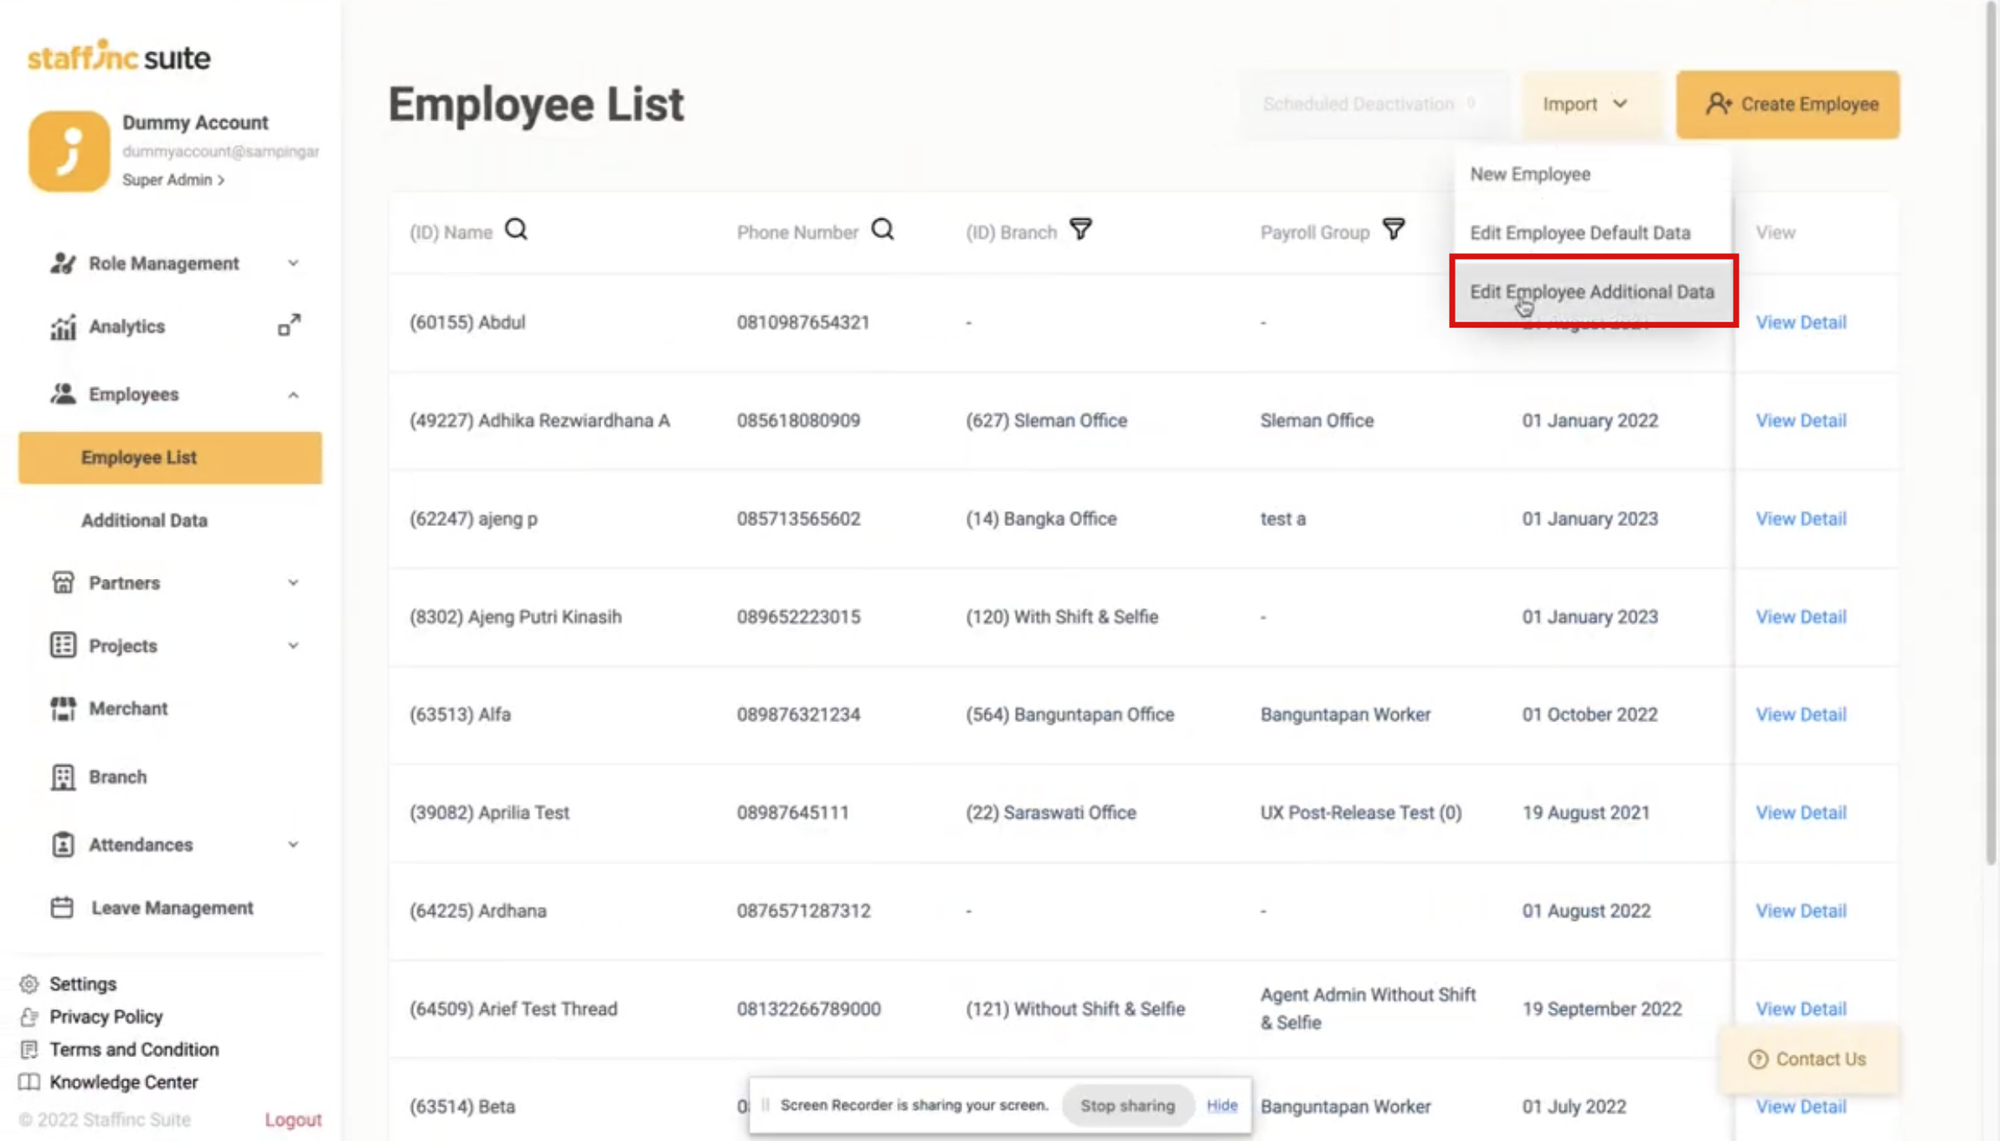
- You will be directed to the Edit Employee’s Additional Data page.
-
2. Choose Export Options
- In the Export section, select No Filter if you want to edit all employees.
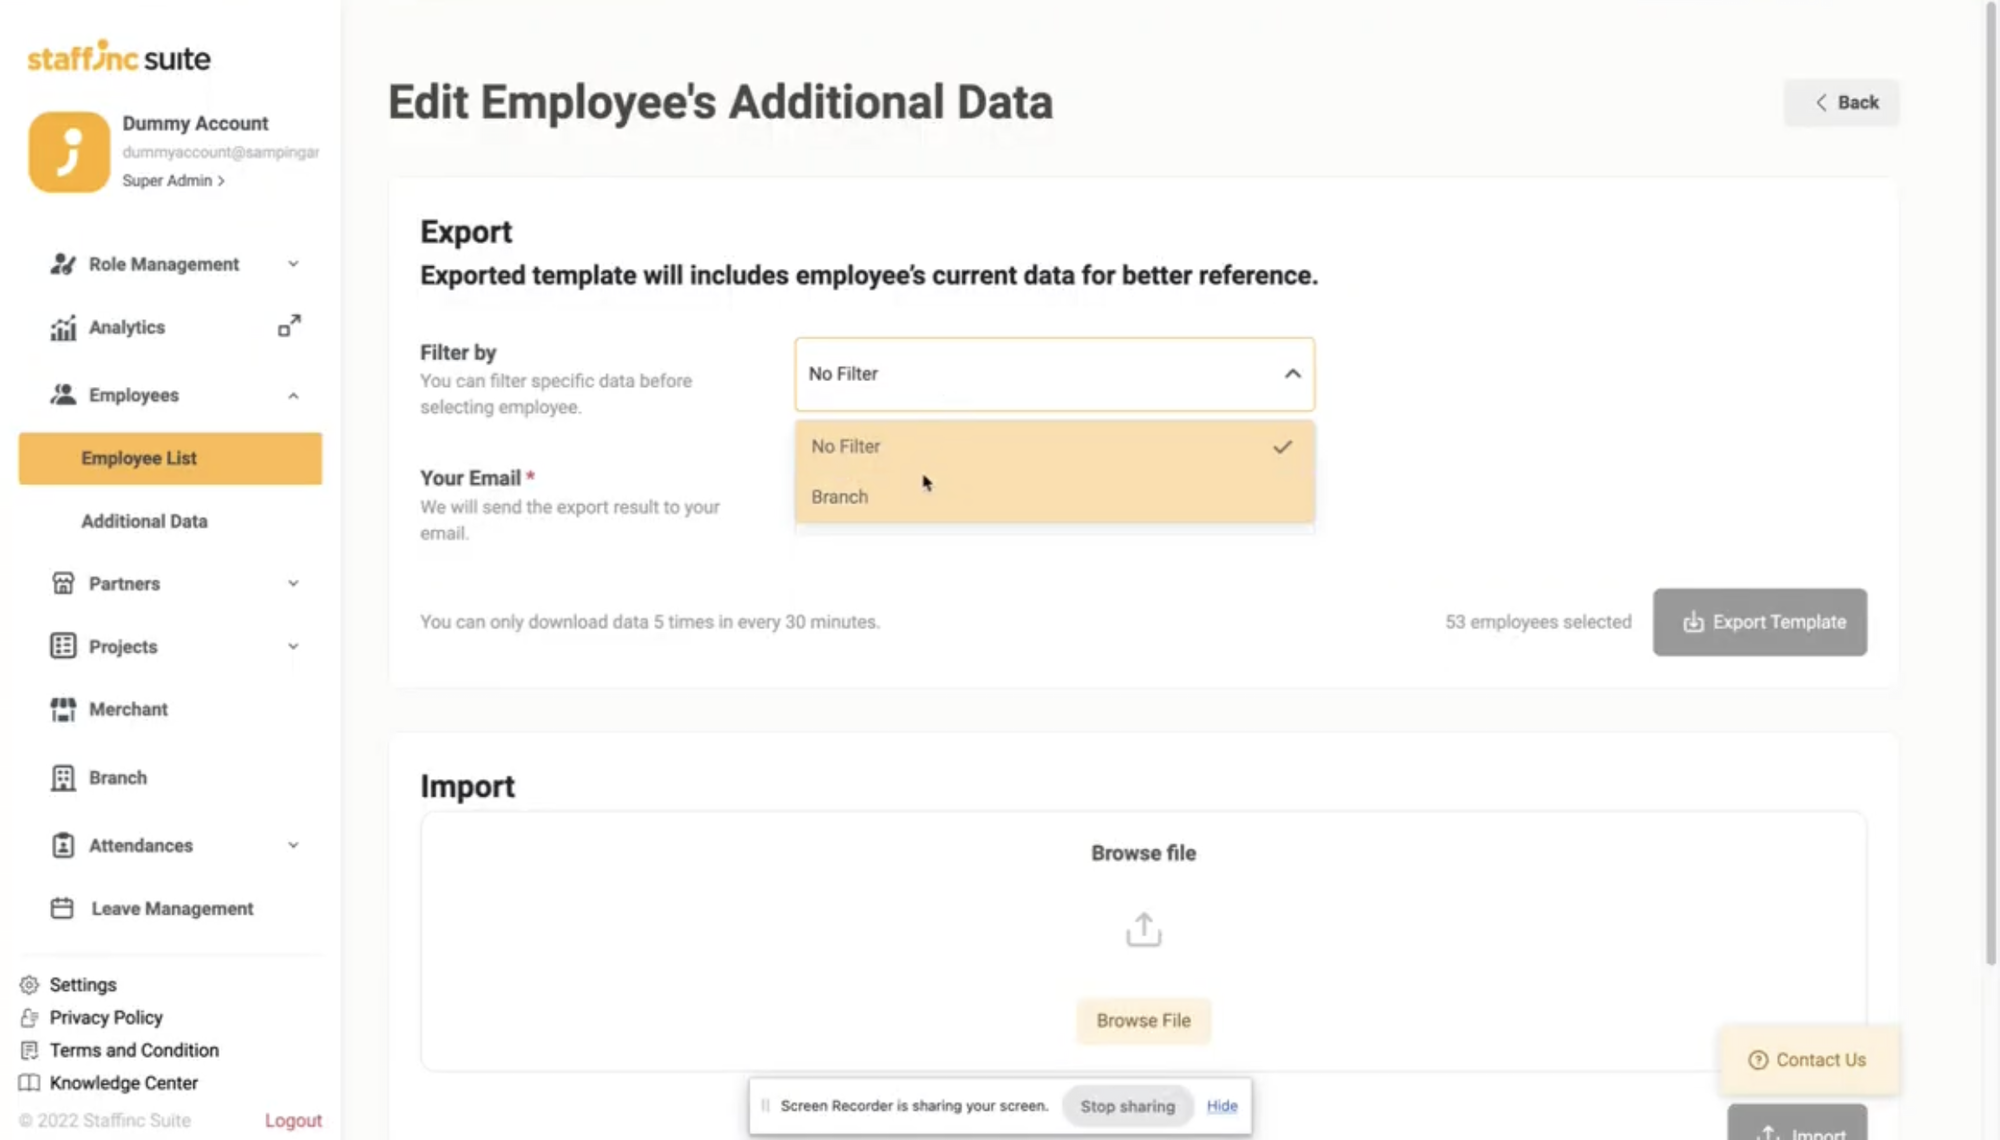
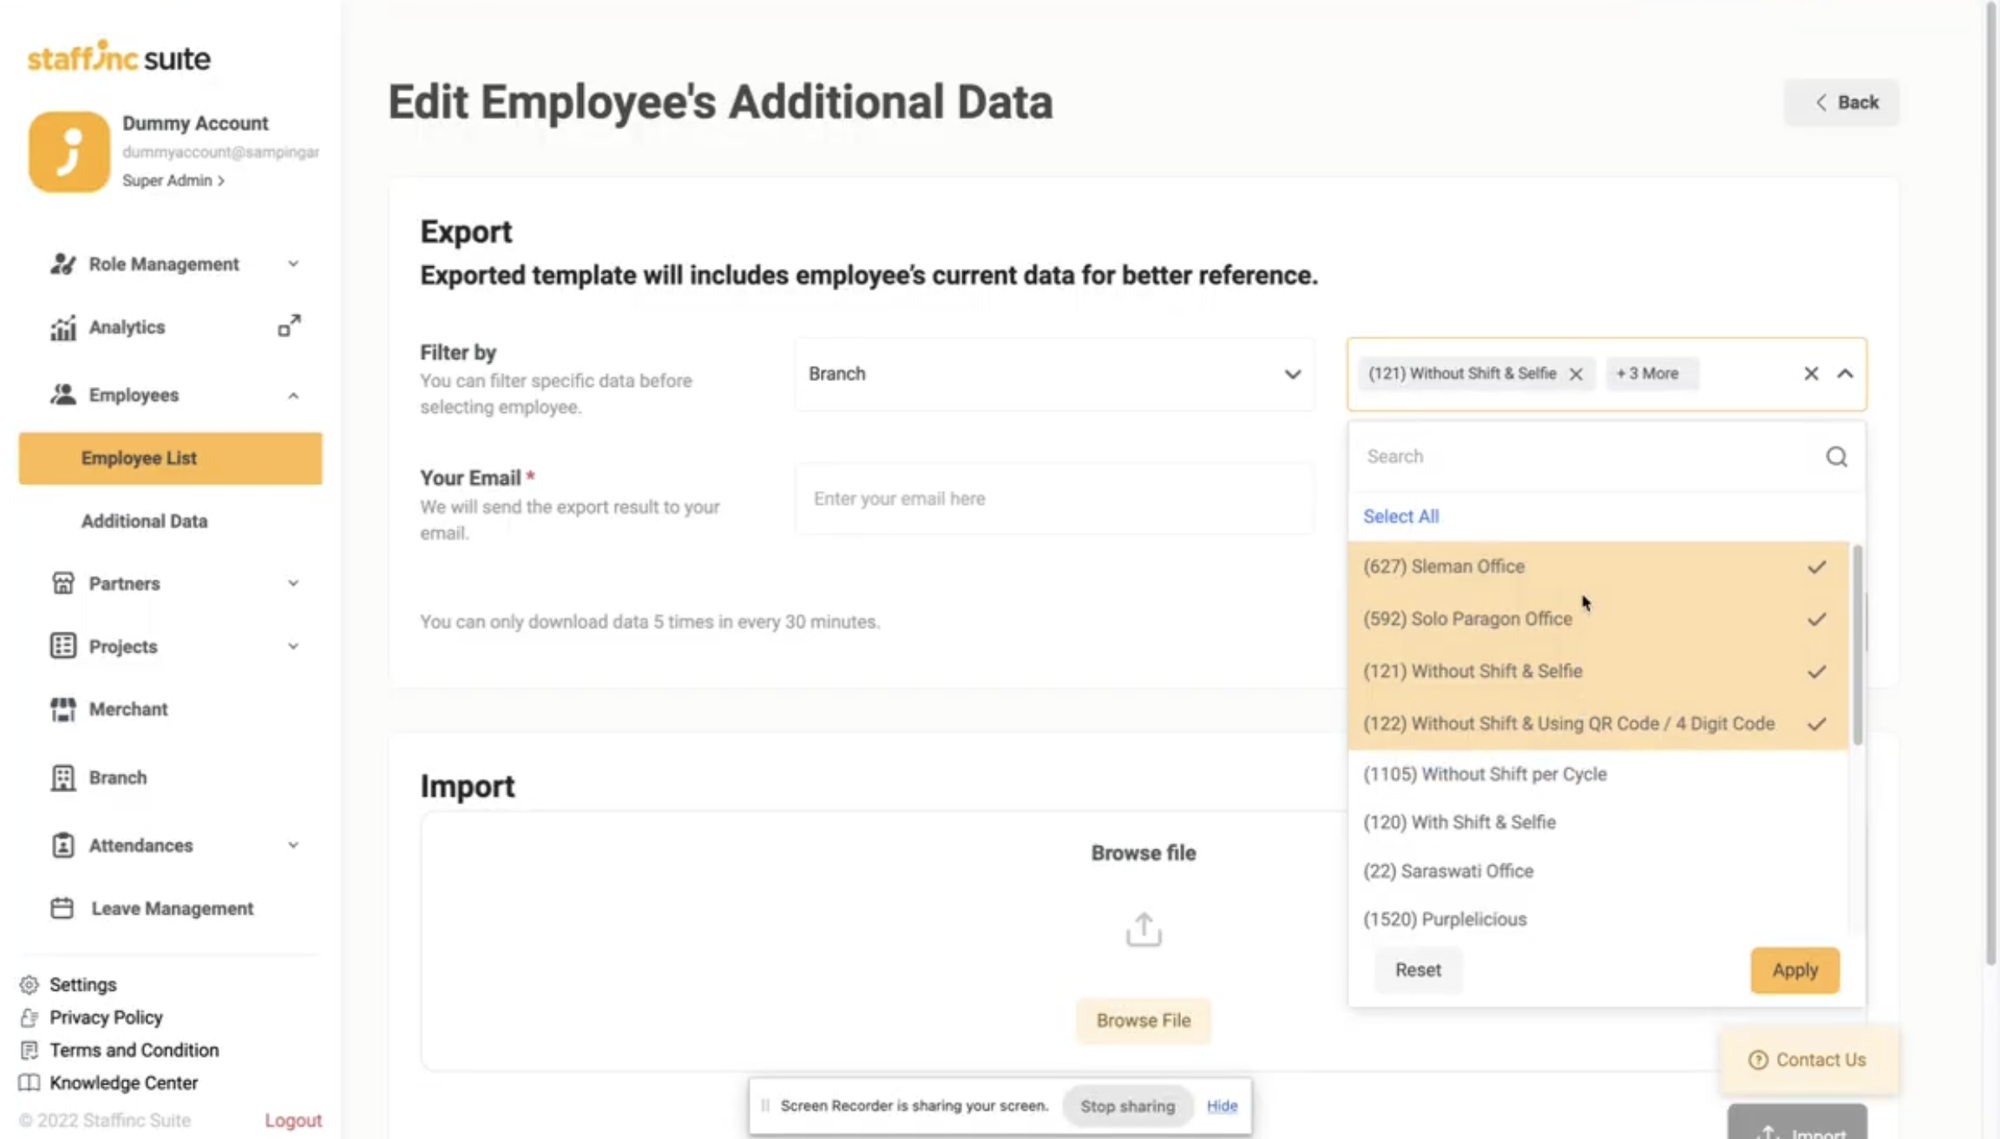
- Select Branch if you want to edit employees from specific branches only. You can select more than one branch.
- In the Export section, select No Filter if you want to edit all employees.
-
3.Enter Email to Download Template
- Enter your email address to download the template. The template will be sent to the email address you entered.

- Click Export Template.
- Enter your email address to download the template. The template will be sent to the email address you entered.
-
4. Download the File from Email
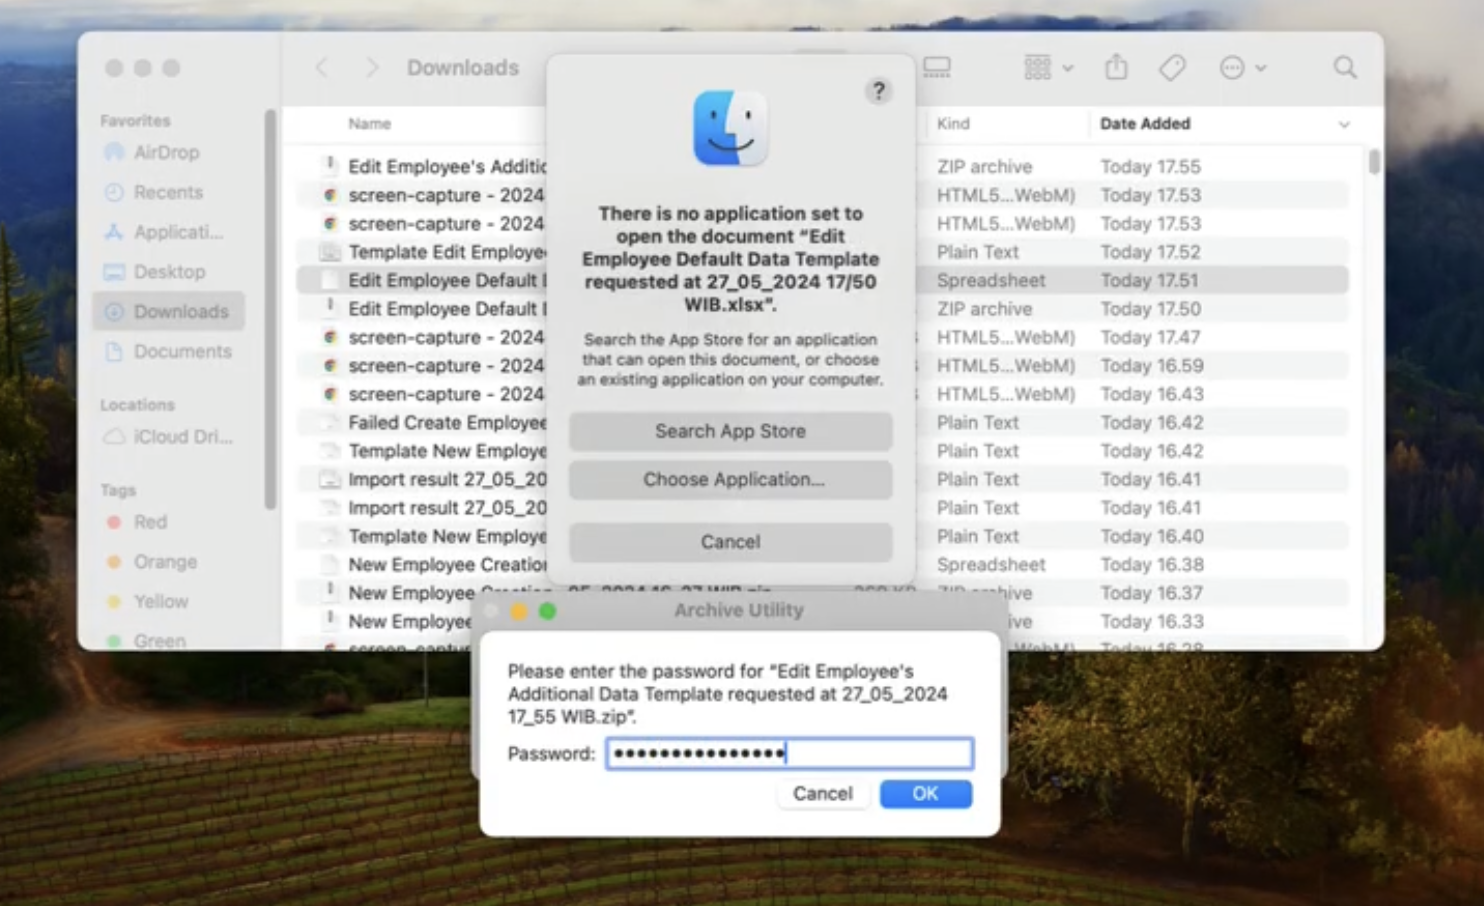
- Open your email and download the received file. The file will be in ZIP format.
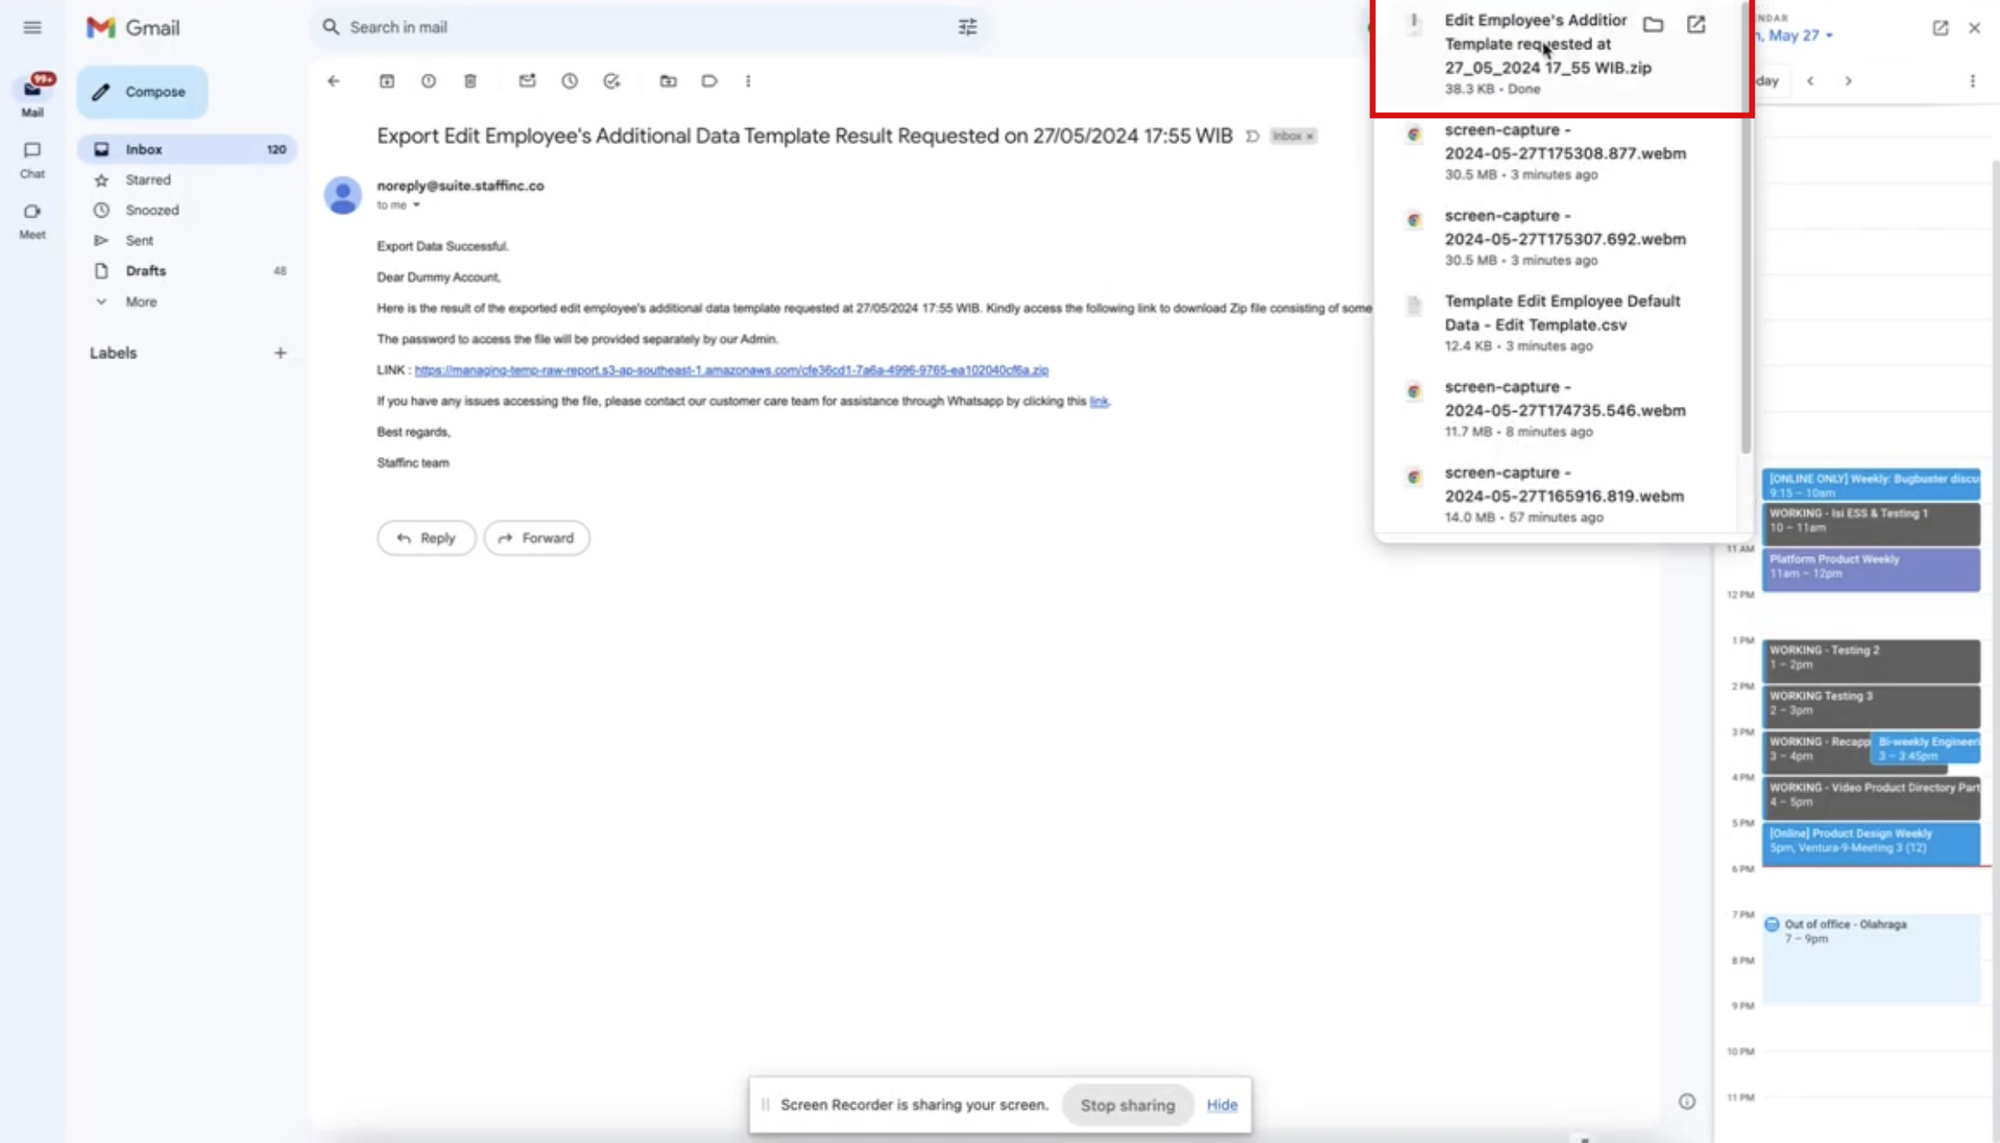
- Extract the ZIP file using this formatted password: [Client ID][Client Name] (example: 247MPO - redBus). You can also ask the Staffinc admin for the password.
- Open your email and download the received file. The file will be in ZIP format.
-
5. Edit the Template with Microsoft Excel/Spreadsheet
- Open the template file with Microsoft Excel or spreadsheet application.
- Read the Instruction sheet to avoid errors in filling out employee data and follow the given guidelines.
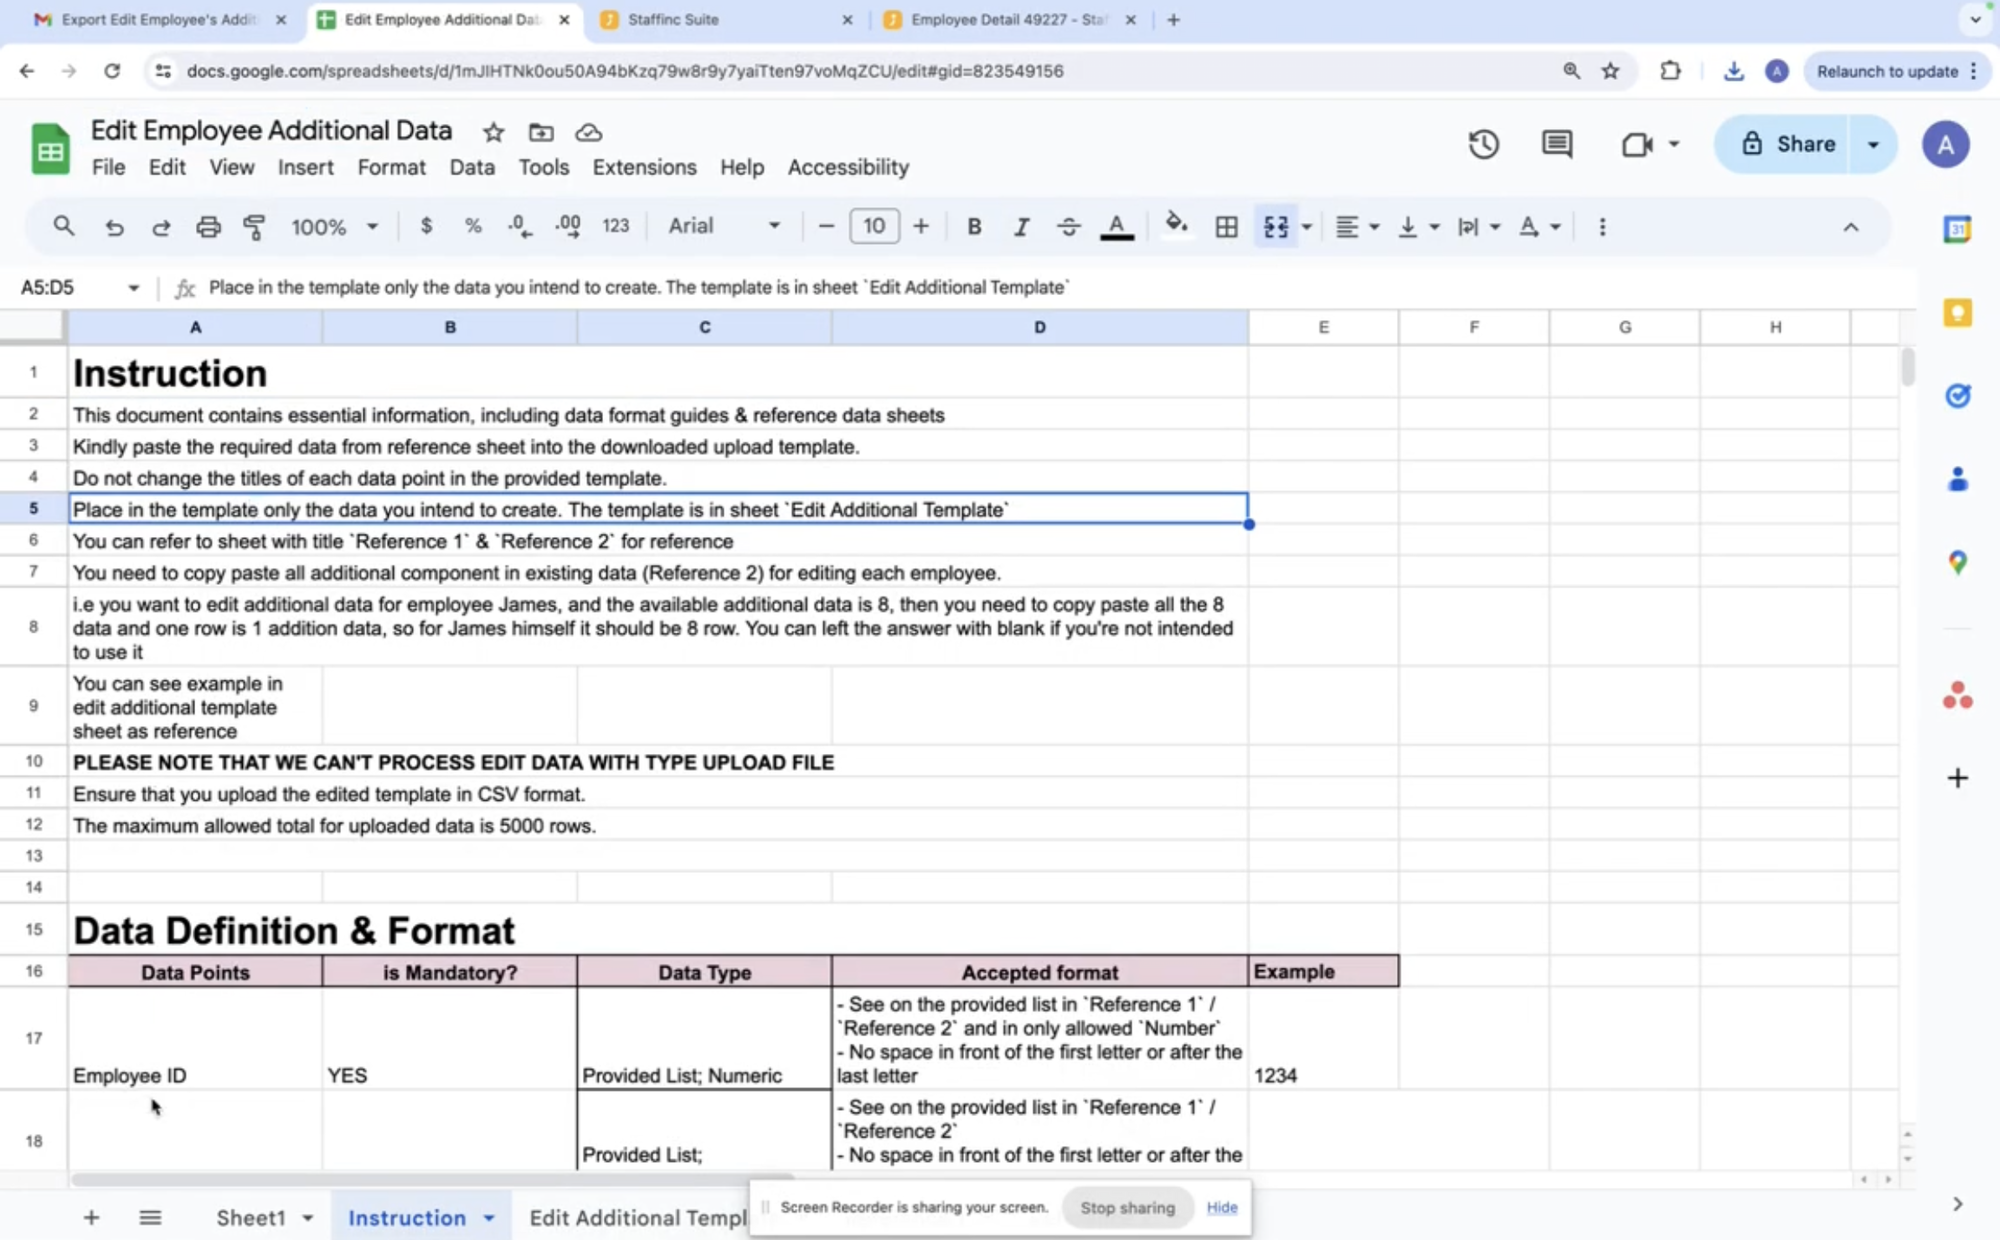
- Edit the template according to your employees' information on the Edit Additional Template sheet. Note that each row represents one piece of additional data information. An example can be seen on the Reference 2 sheet.
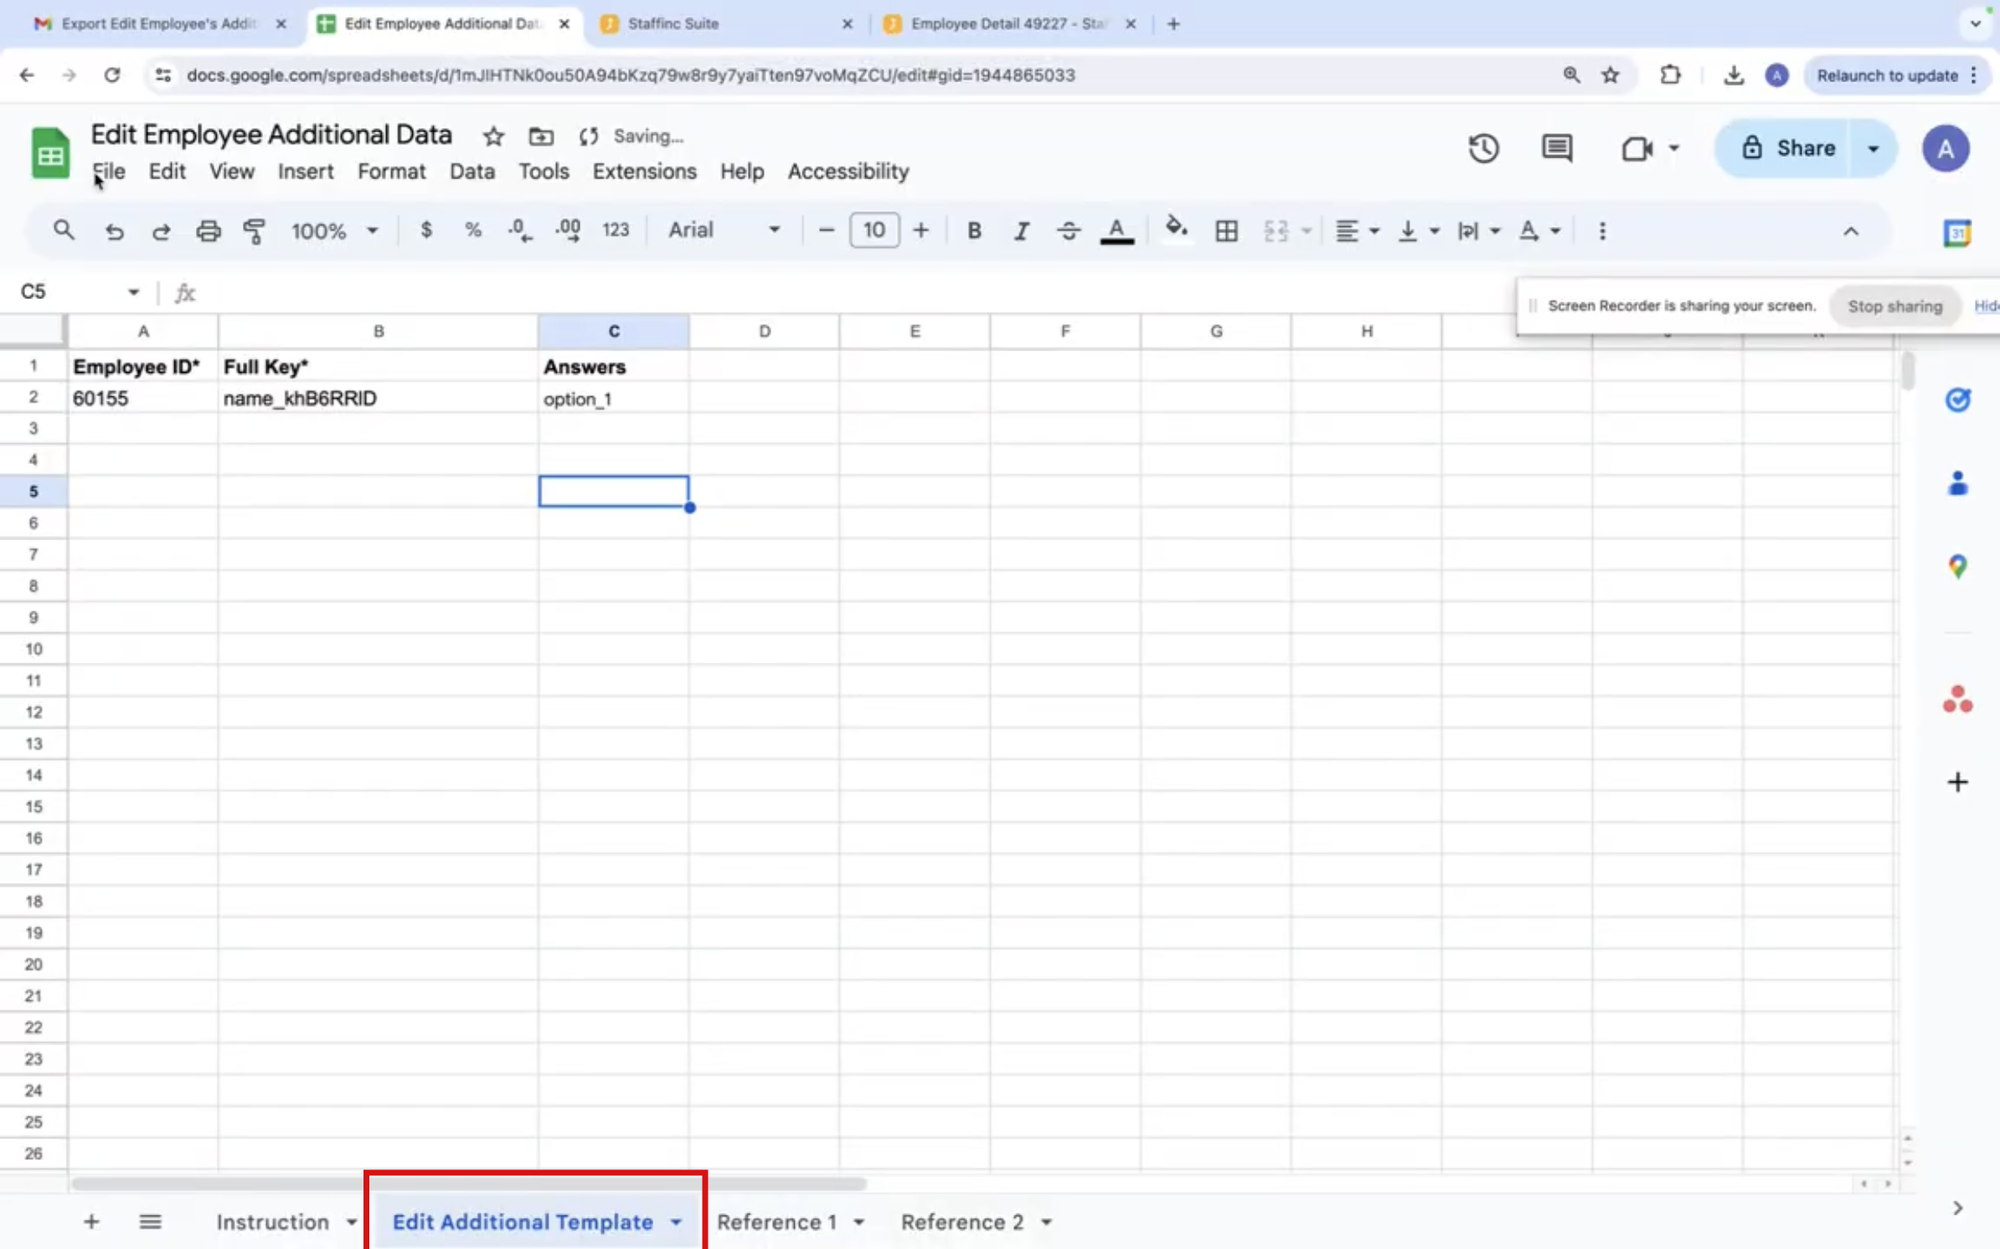
- To filling in the Employee ID Column, copy the Employee ID of the desired employee referring to the sheet Reference 2 - Existing Data Point.
- To filling in the Full Key Column, copy the Full Key of the specific data from the desired employee on the sheet Reference 2 - Existing Data Point.
- To filling in the Answer Column, Copy the Options according to the data on the sheet Reference 1 - Available Additional Data Point. If the option is not in sheet Reference 1, you can fill in the Answer column according to the data without referring to sheet Reference 1.
-
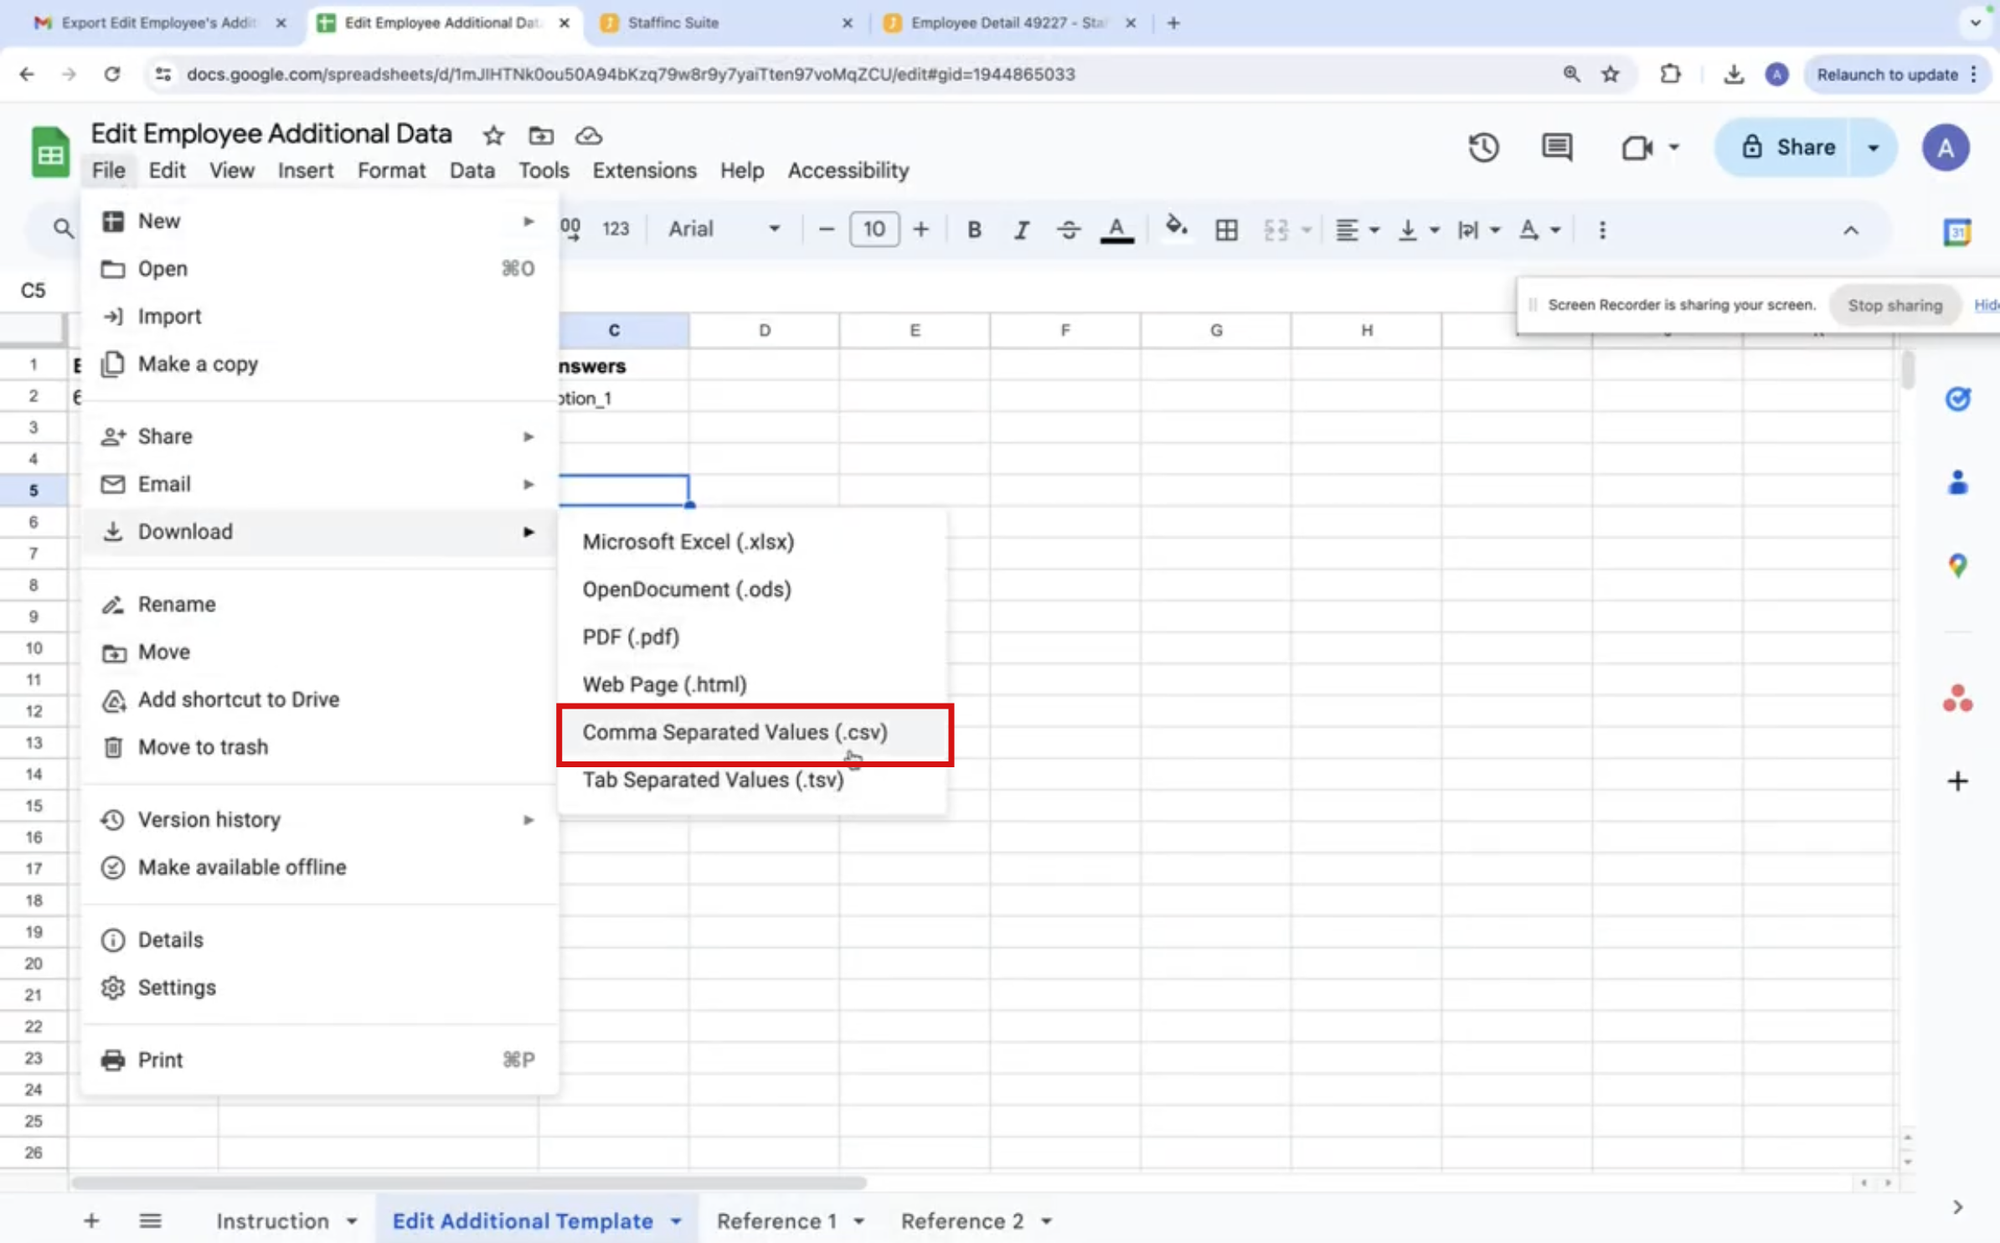
6. Save the Template in CSV Format
- After editing the template, save the file in CSV format.
- After editing the template, save the file in CSV format.
-
7. Upload the Edited Template
- In the Import section, click Browse file to upload the edited CSV file.
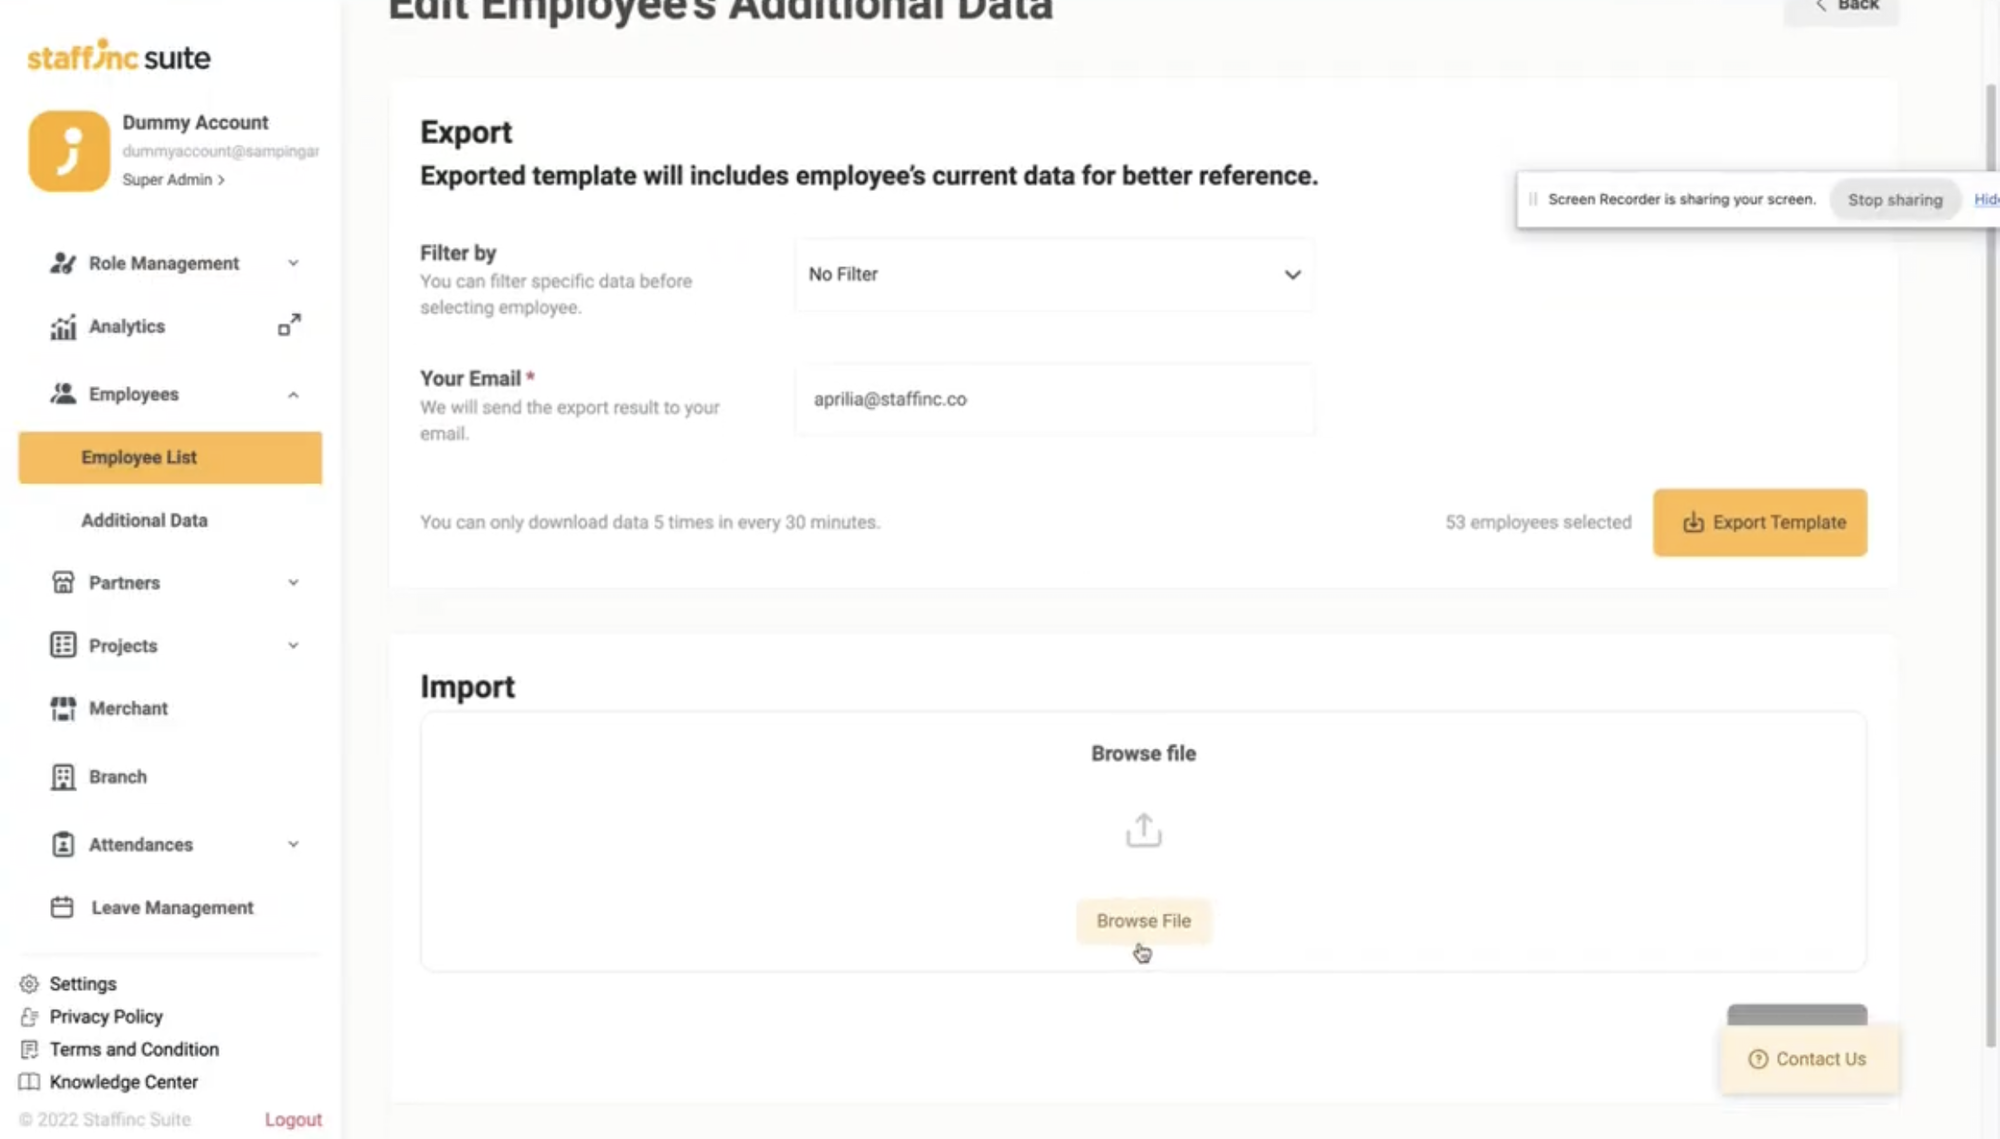
- After selecting the file, click Import File.
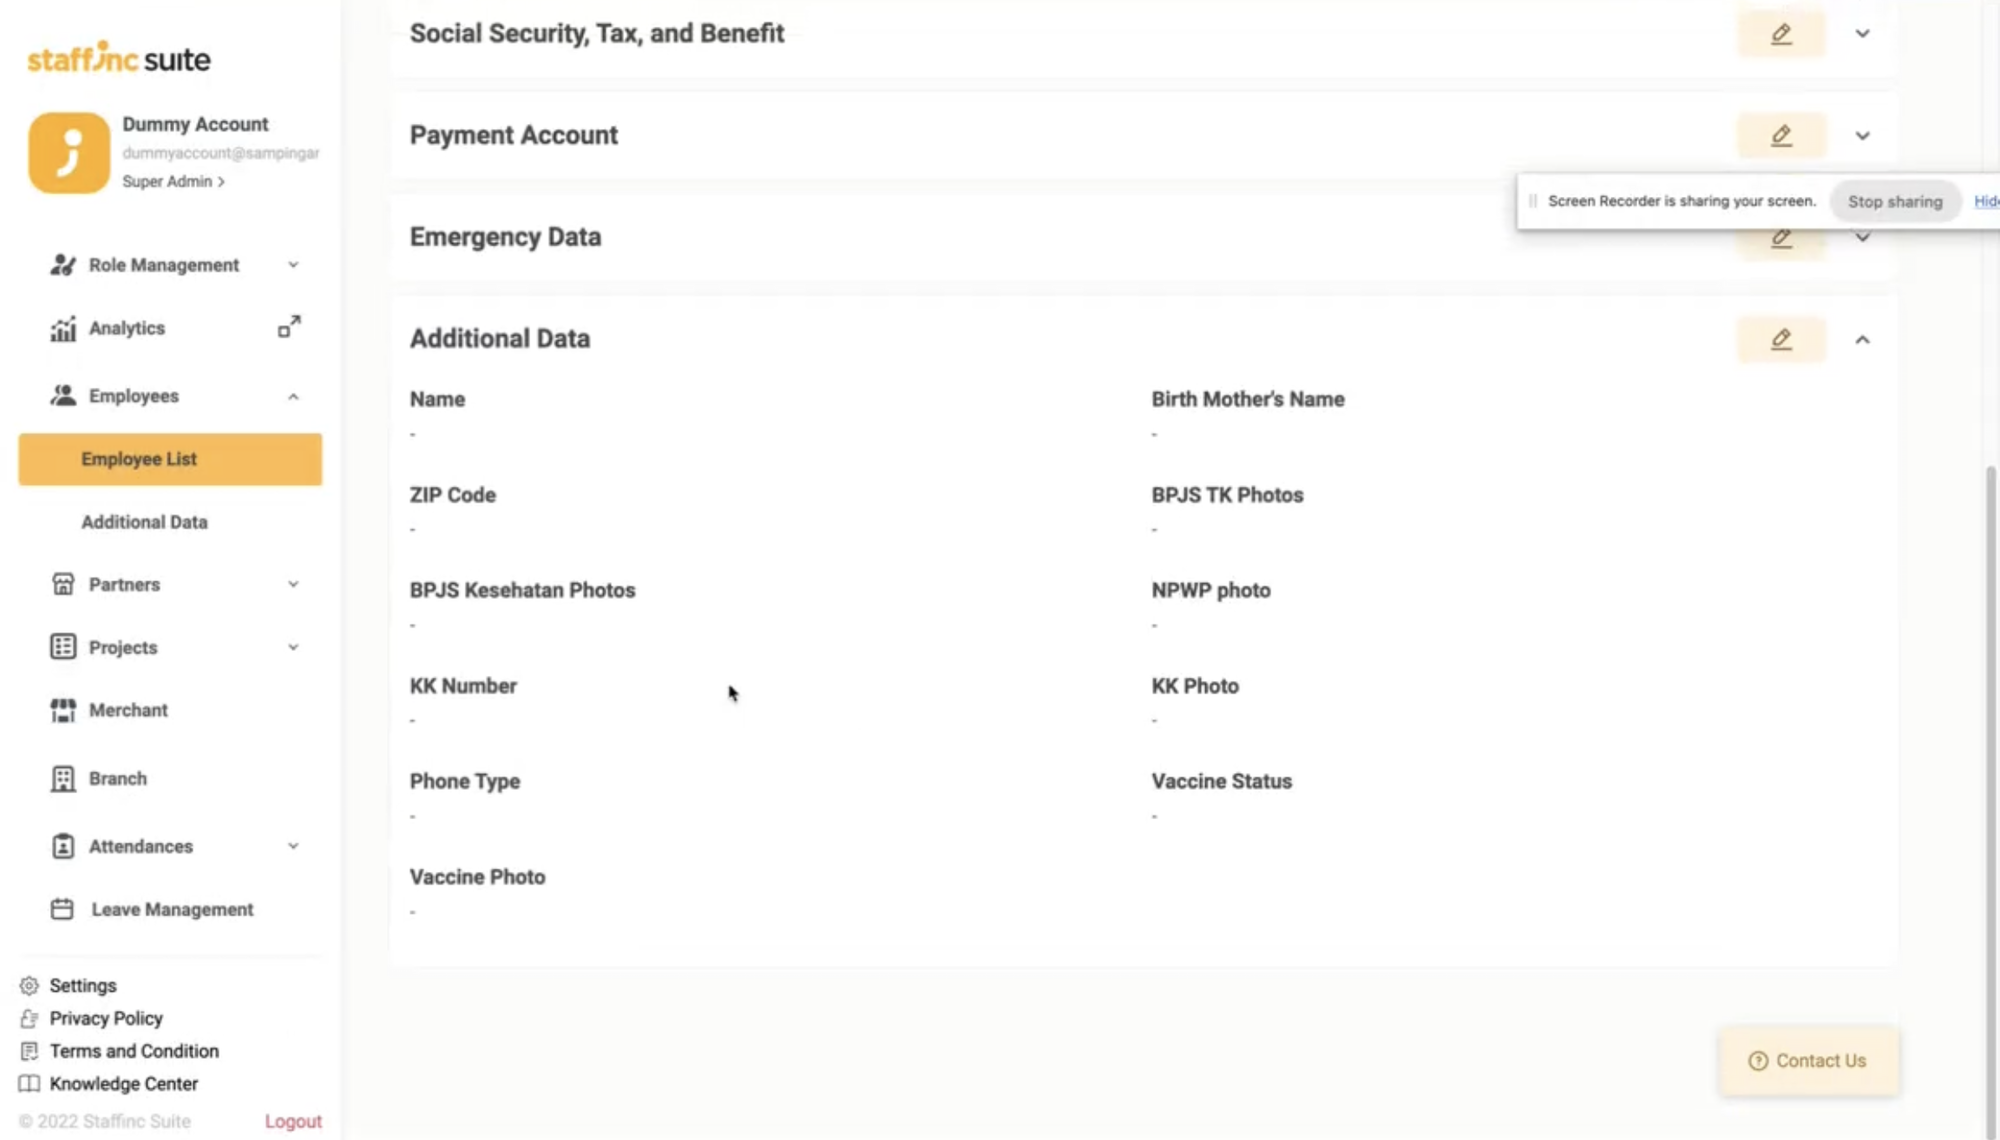
- Once the data is successfully uploaded, it can be viewed in the detailed employee list.
- In the Import section, click Browse file to upload the edited CSV file.
By following these steps, you can easily edit additional employee data in bulk and ensure that all changes are saved correctly.