New Employee Creation (Bulk)
In this section, you will learn how to add employees using the bulk upload method. Follow these steps:
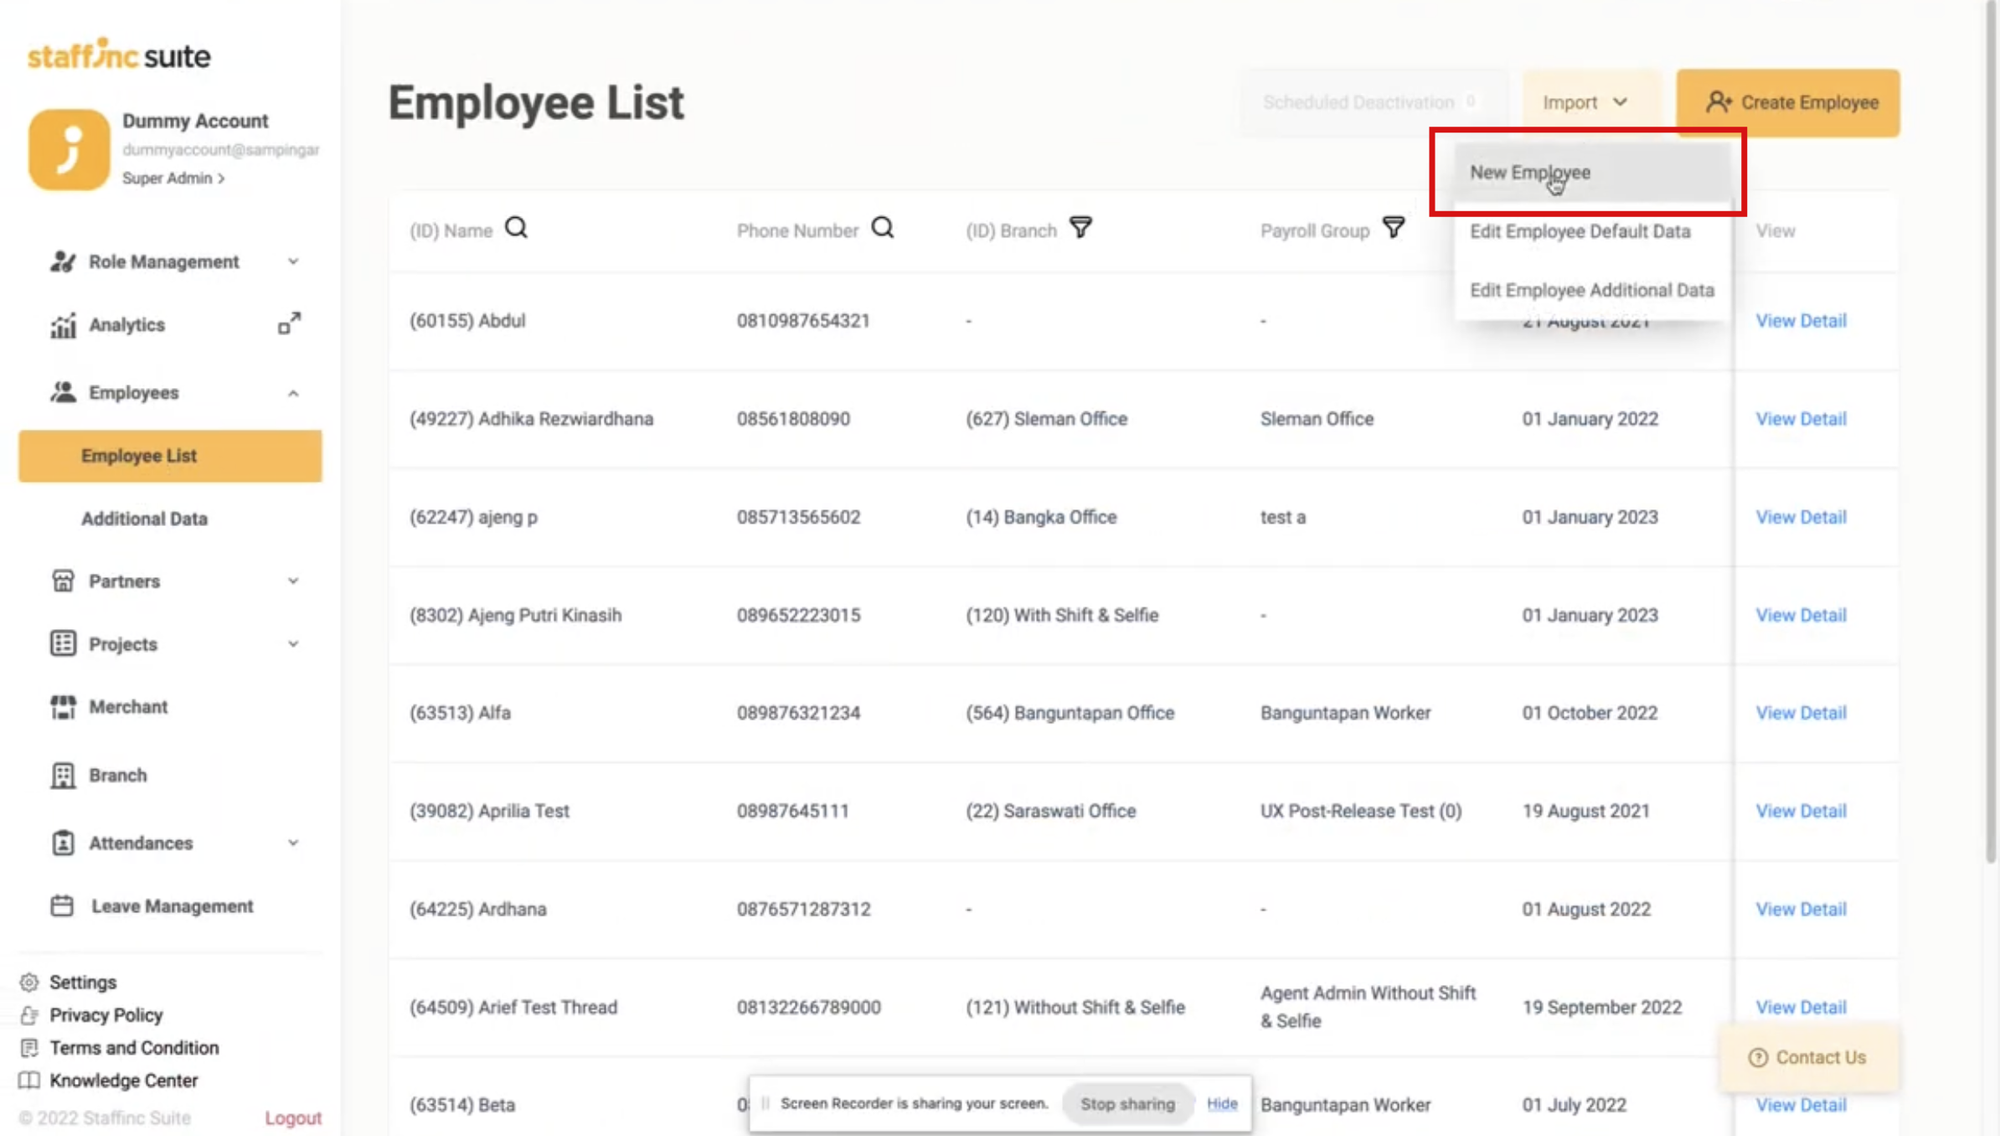
- 1. Access the Employee List Menu
-
Open the application and navigate to the Employee List menu.
-
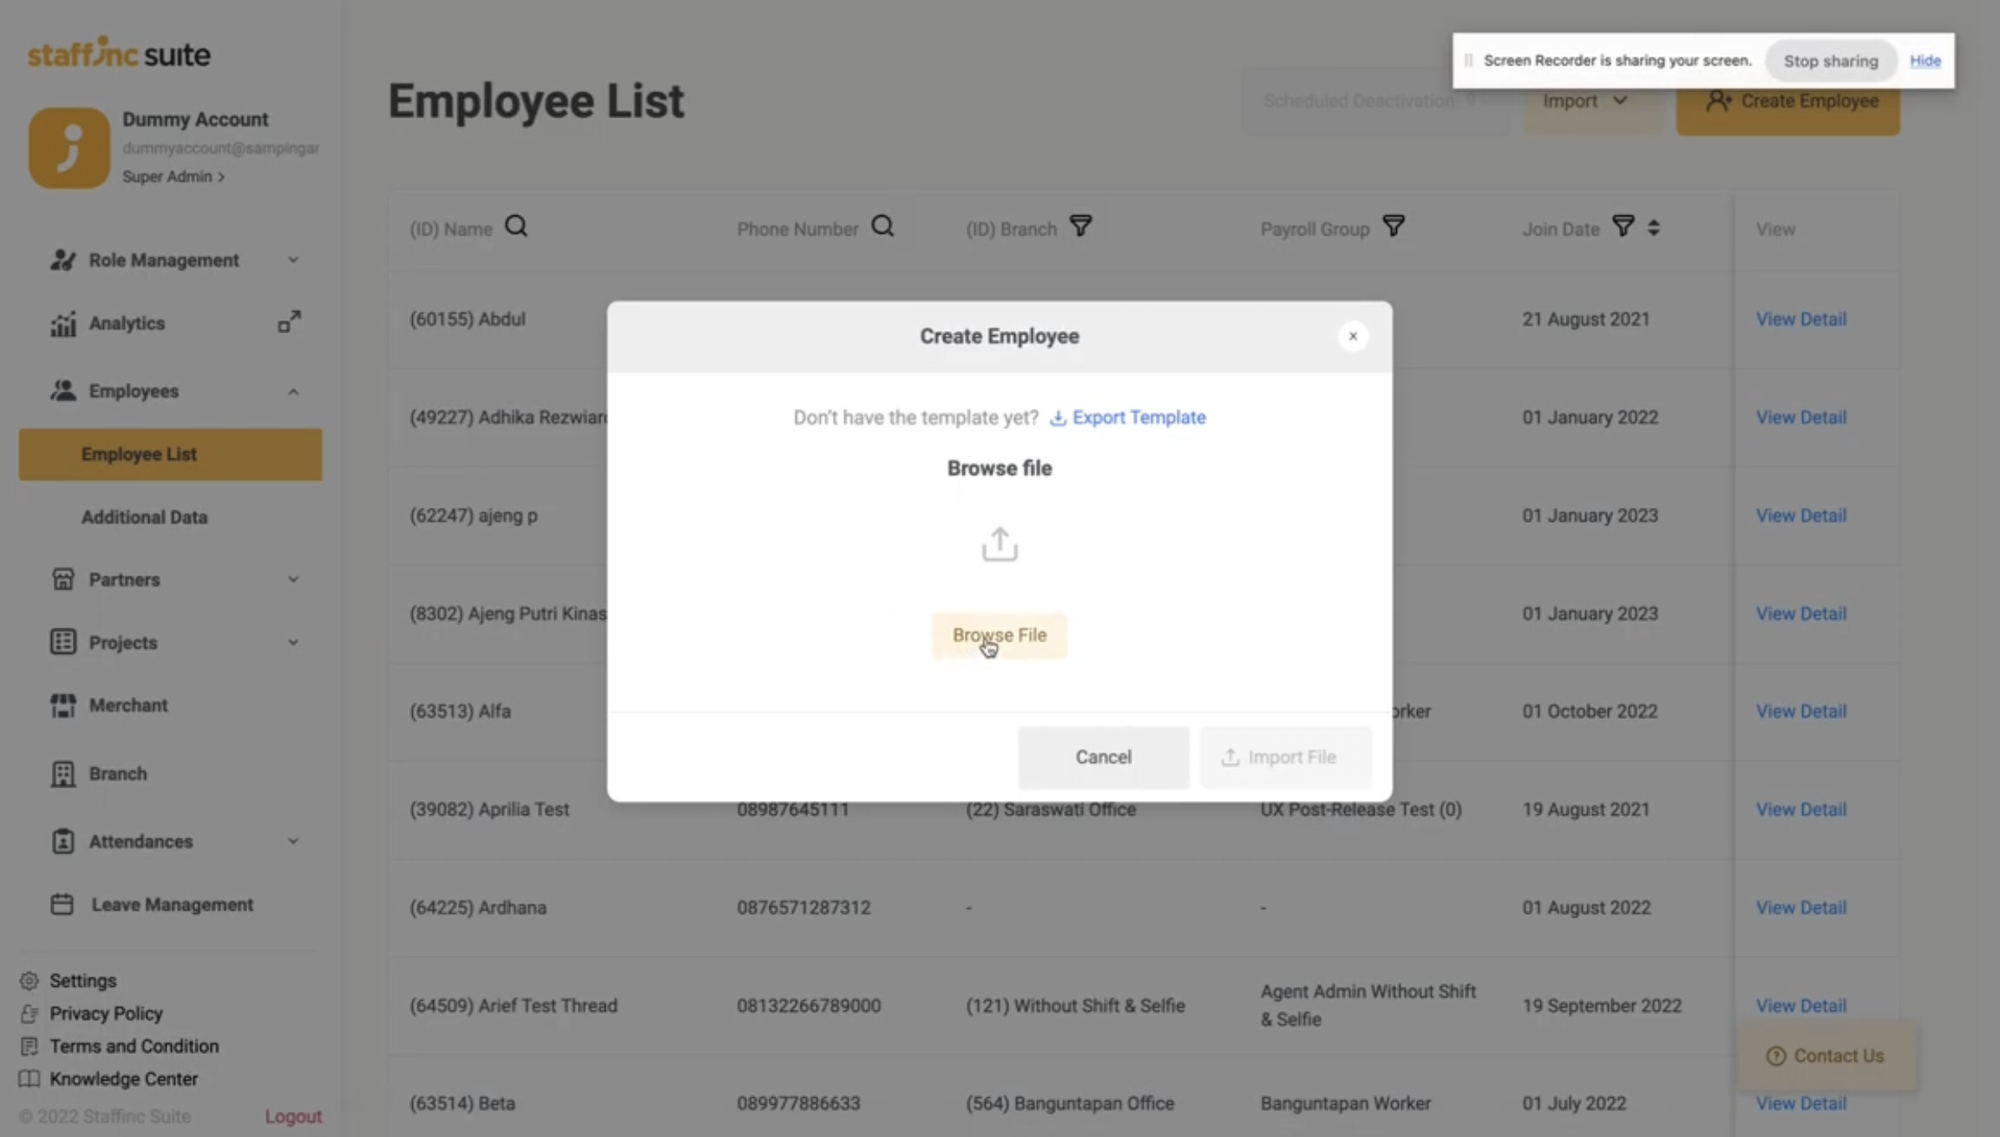
In the upper right corner, click +Import > New Employee.
-
A "Create Employee" window will appear.
-
-
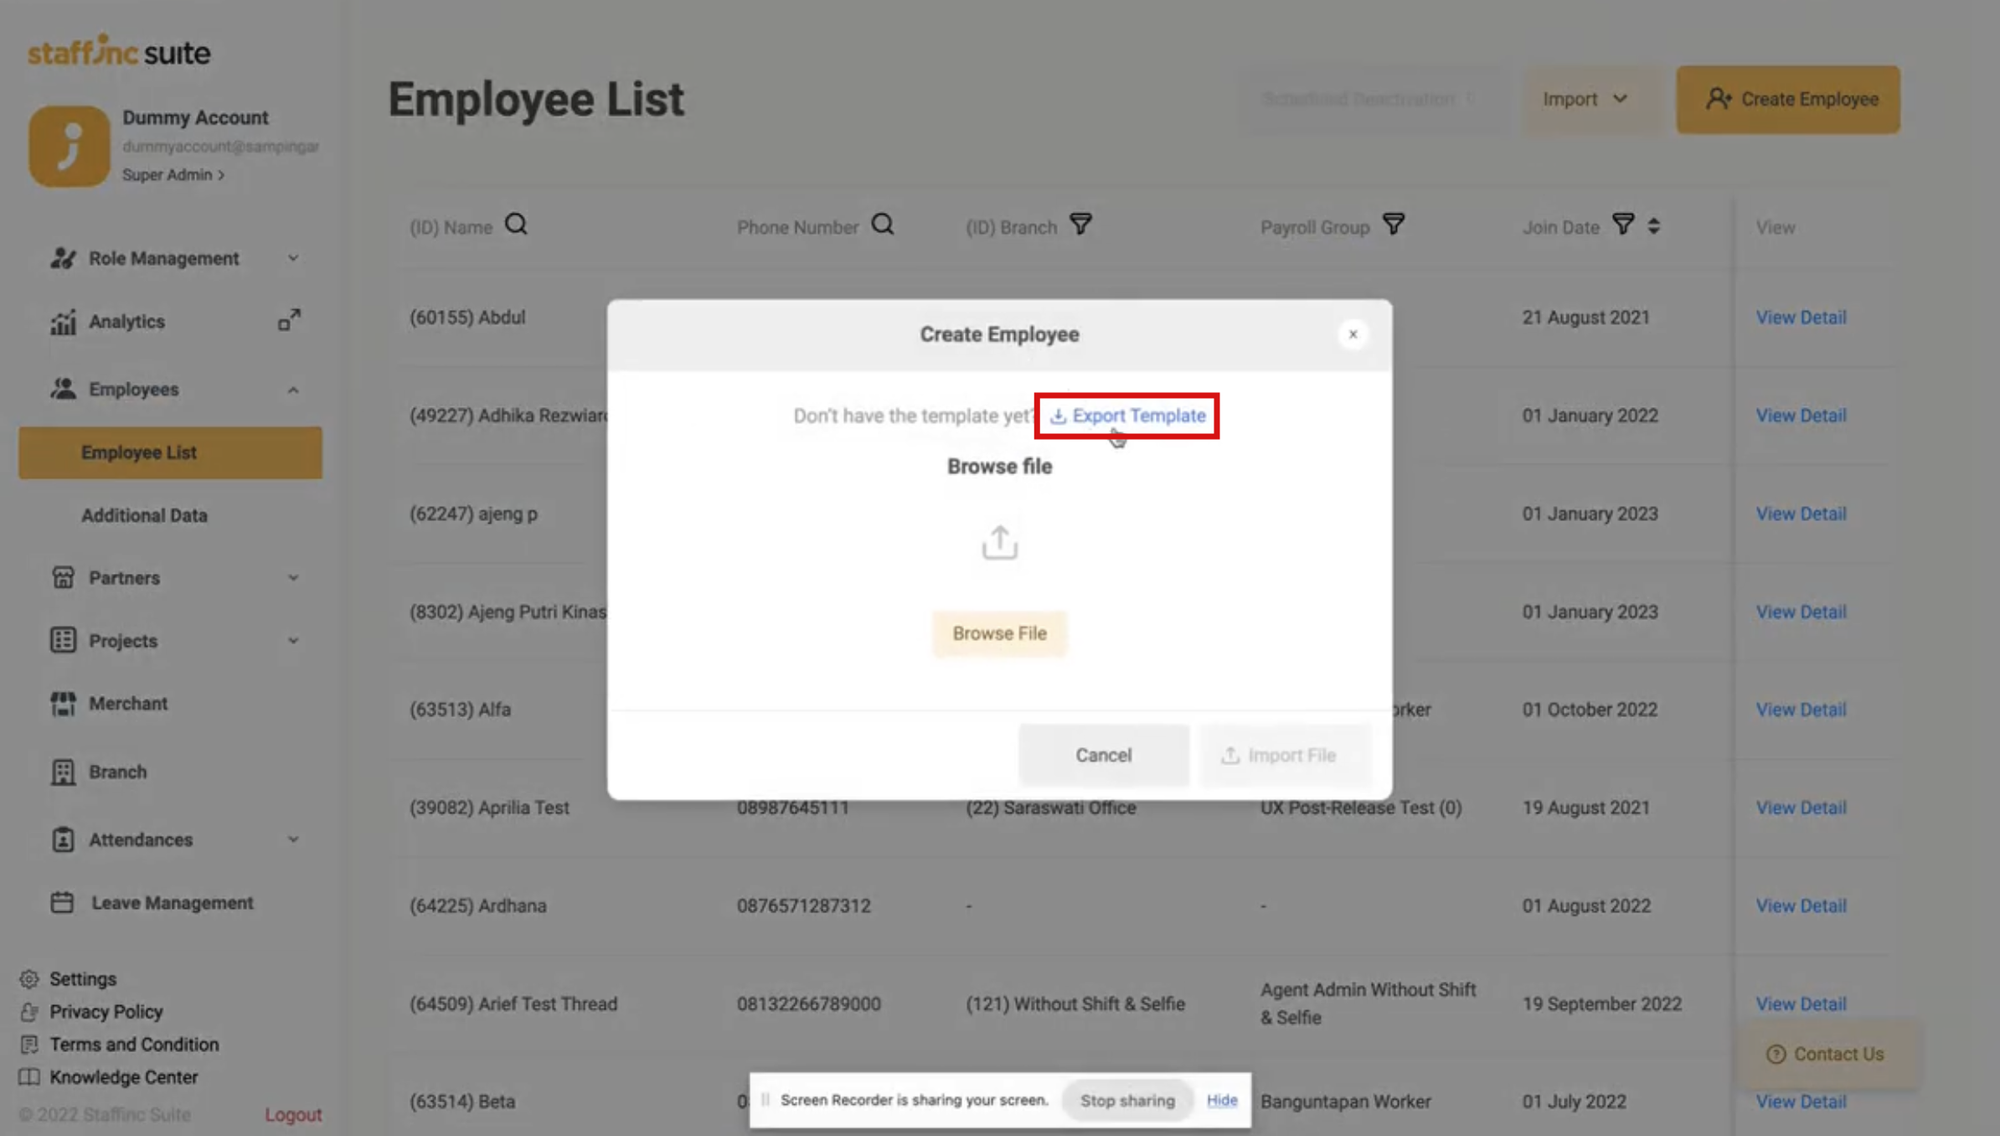
2. Ensure You Use the Provided Template
-
Click Export Template.
-
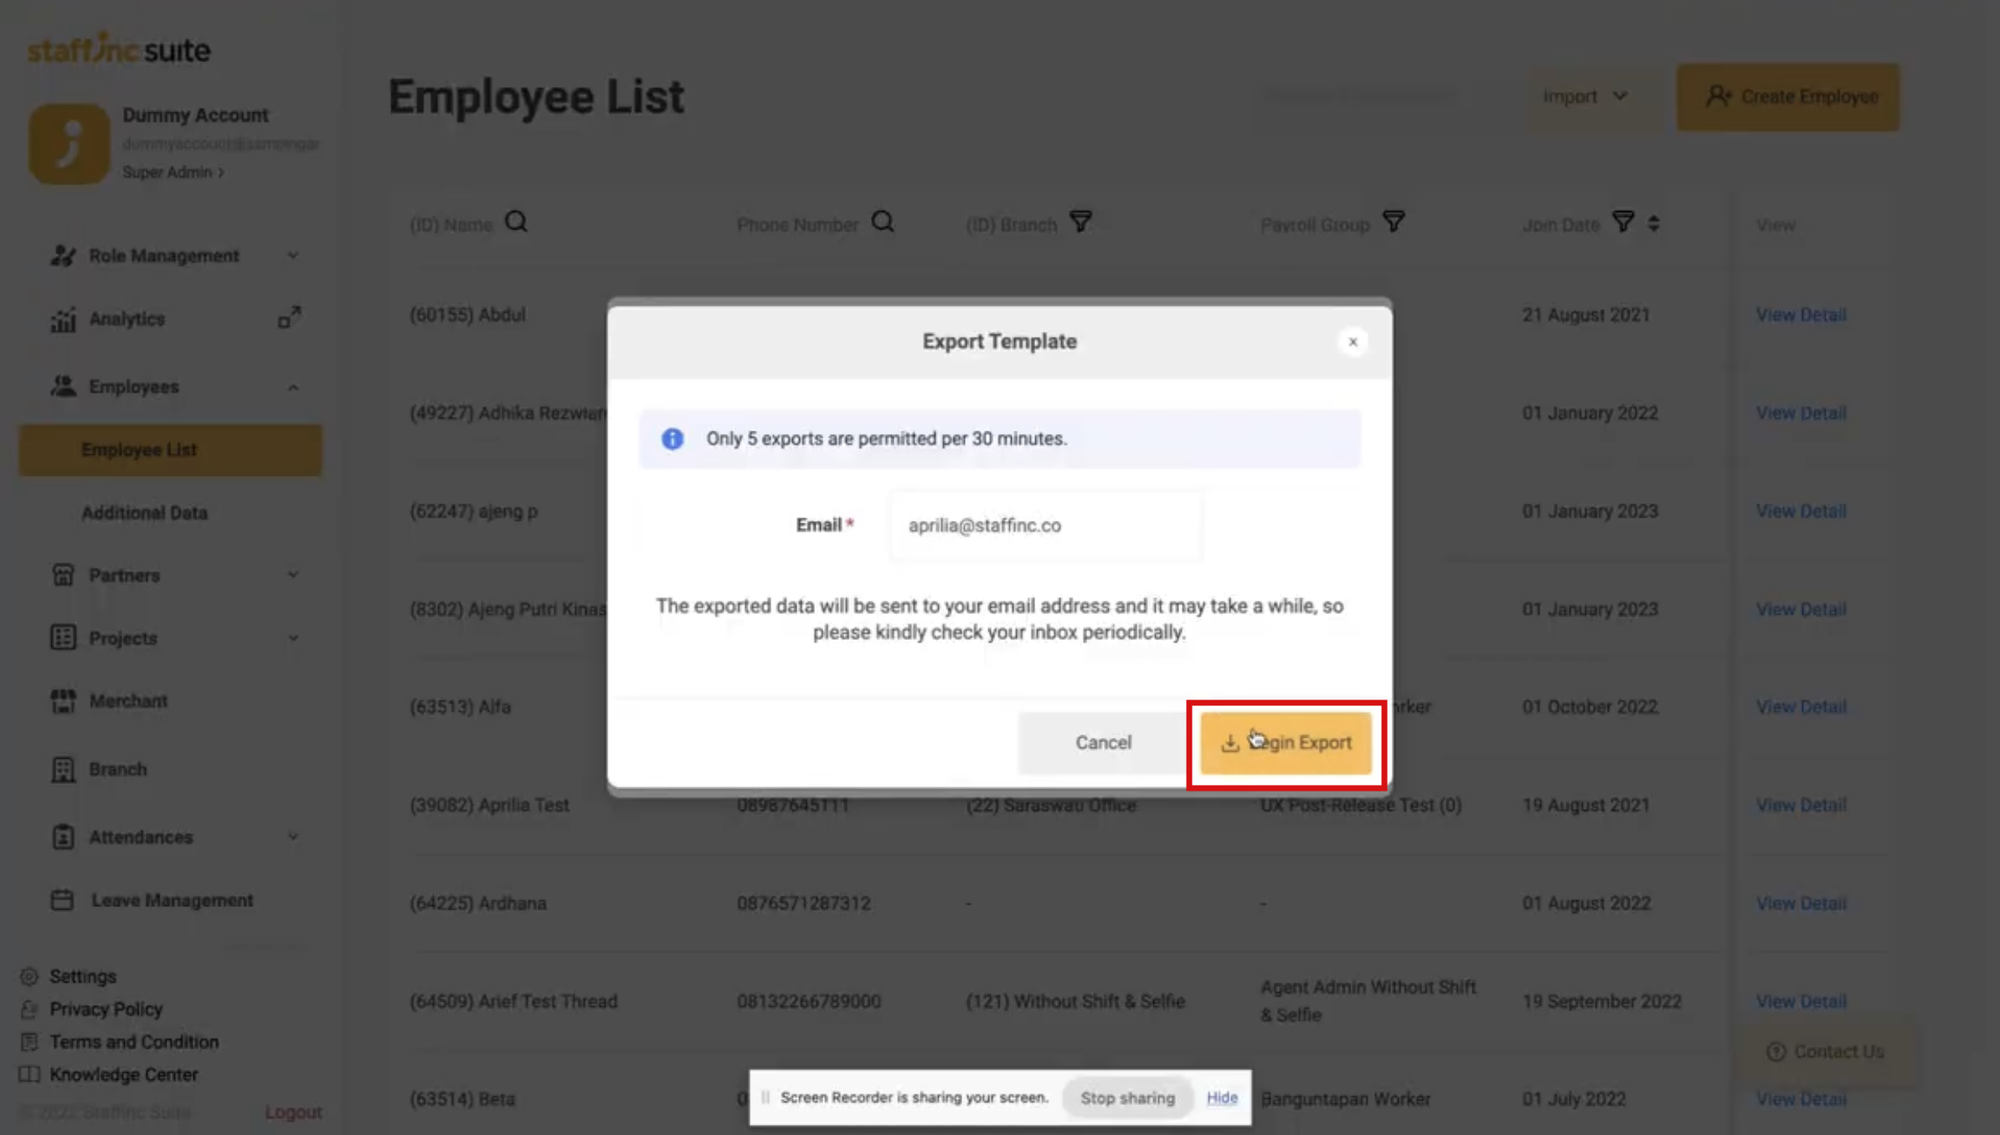
Enter Email to Download Template
-
The template will be sent to your email. Enter your email address to receive the template.
-
-
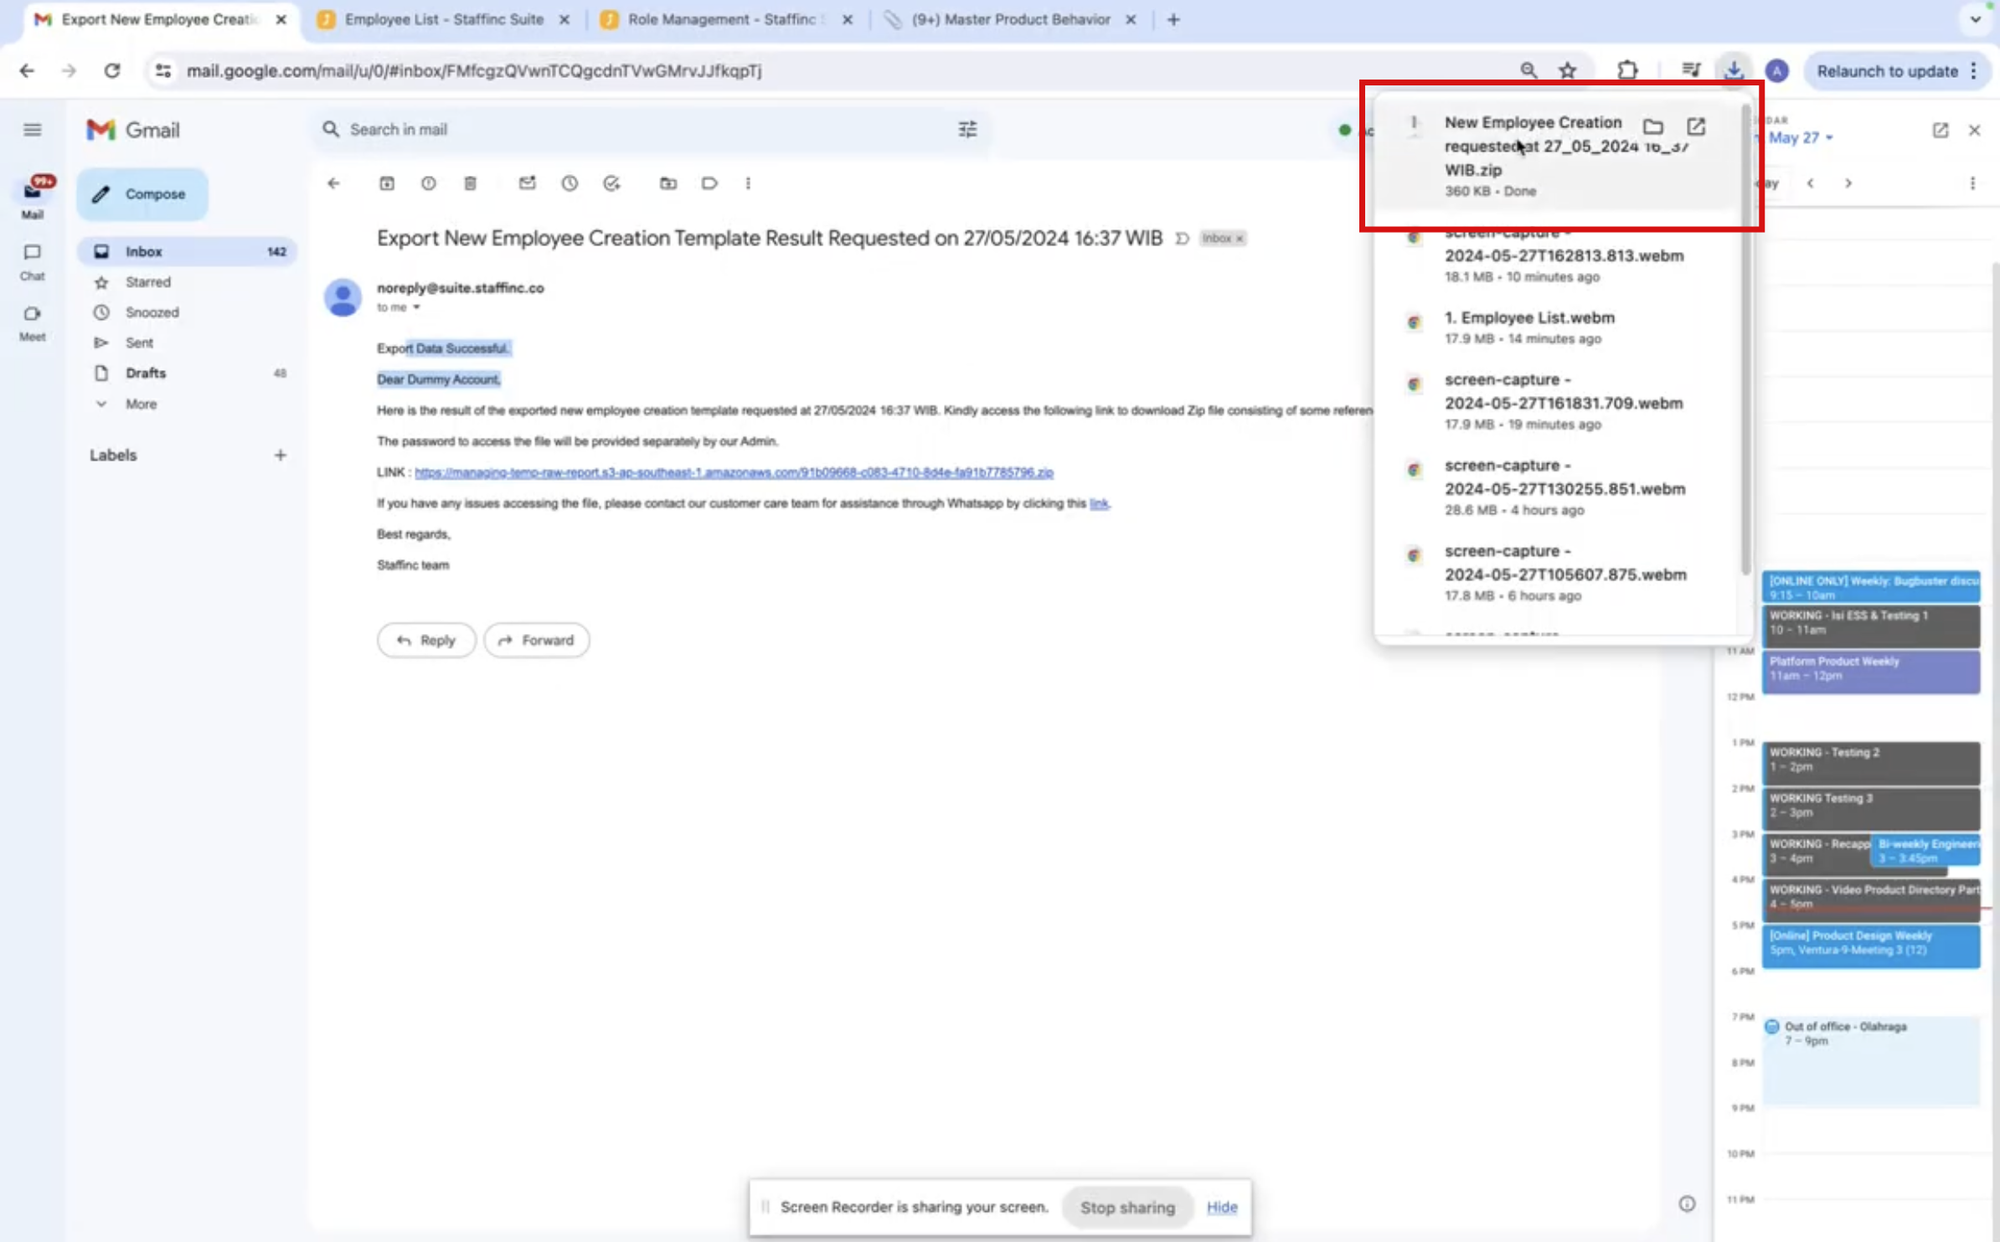
3. Download the File from Email
-
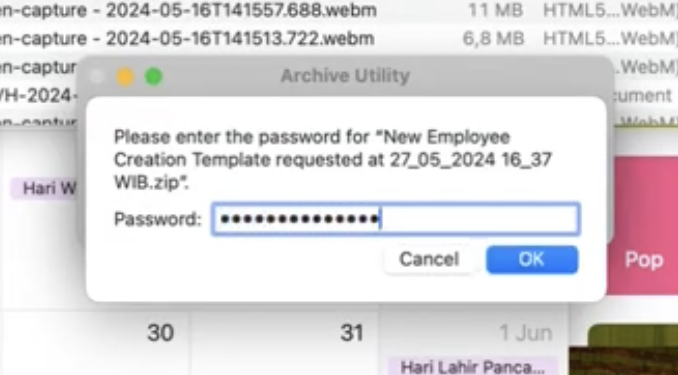
Open your email and download the received file. The file will be in ZIP format.
-
Extract the ZIP file using this formatted password: [Client ID][Client Name] (example: 247MPO - redBus). You can also ask the Staffinc admin for the password.
-
-
4. Fill in the Template with Microsoft Excel/Spreadsheet
-
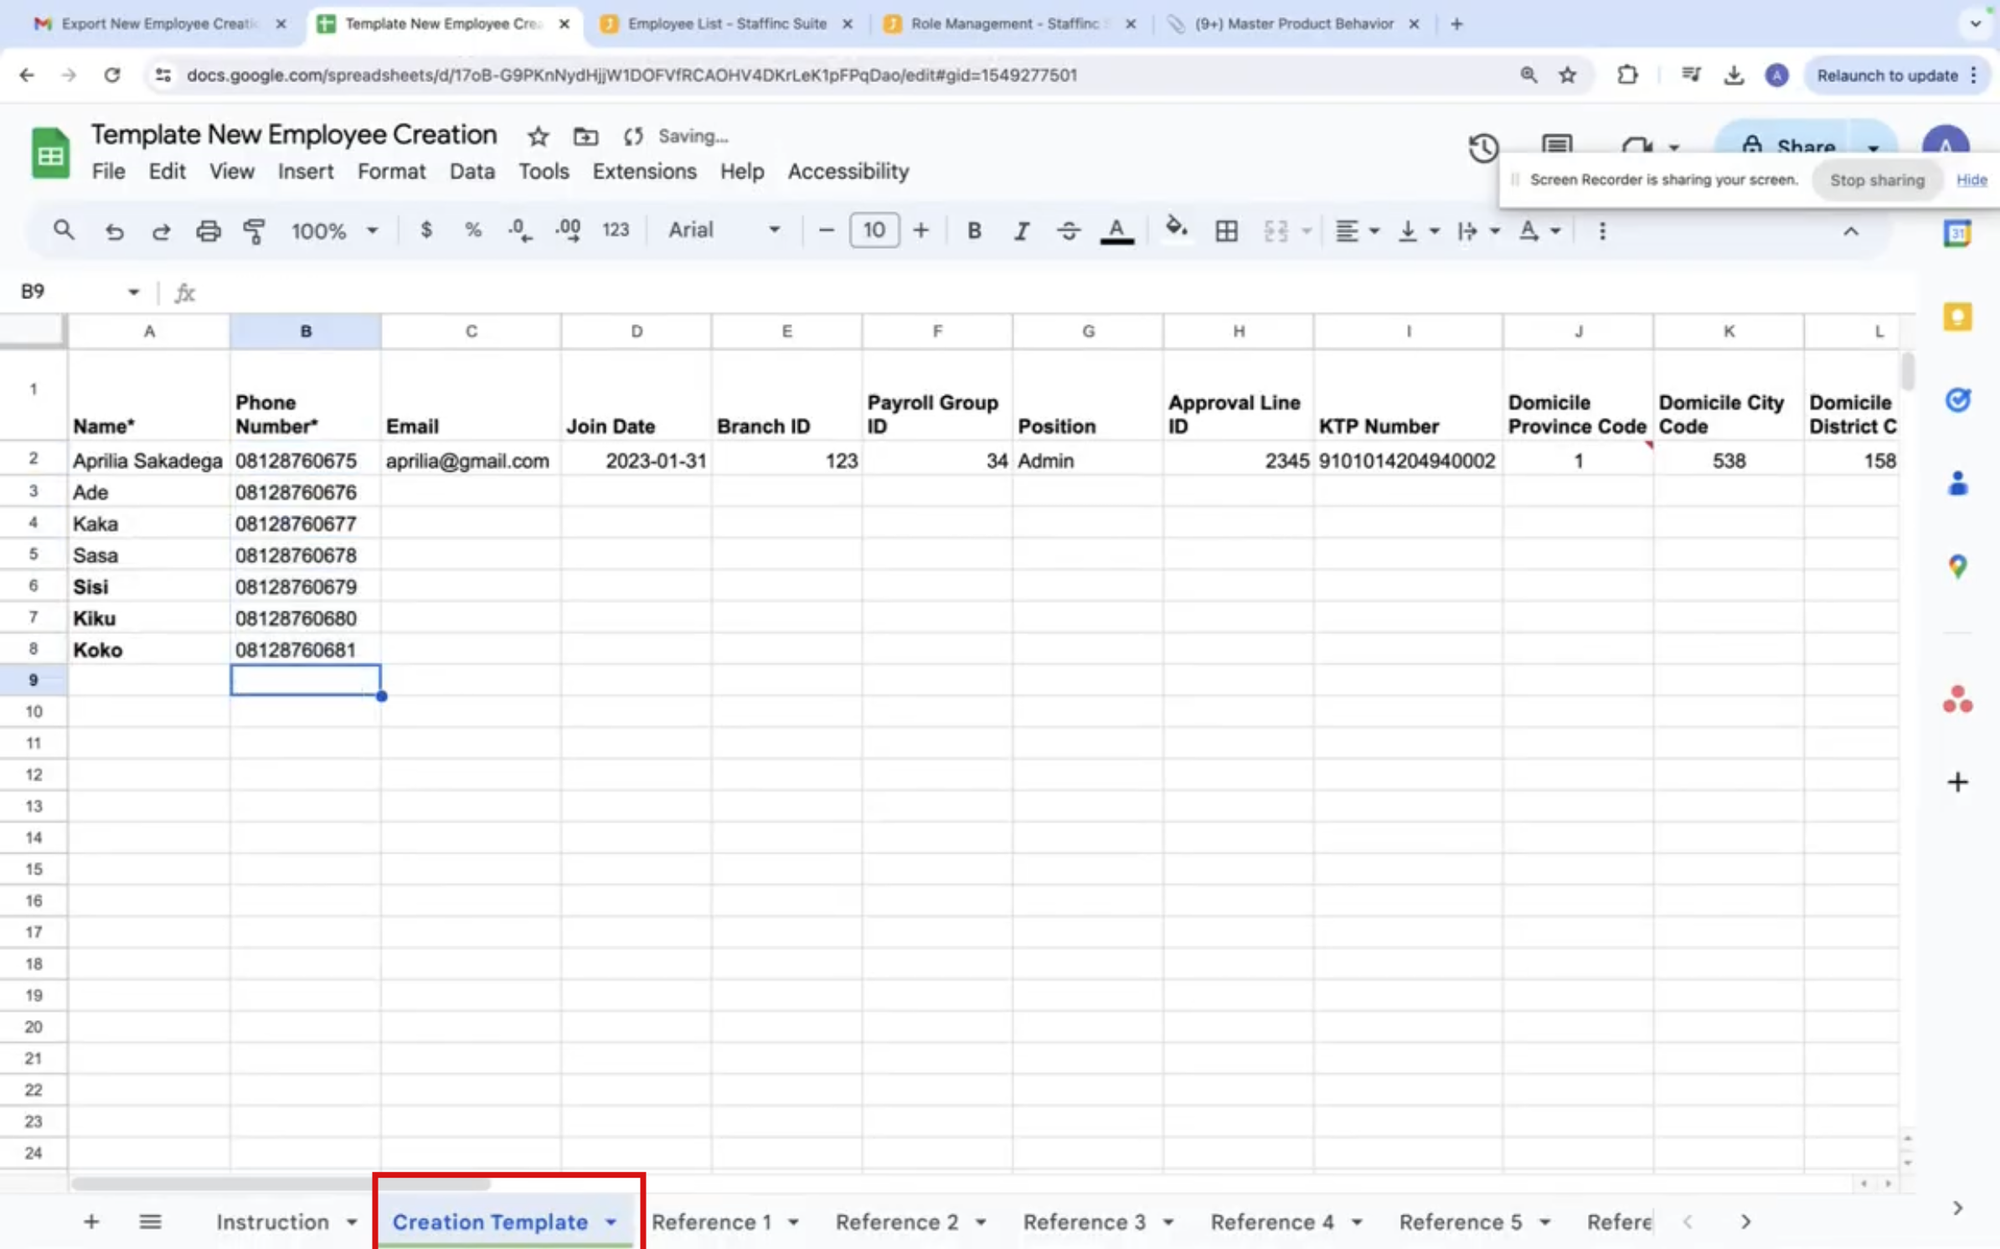
Open the template file with Microsoft Excel or another spreadsheet application.
-
Fill in the template according to your employee information. Ensure the Name and Phone Number on the “Creation Template” sheet are filled out as they are mandatory.
-
-
5. Read Instructions on the "Instruction" Sheet
- To avoid errors, read the instructions on the “Instruction” sheet and fill out the data according to the provided guidelines.
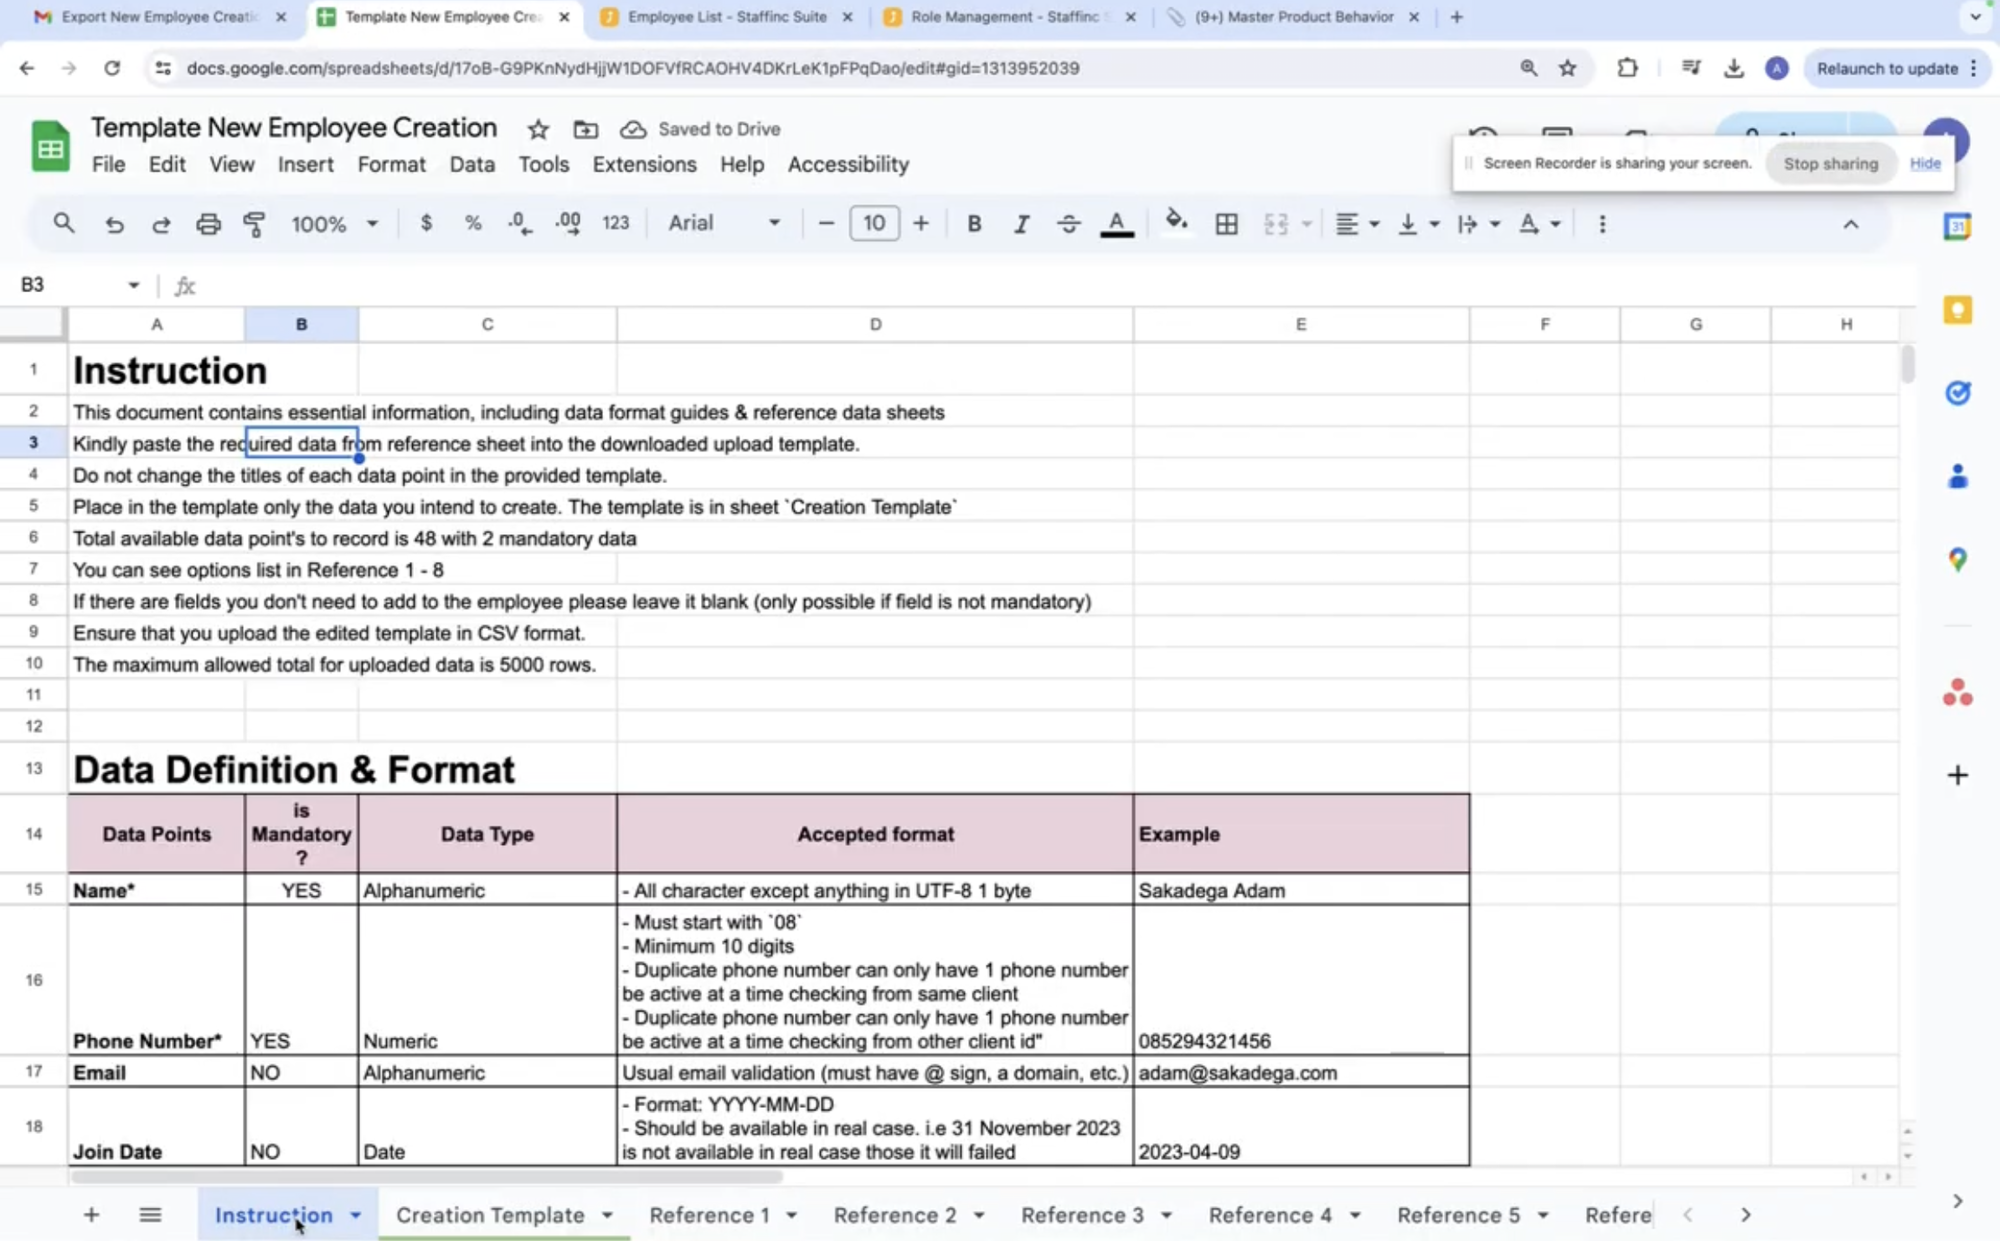
- To avoid errors, read the instructions on the “Instruction” sheet and fill out the data according to the provided guidelines.
-
6. Save the Template in CSV Format
- After completing the template, save the file in CSV format.
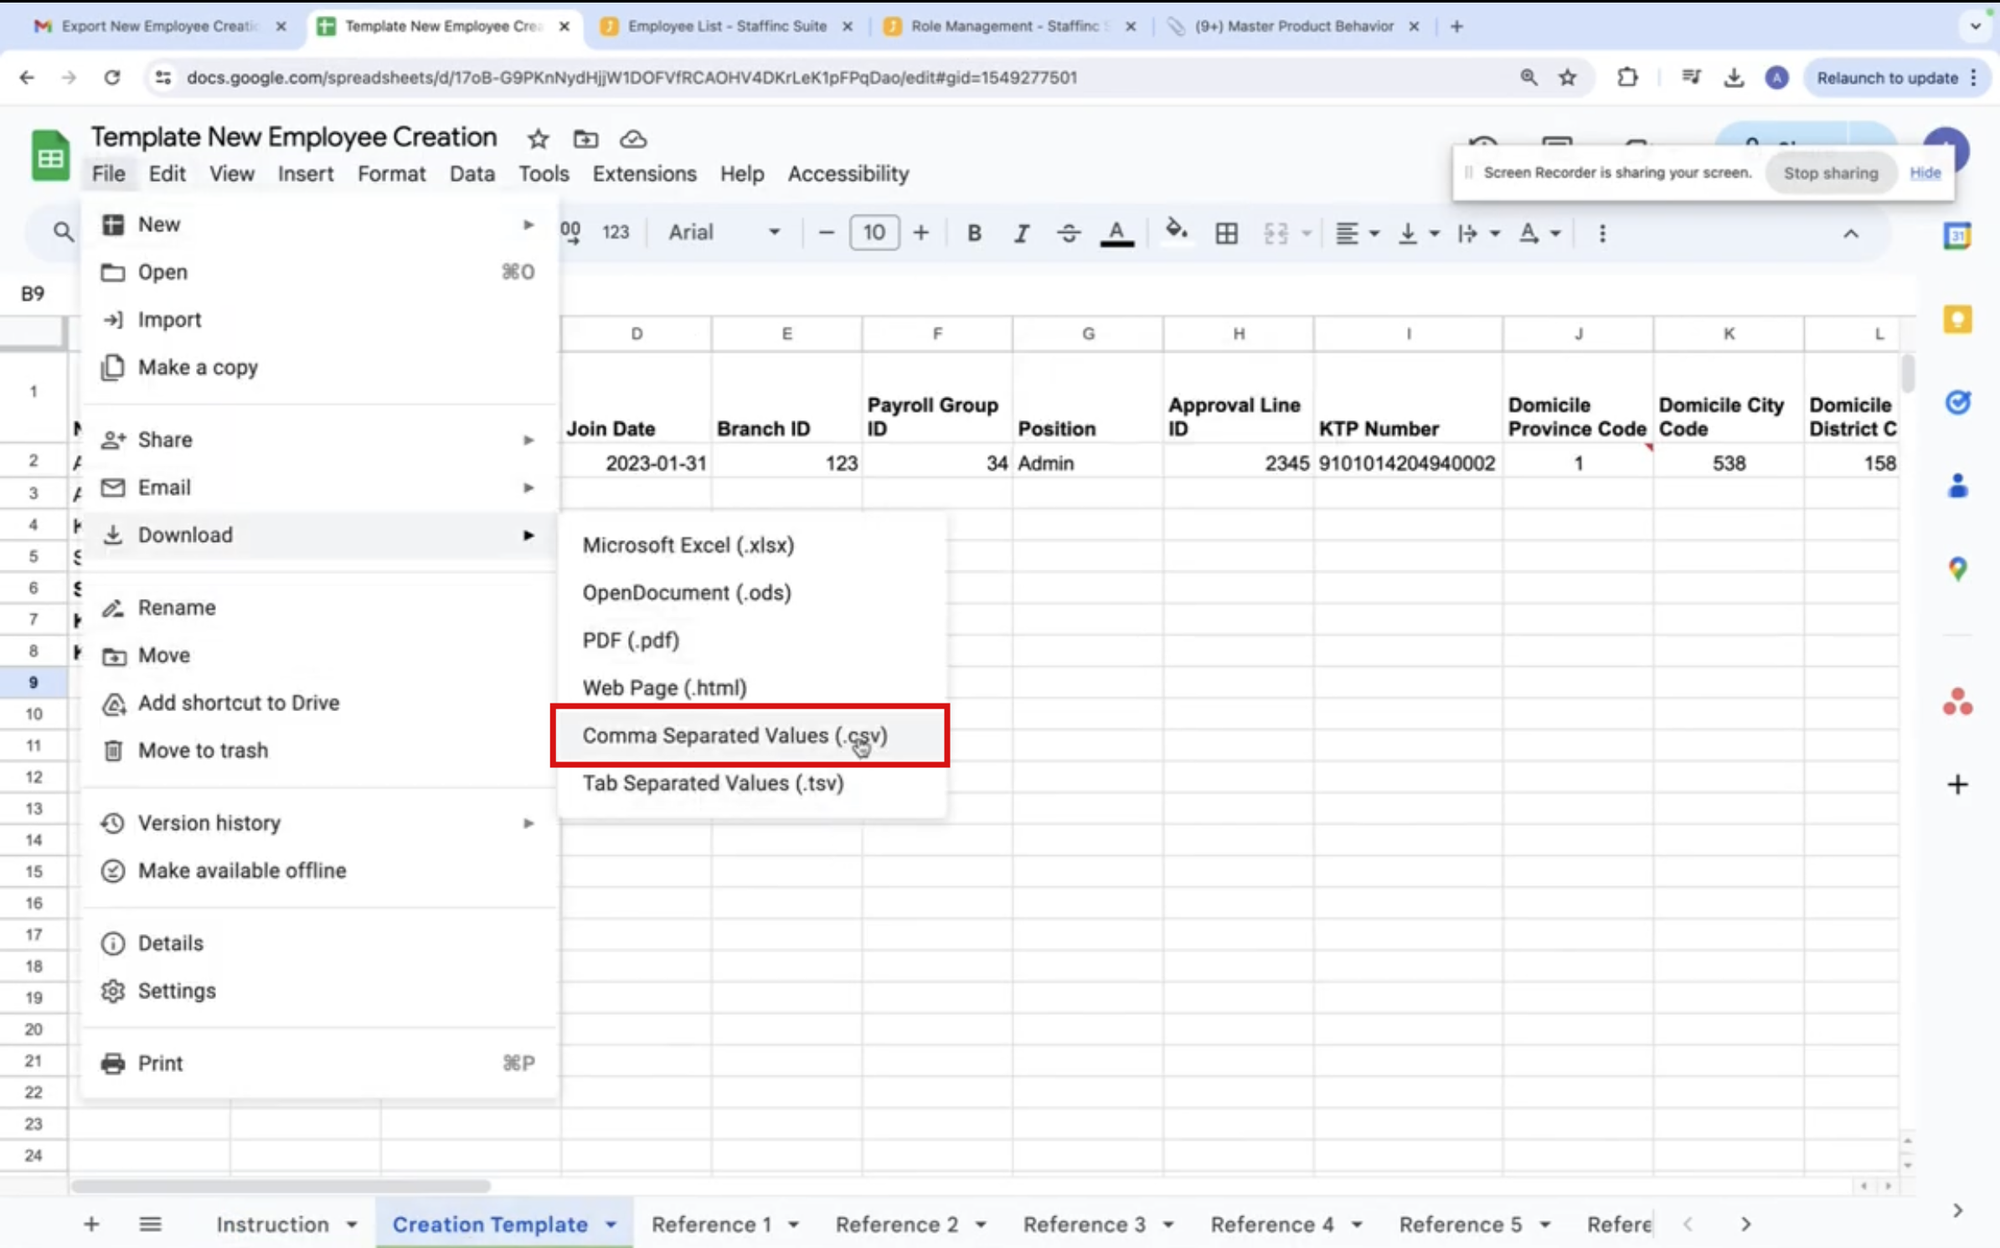
- After completing the template, save the file in CSV format.
-
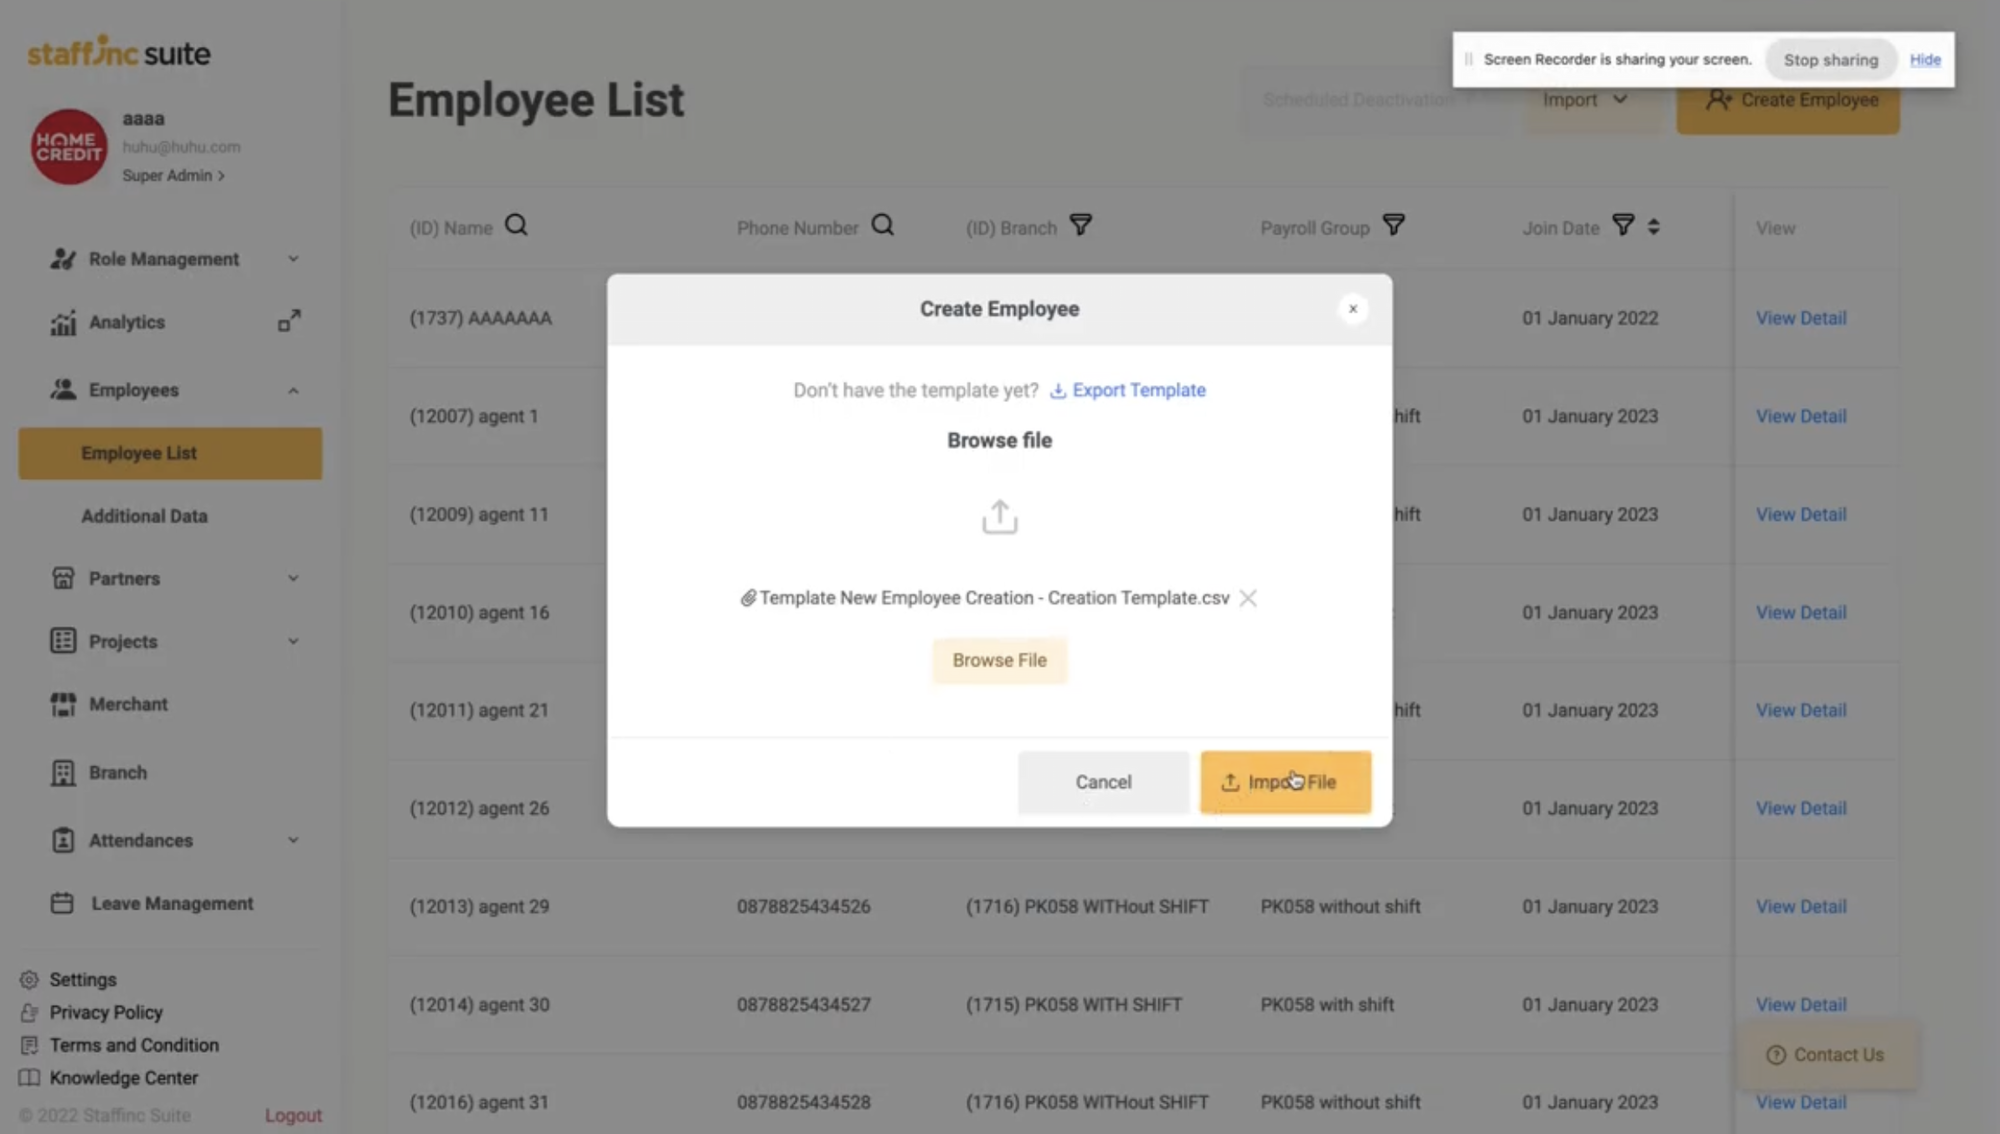
7. Upload the Template to the "Create Employee" Window
-
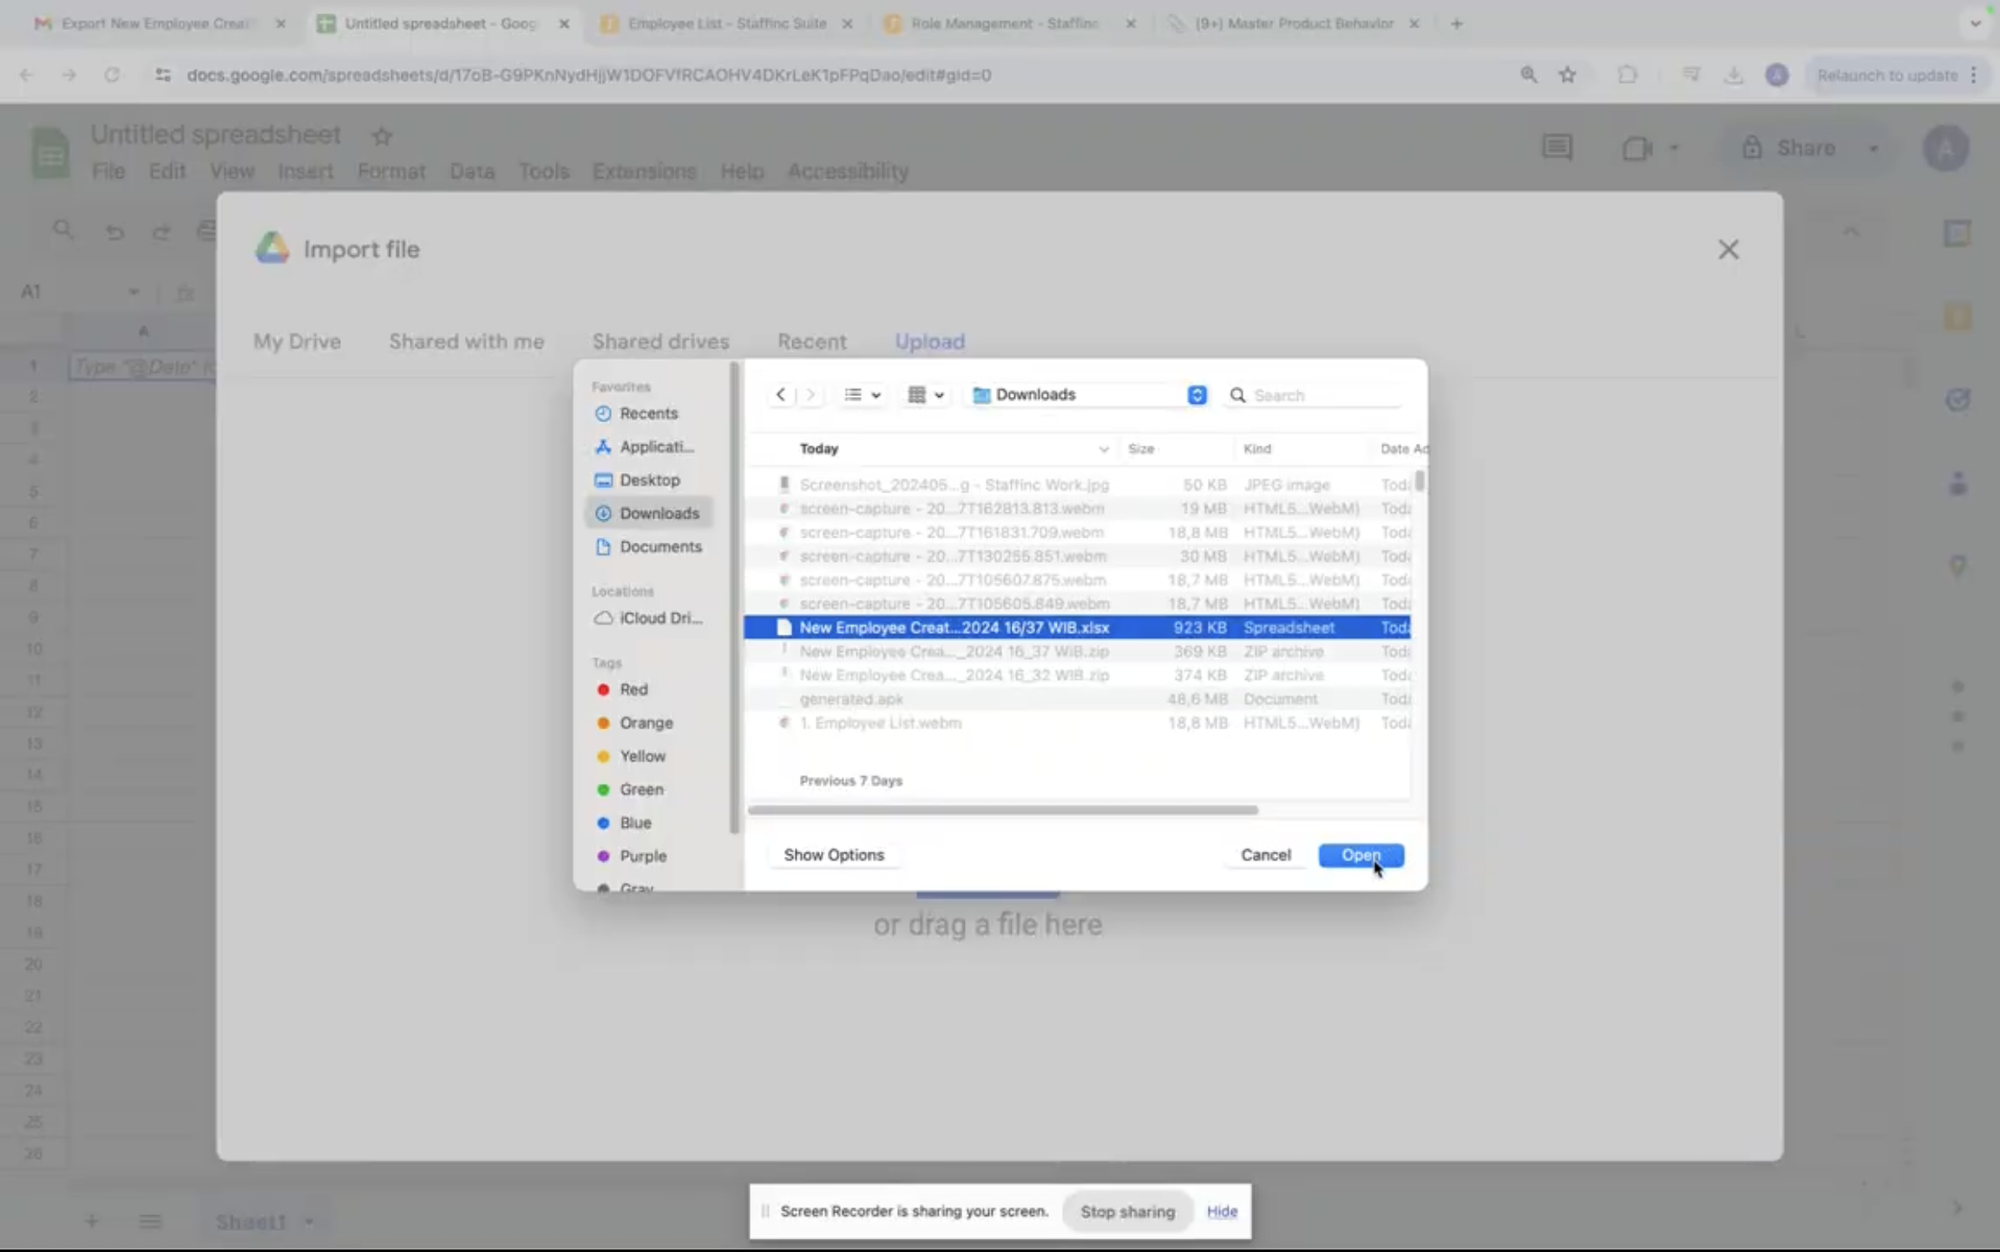
In the Create Employee window, click Browse file to upload the CSV file.
-
After selecting the file, click Import File.
-
-
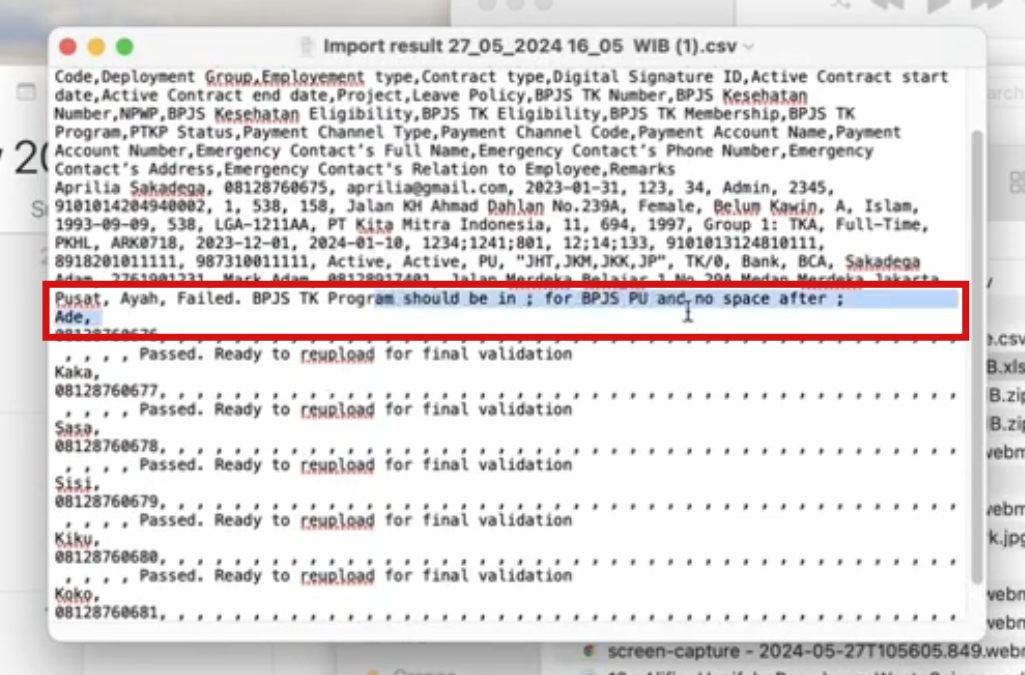
8. If an "Upload Failed" Notification Appears
-
Click Download result.
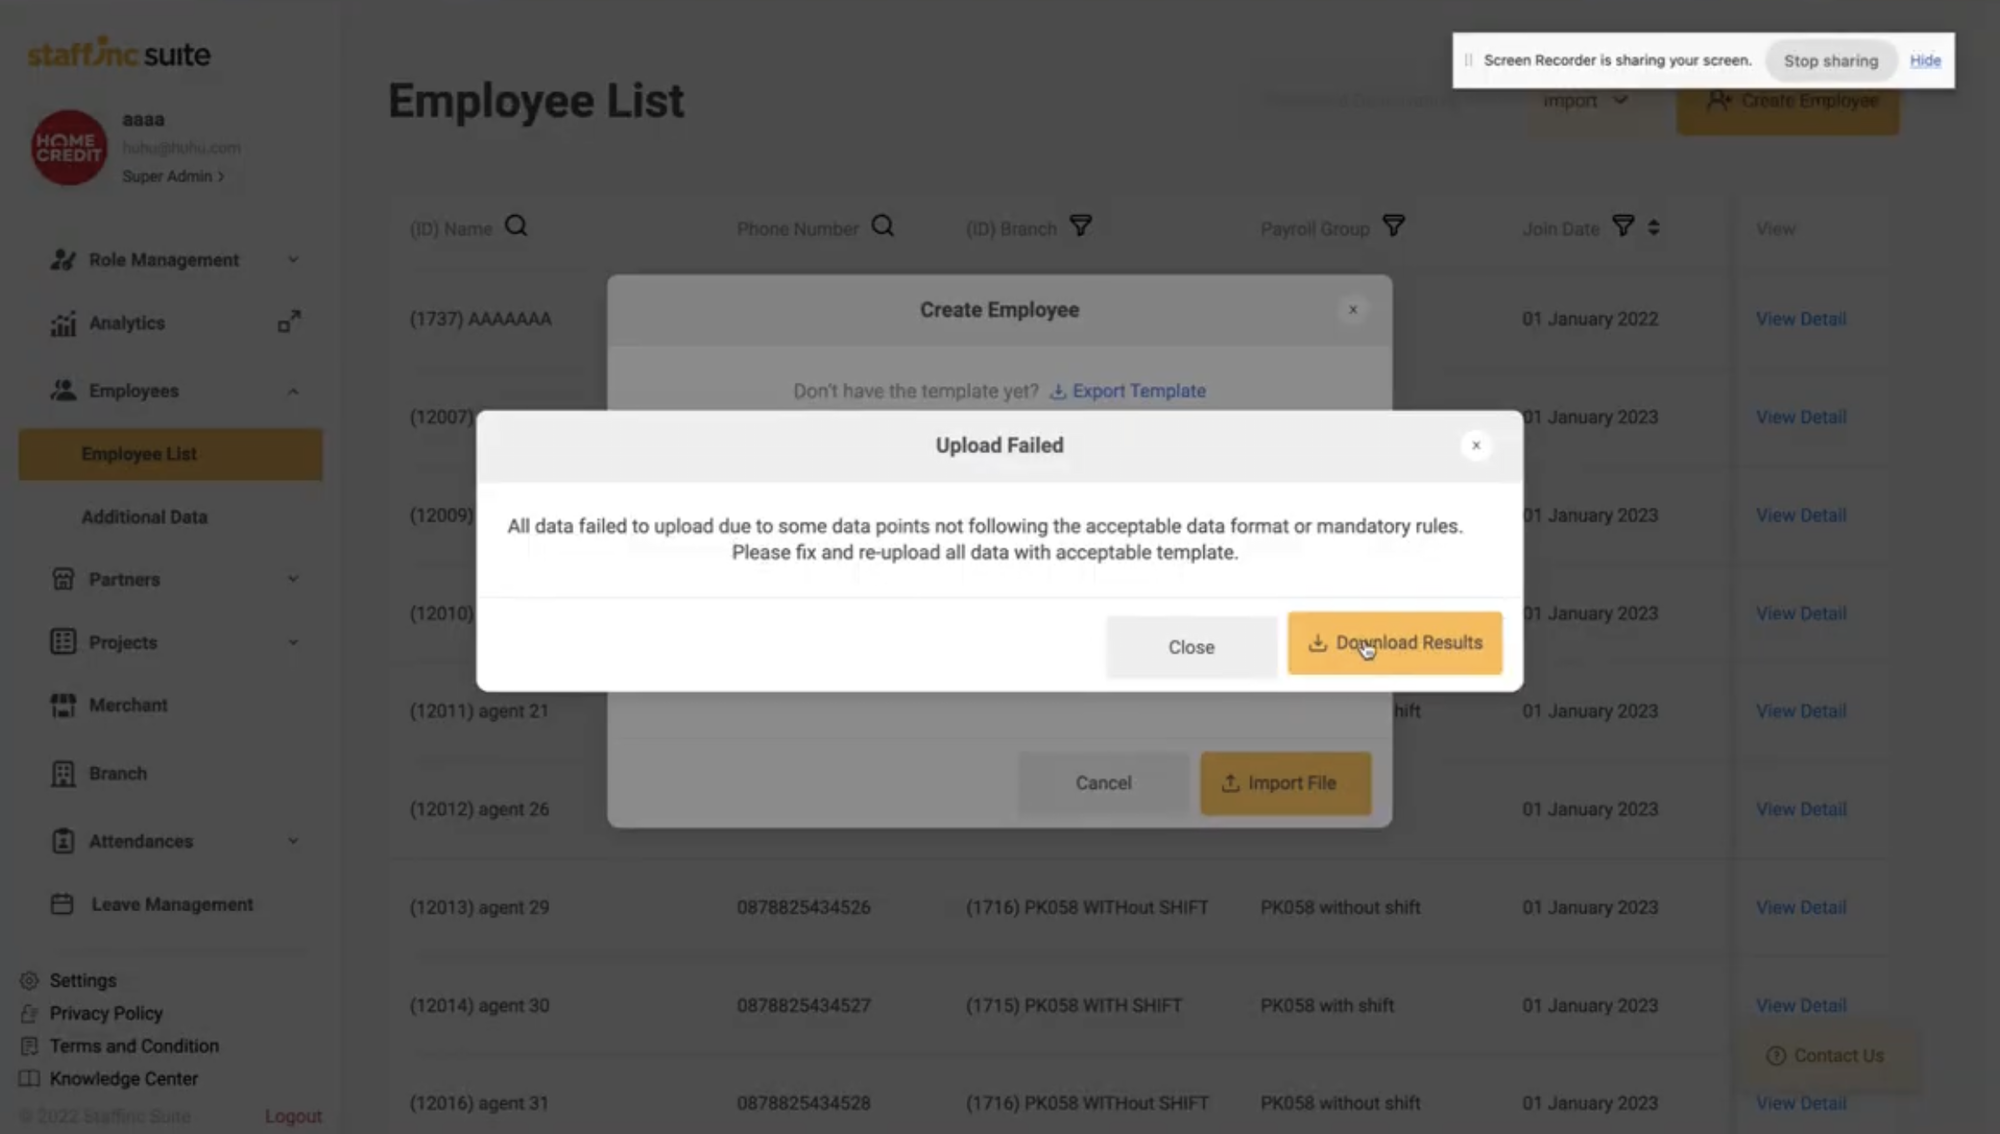
-
Open the downloaded file and check the sections marked as failed to identify errors.
-
Correct the CSV file according to the identified errors and repeat the upload process.
-
9. Re-upload the Corrected CSV File
-
If an Upload results window appears and shows failed data, click Download failed data.

-
After completing the corrections, click the Close button.
-
-
10. Completion
- If successful, you will be redirected back to the Employee List.
- If successful, you will be redirected back to the Employee List.
By following these steps, you can easily and efficiently add new employees in bulk.