Payroll Group Creation
A Payroll Group includes specific salary components based on their values. Below are the steps to create a new Payroll Group and manage existing Payroll Groups.
Access and Explore Payroll Group:
-
1. Access Payroll Group Menu
- Scroll through the menu and select Payroll > Payroll Group.
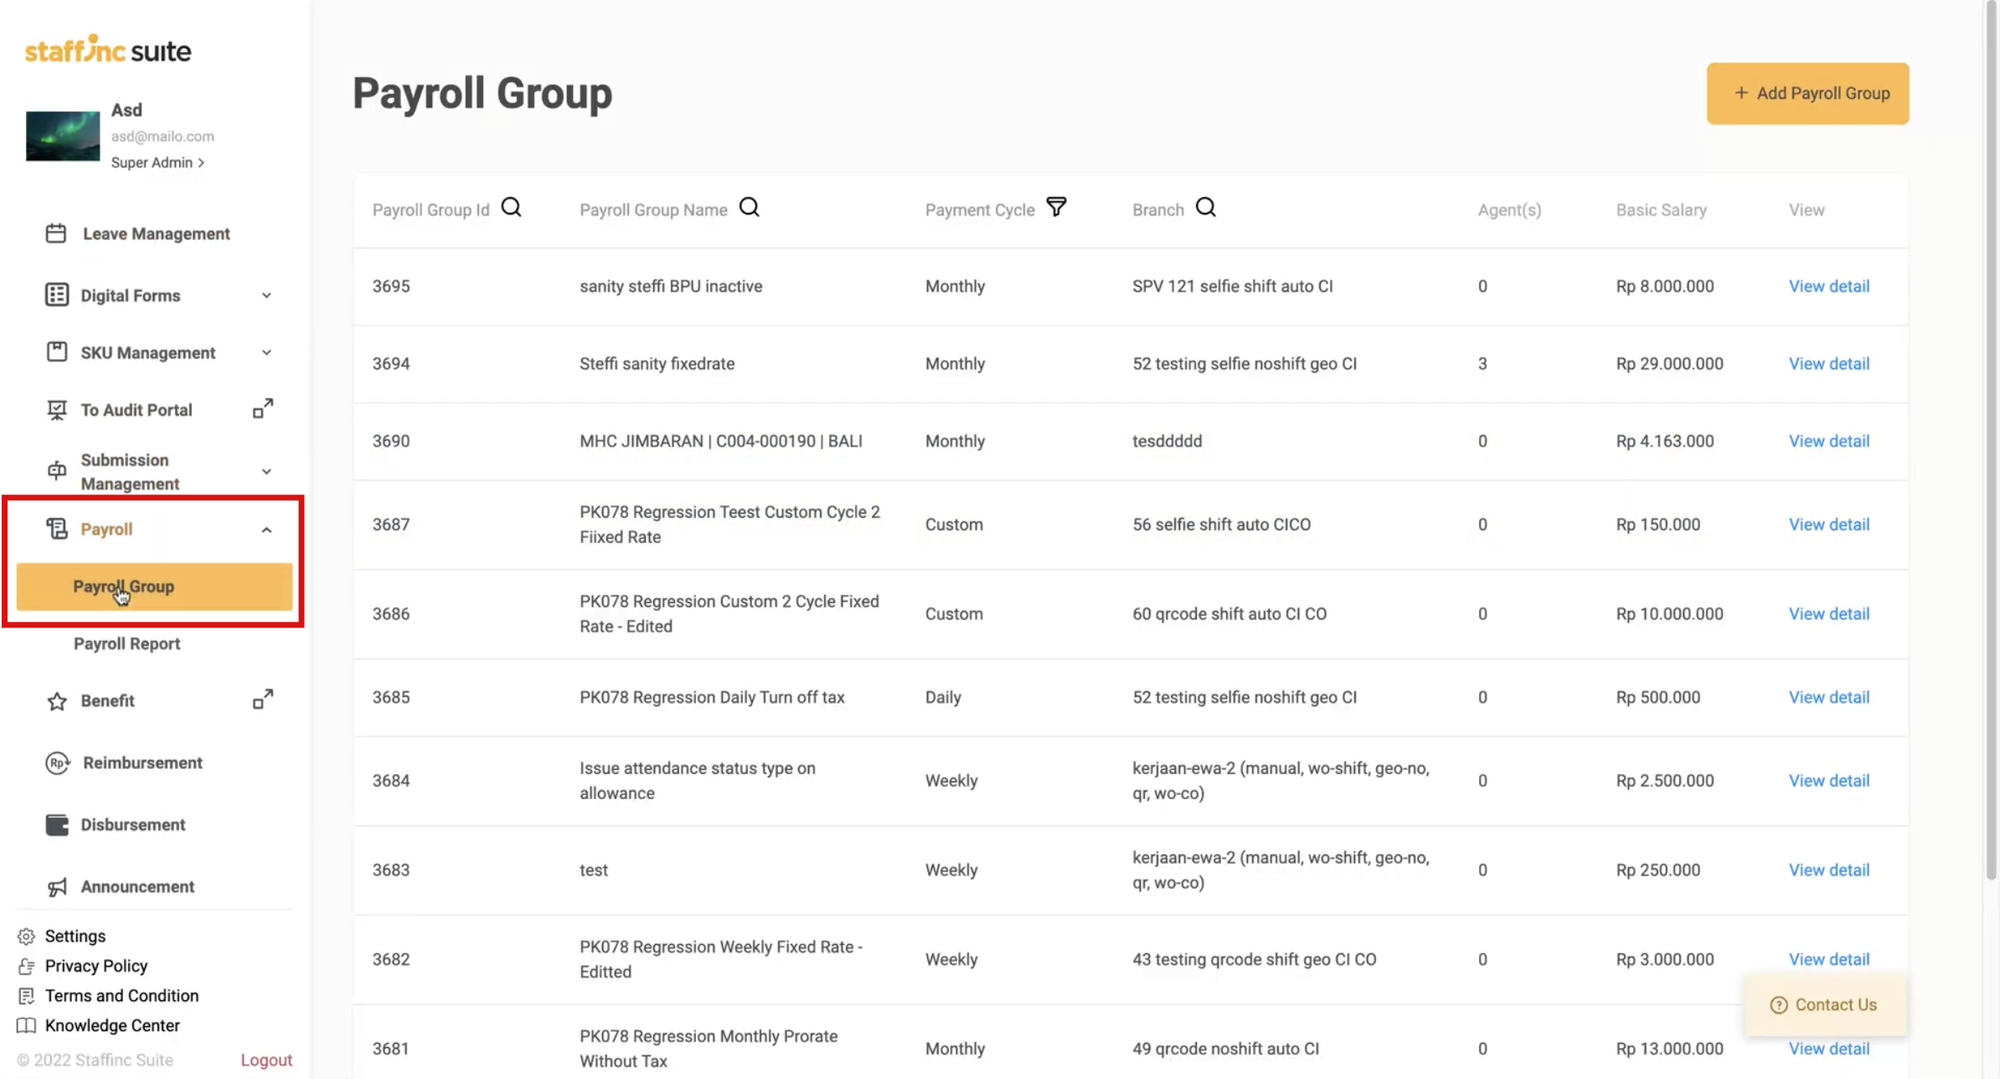
- Scroll through the menu and select Payroll > Payroll Group.
-
2. Search Payroll Group
- Search by Payroll Group ID: Click the Search icon next to the Payroll Group ID column, then type the ID or name of the employee you want to find.
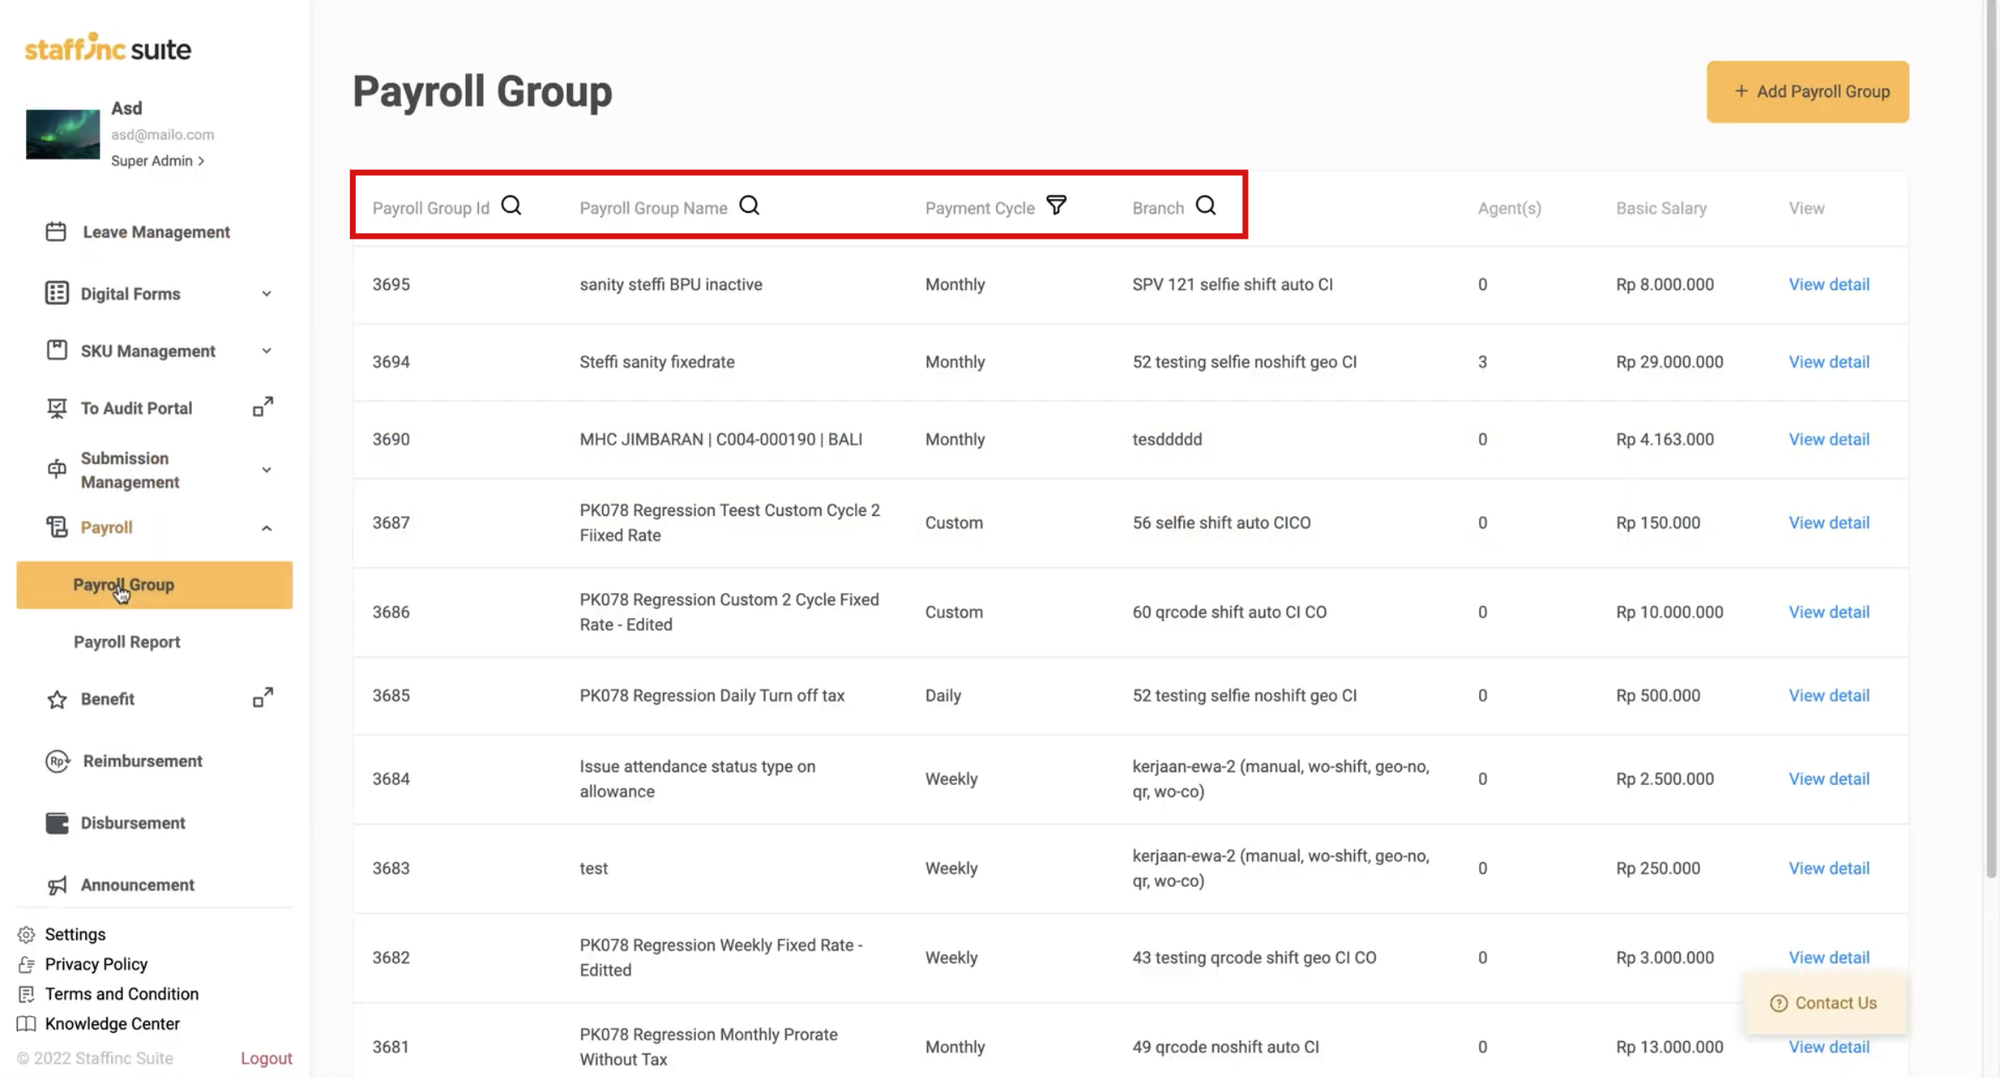
- Search by Payroll Group Name: Click the Search icon next to the Payroll Group Name column, then type the name of the Payroll Group you want to find.
- Filter by Payment Cycle: Click the Filter icon next to the Payment Cycle column, then select the payment cycle group you want to search for. This feature supports multiple selections.
- Search by Branch: Click the Search icon next to the Branch column, then type the name of the branch you want to find.
- Search by Payroll Group ID: Click the Search icon next to the Payroll Group ID column, then type the ID or name of the employee you want to find.
Creating a New Payroll Group:
In this section, you will learn how to create a new Payroll Group. Fields marked with a red asterisk (*) are mandatory.
-
1. Access Payroll Group Menu
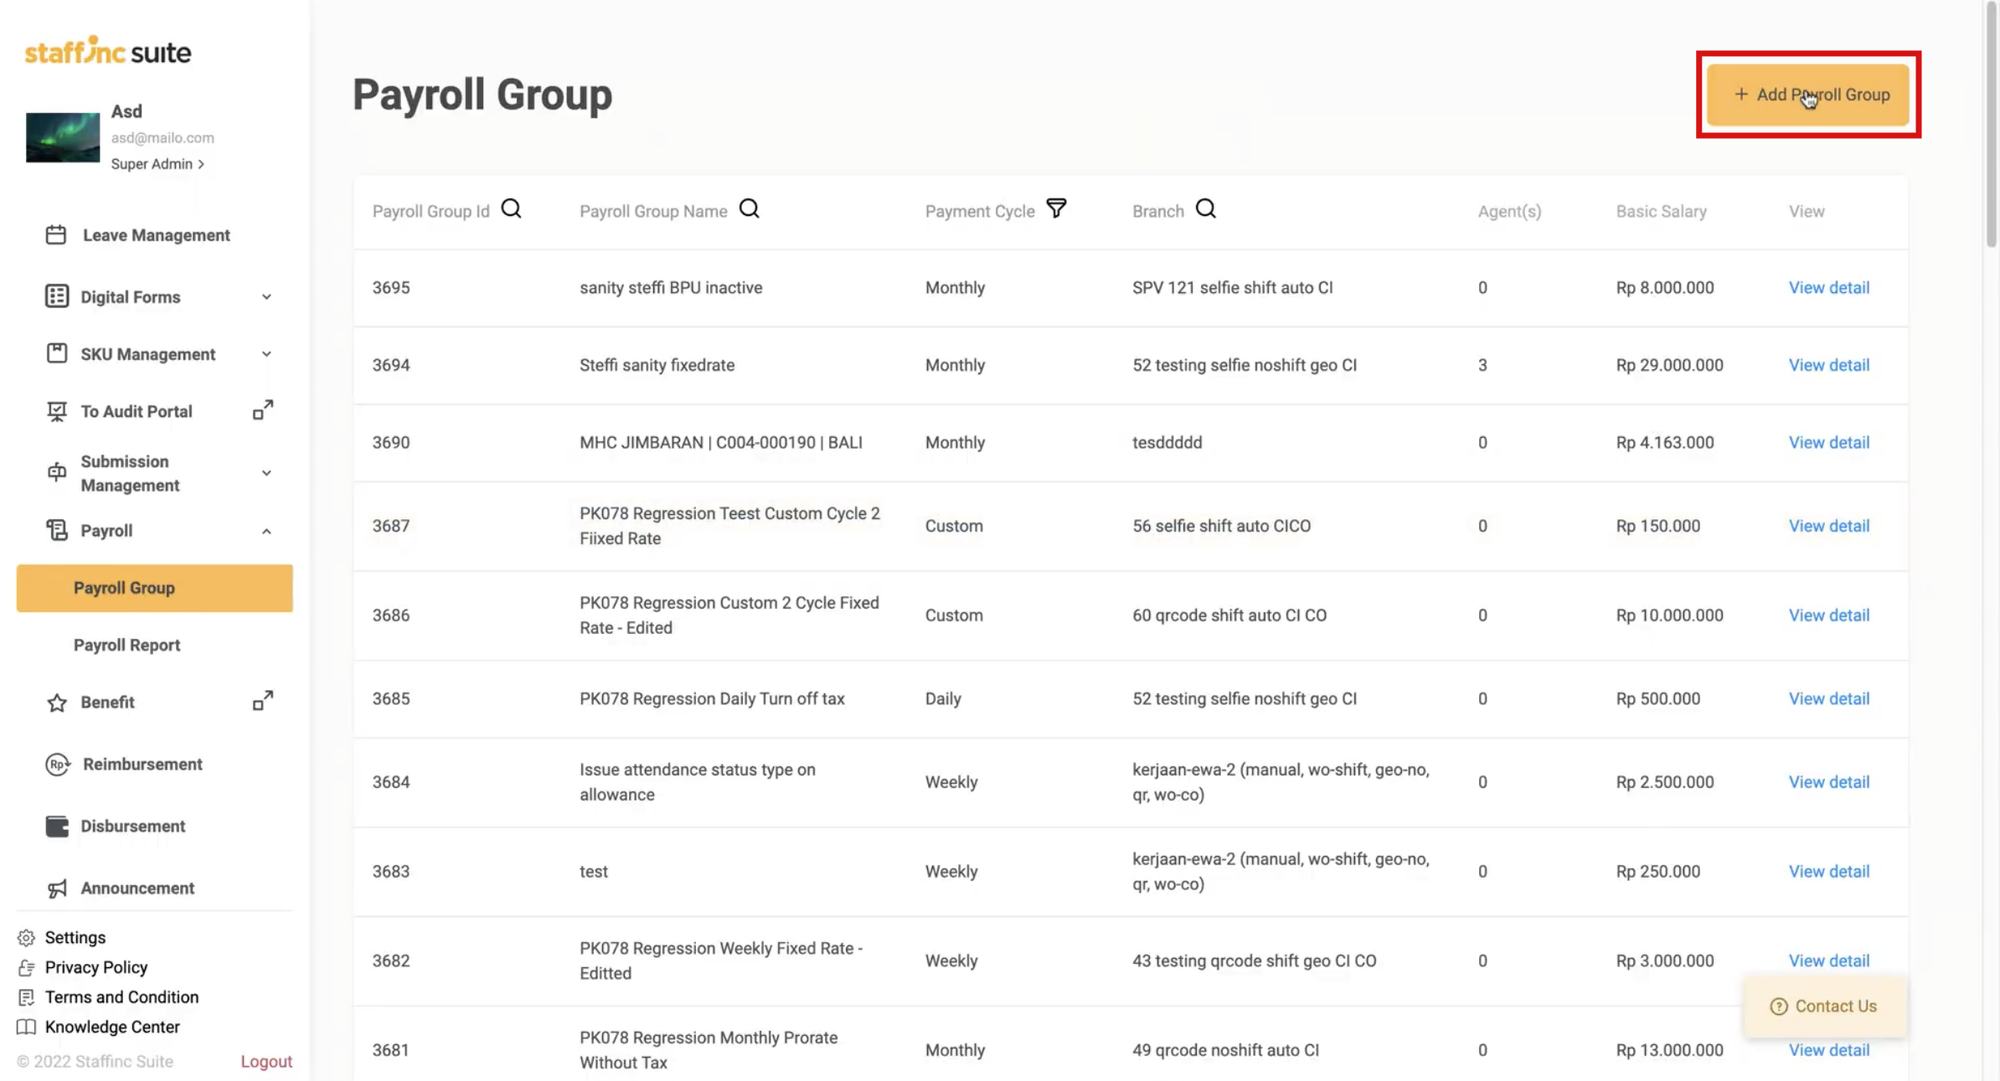
- Click the Payroll Group menu, then select +Add Payroll Group.
- You will be directed to the New Payroll Group Creation page.
-
2. Fill in Payroll Group Information
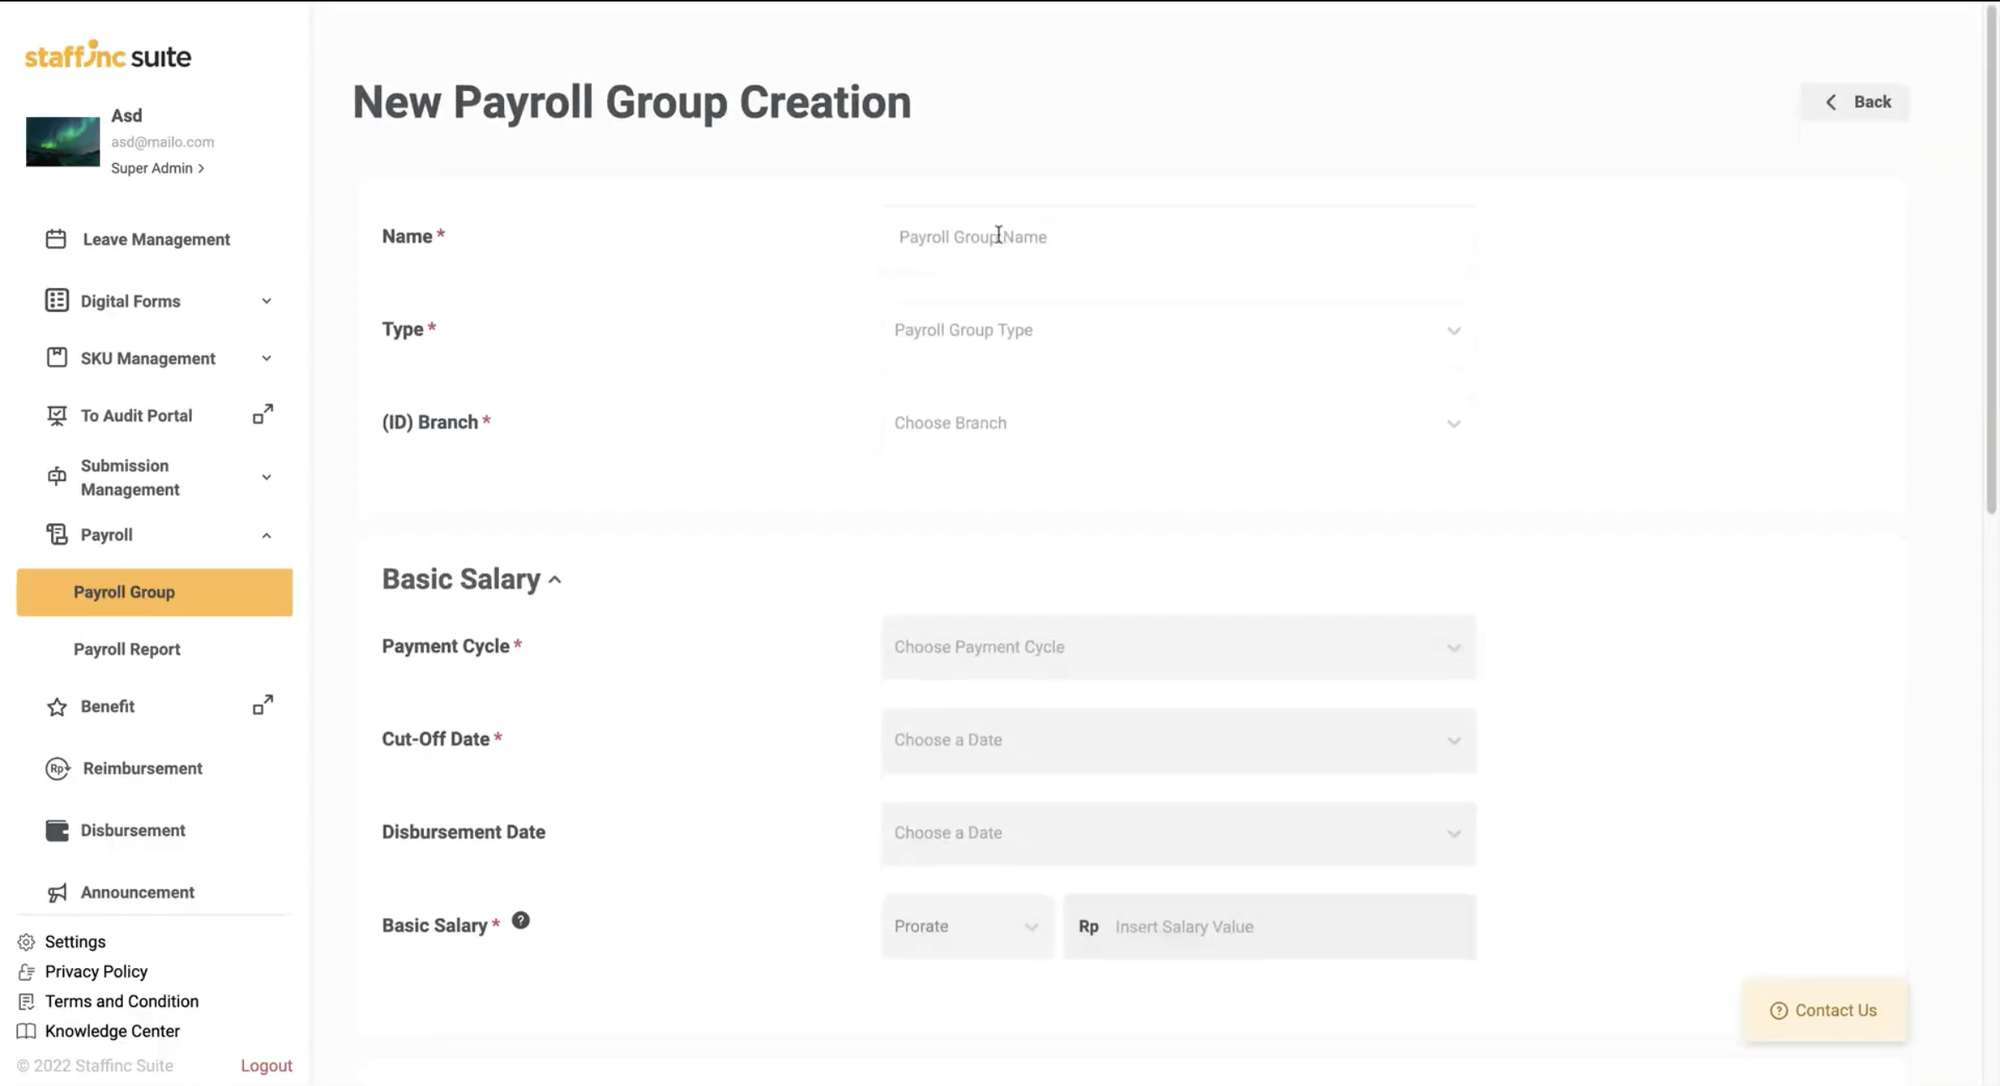
- Name: Enter the name of the Payroll Group.
- Type: Specify the type of Payroll Group.
- Branch (ID): Enter the relevant branch ID.
-
3. Fill in Data in the Basic Salary Field
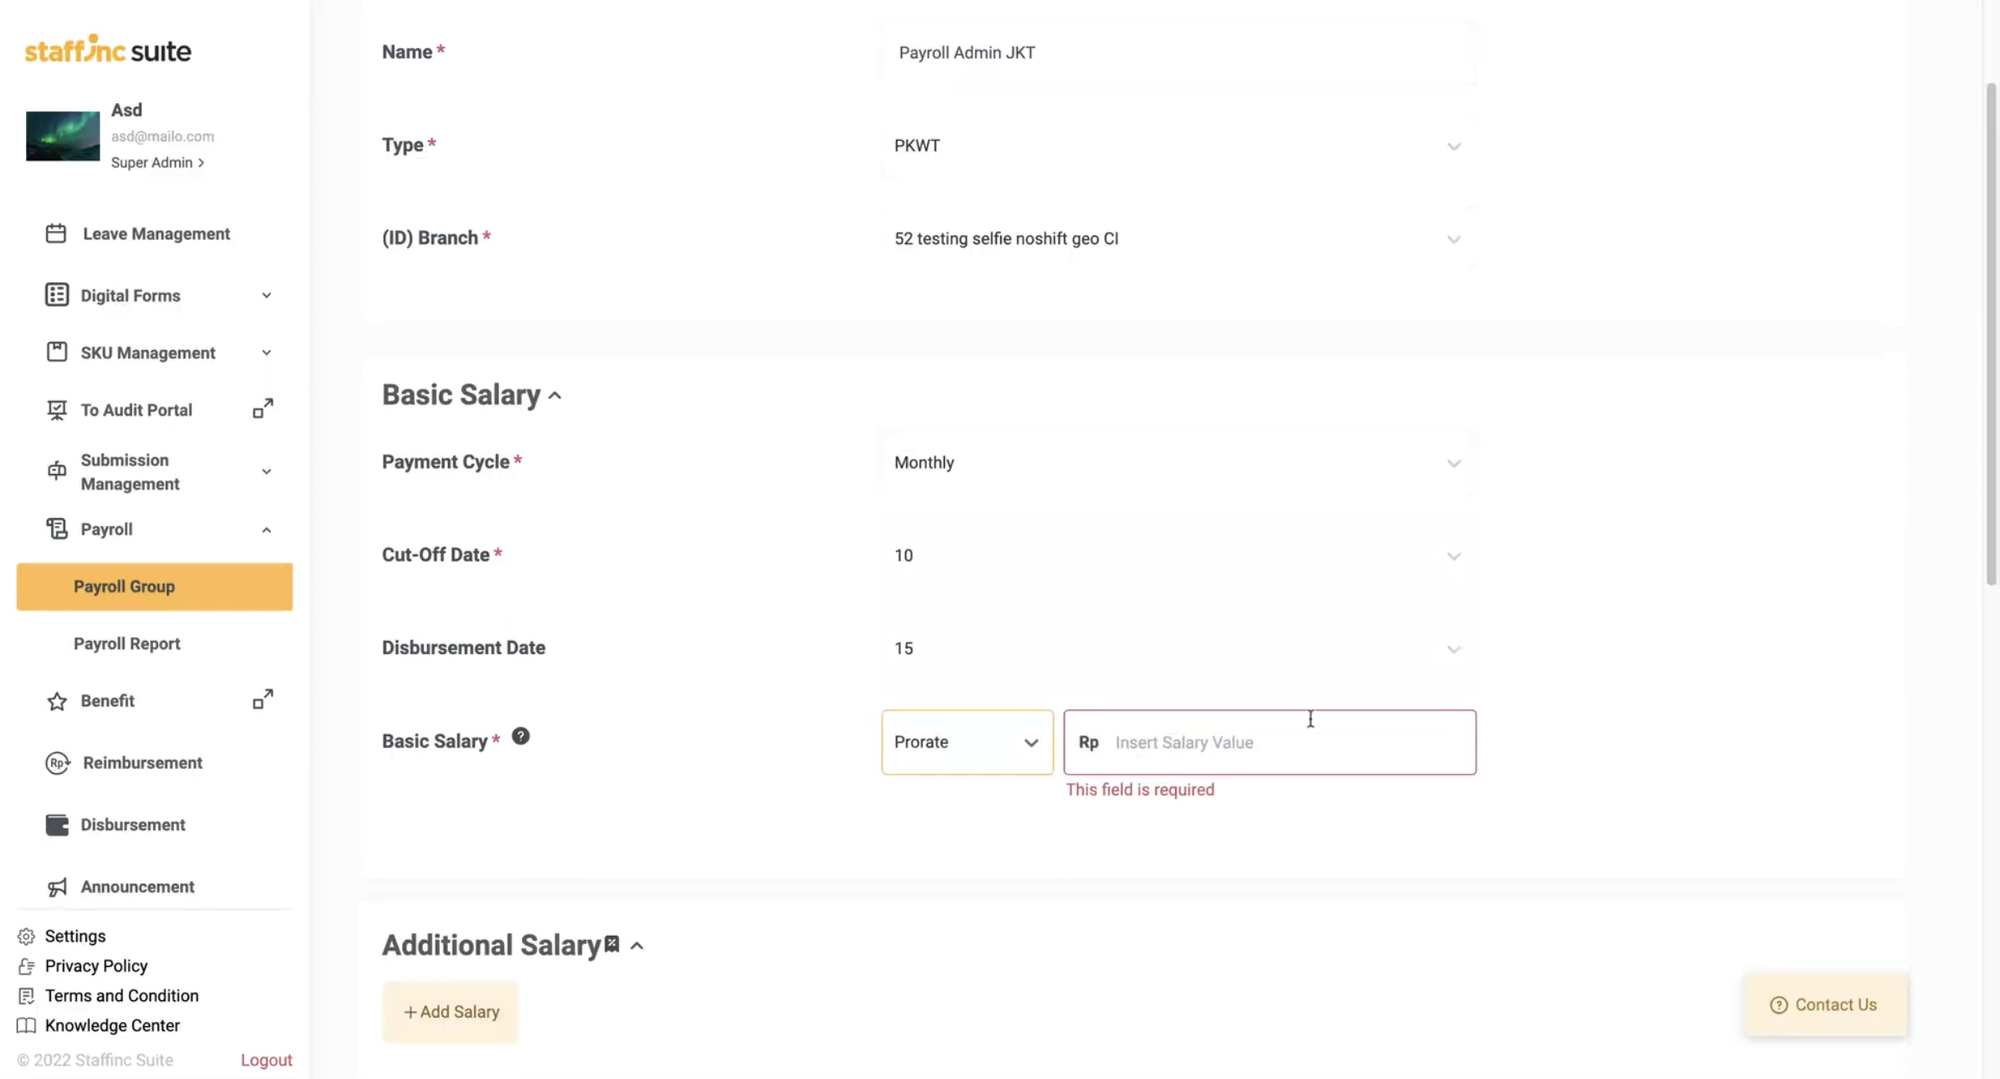
- Payment Cycle: Specify the salary payment cycle.
- Cut-off Date: Specify the cut-off date for payment calculations.
- Disbursement Date: Specify the payment disbursement date.
- Salary: Enter the type and amount of salary paid.
-
4. Add Additional Salary (Optional)
- If there are additional salaries, click +Add Salary. Add special salaries for certain periods.
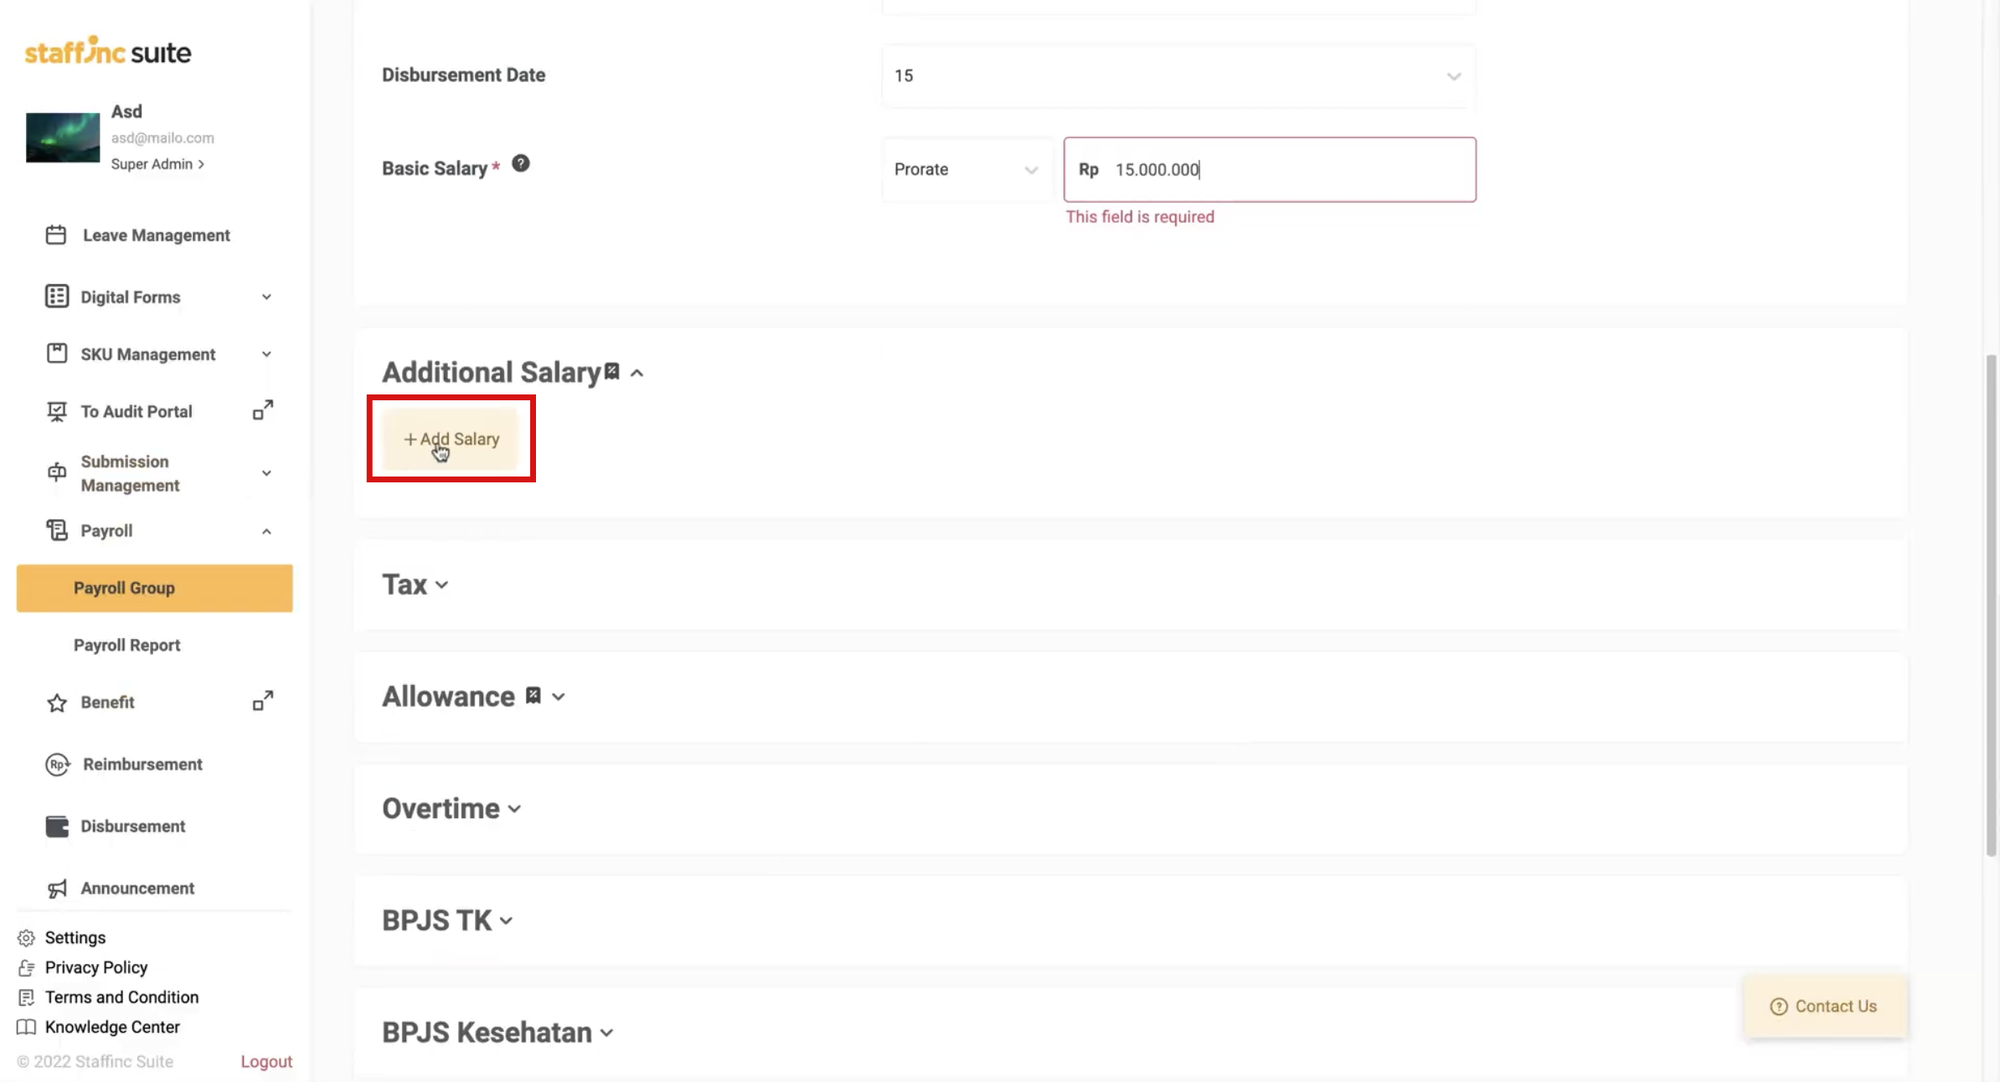

- If there are additional salaries, click +Add Salary. Add special salaries for certain periods.
-
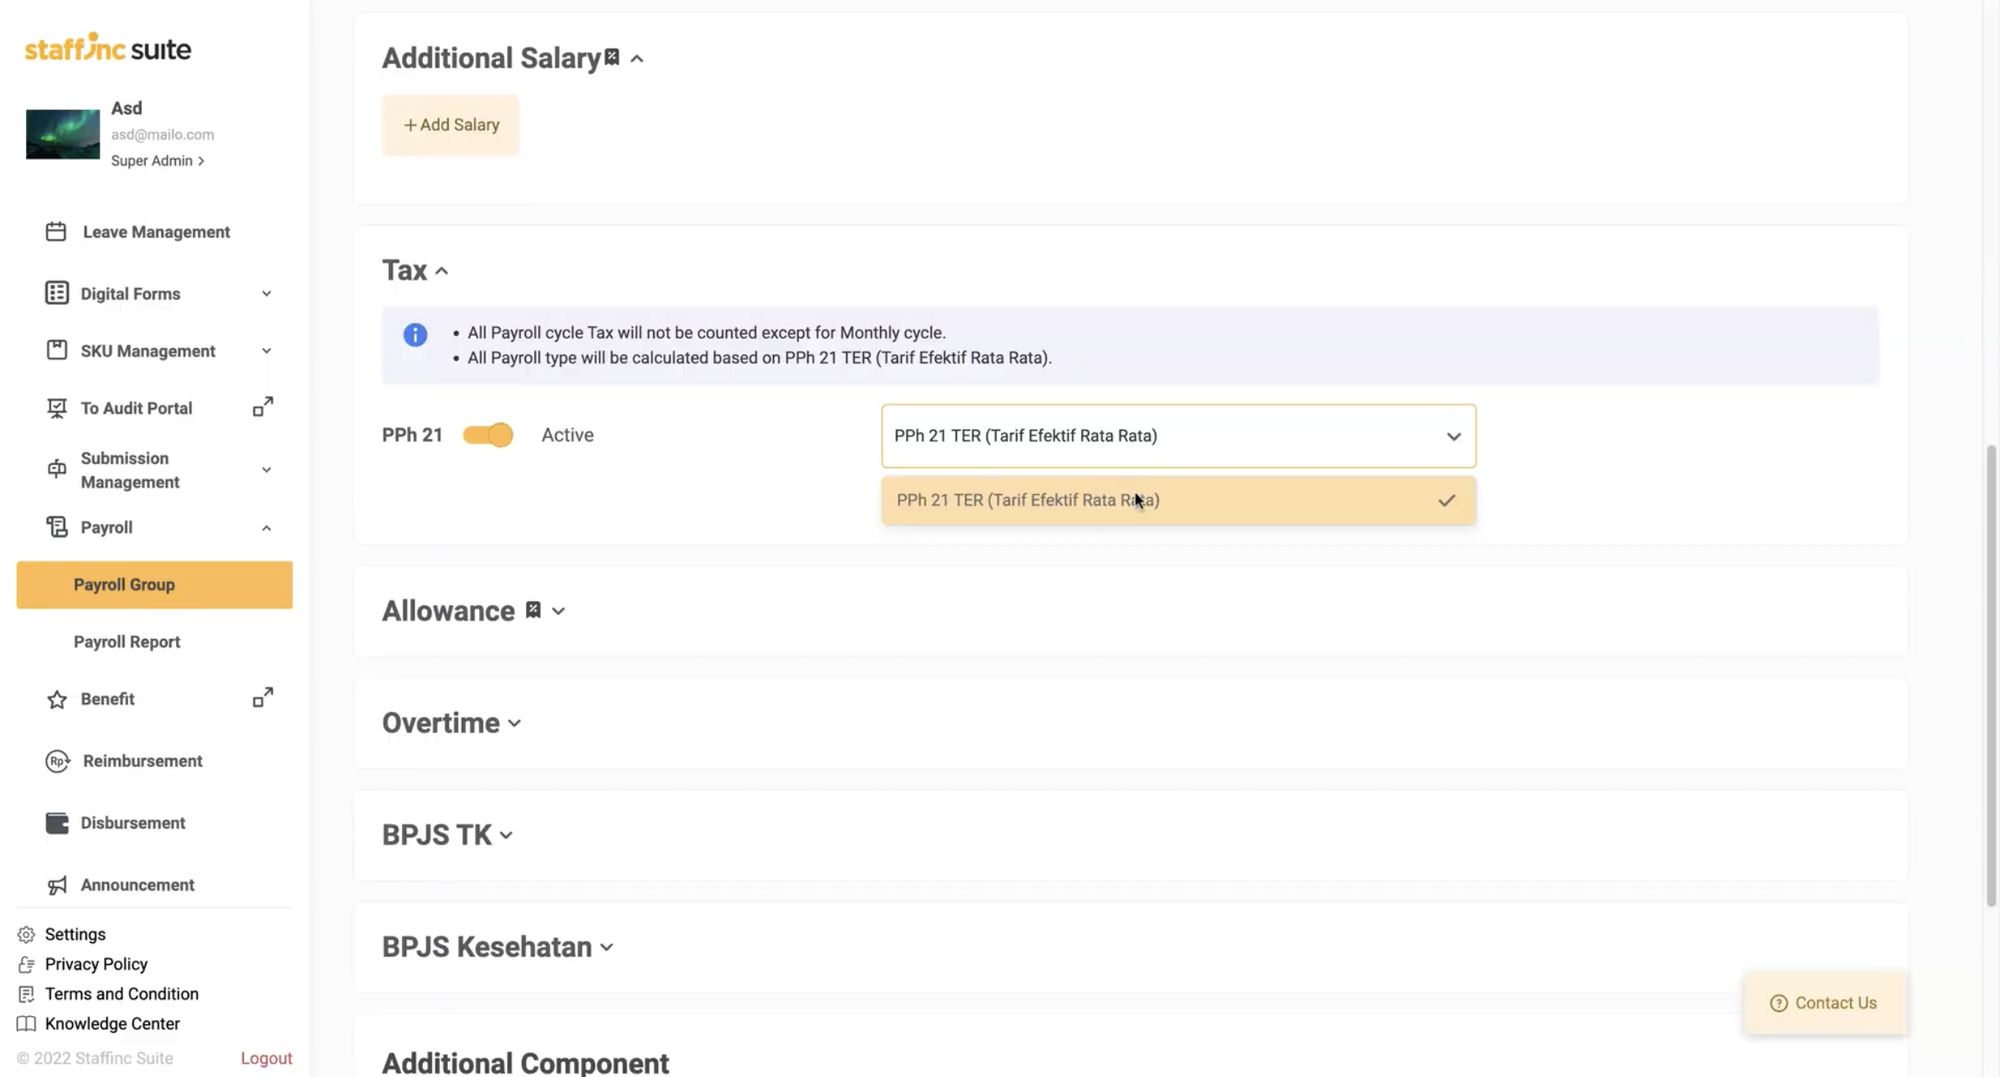
5. Fill in Other Optional Data
- Click the desired data field to fill in other optional data. Some data fields that can be filled in include:
- Tax: Tax information.
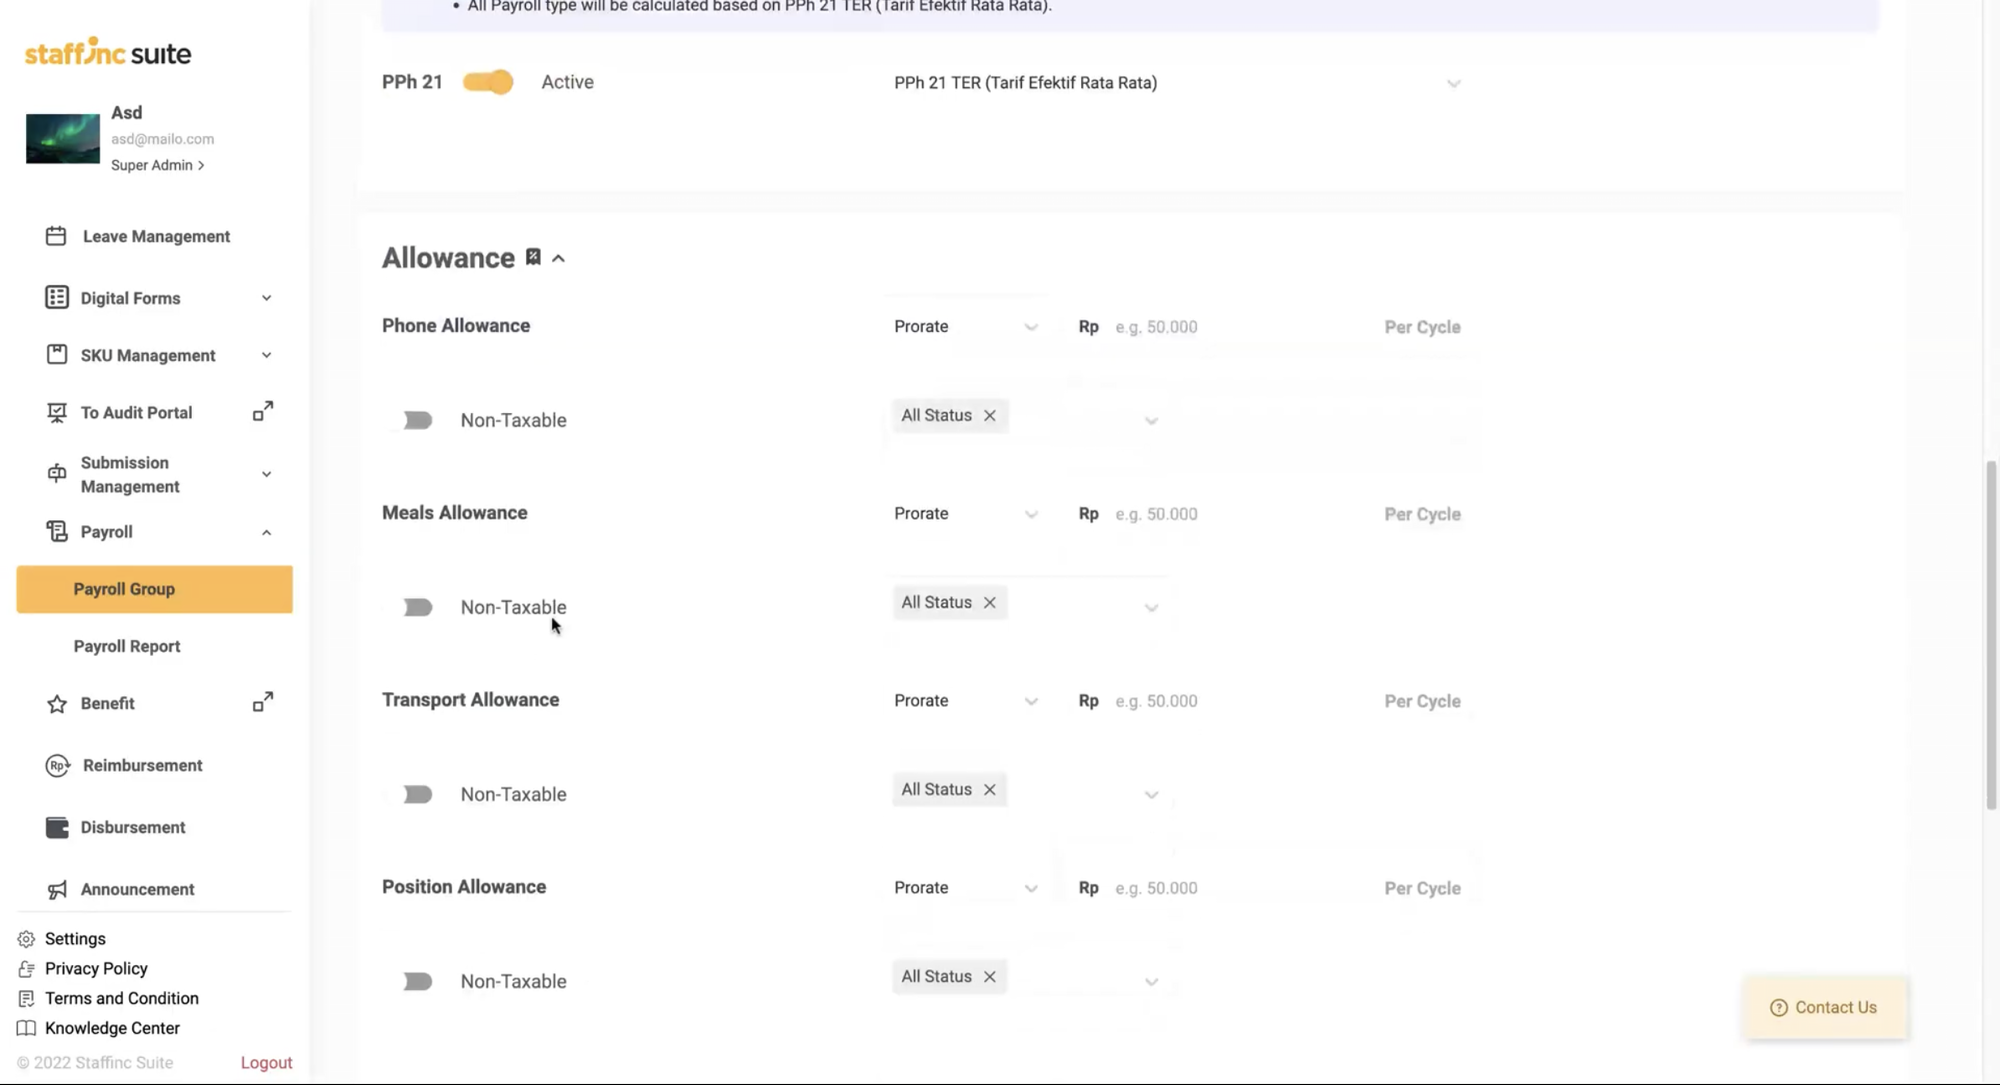
- Allowance: Compensation provided in addition to the basic salary.
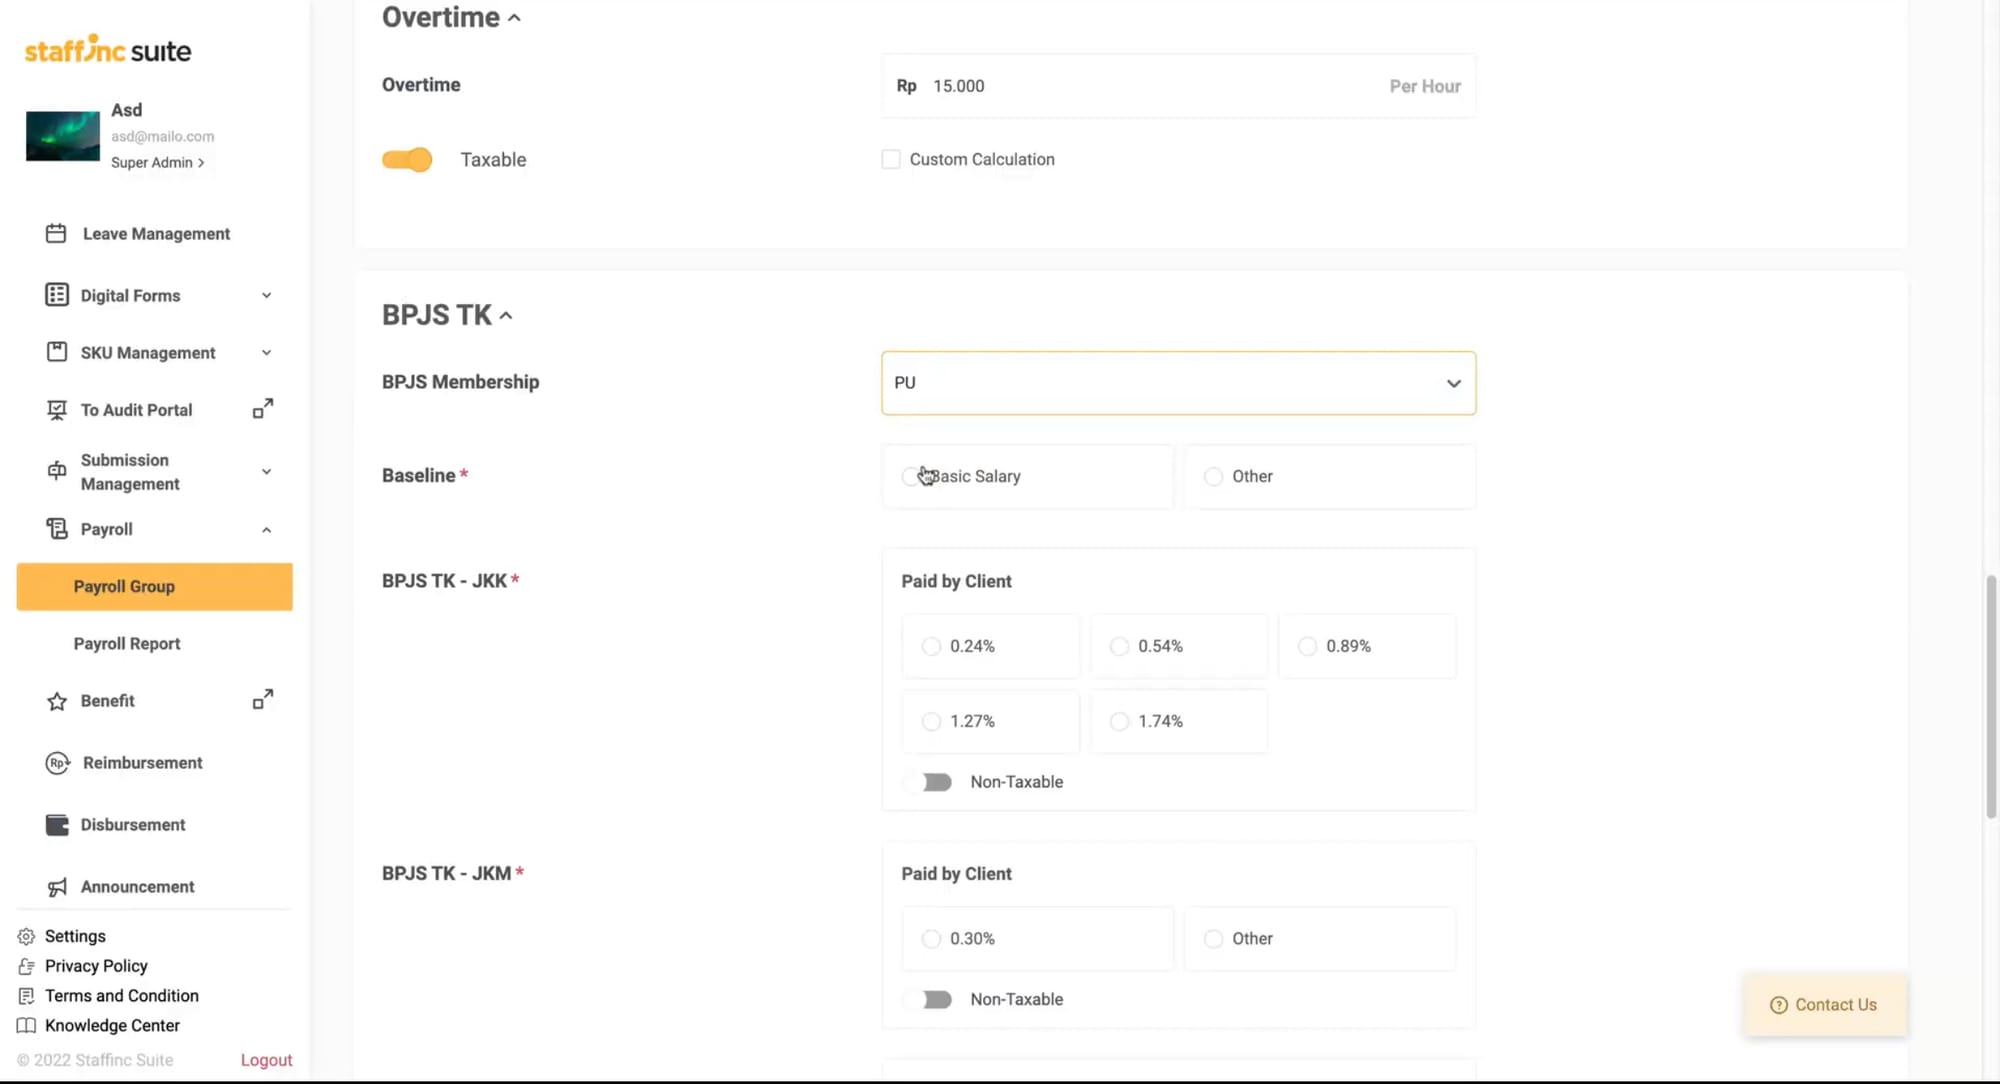
- Overtime: Overtime pay per hour.
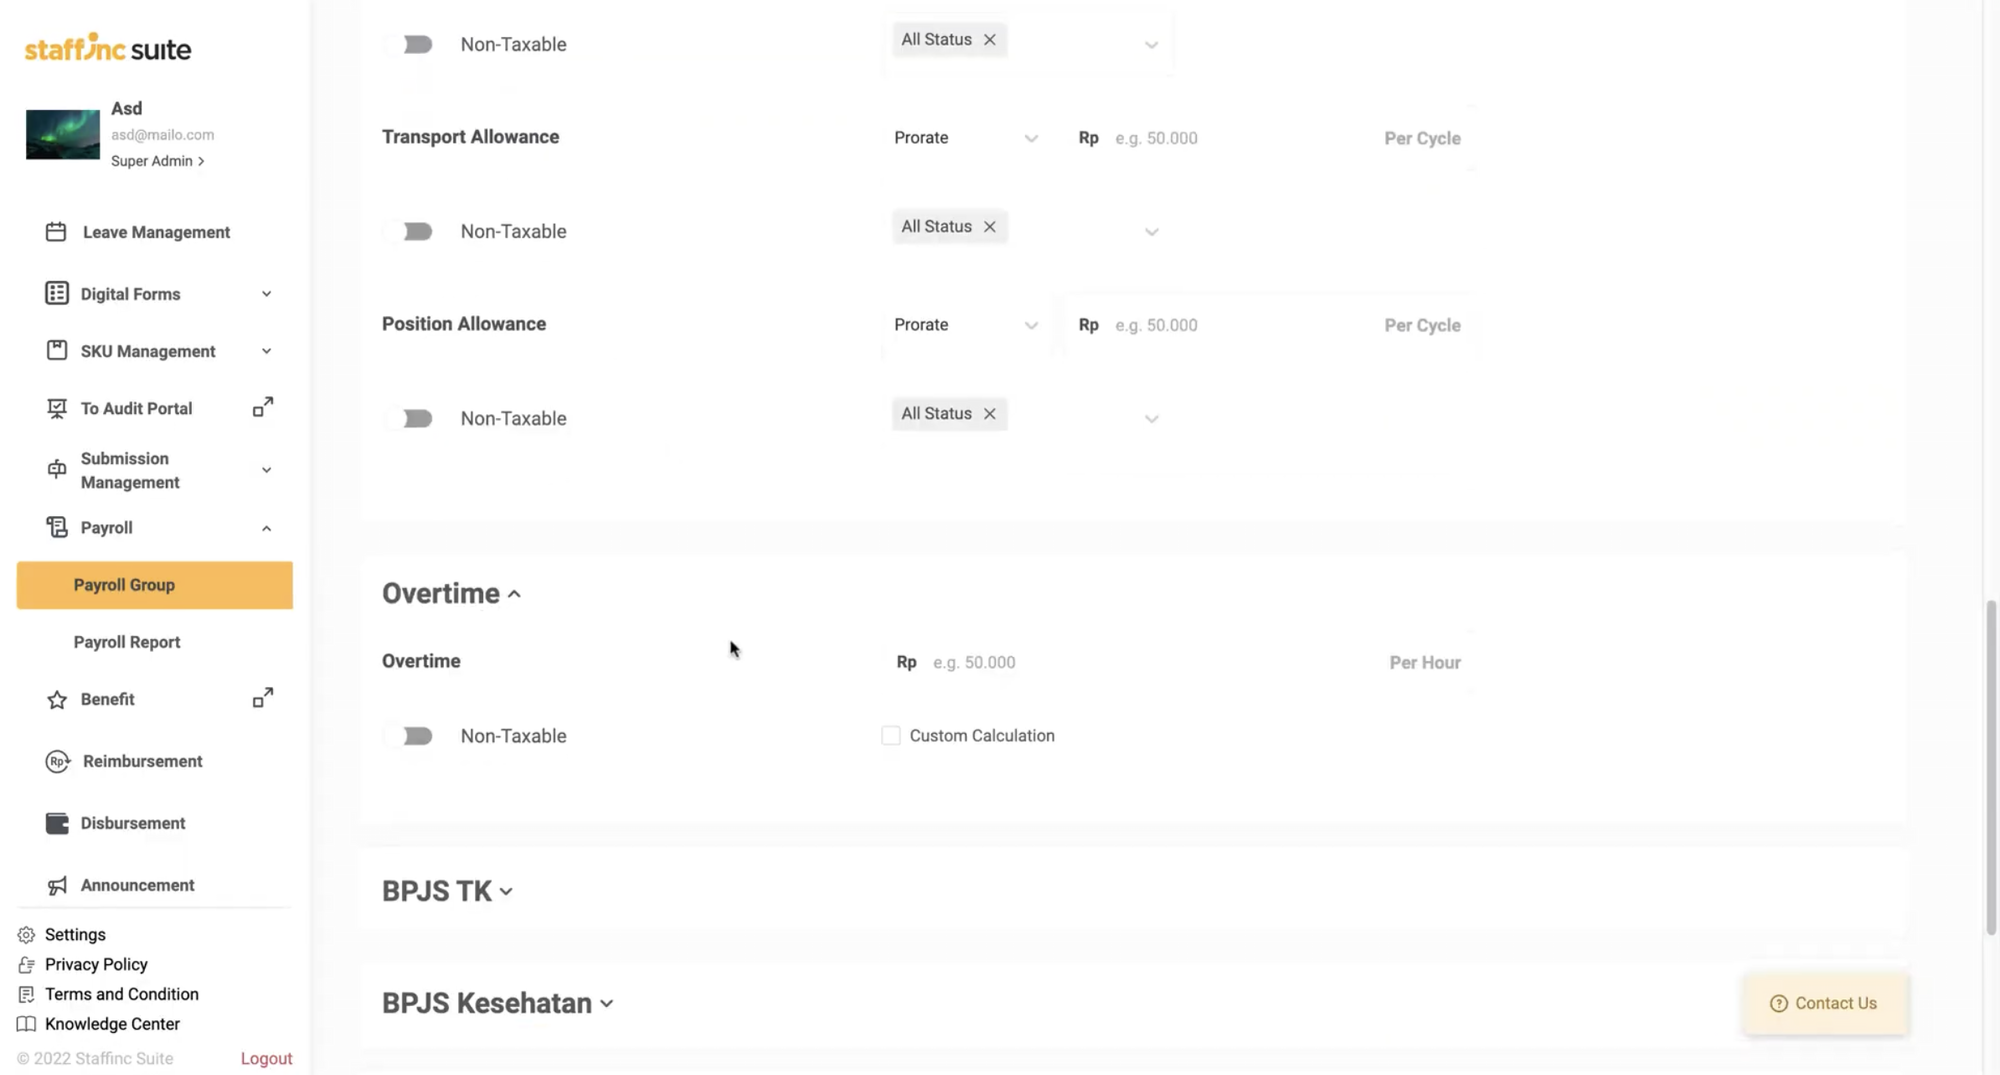
- BPJS TK: BPJS Employment information. This data includes information about the types of BPJS memberships, baseline salary, and the percentages for BPJS TK-JKK, BPJS TK-JKM, BPJS-JHT, and BPJS-JP contributions.

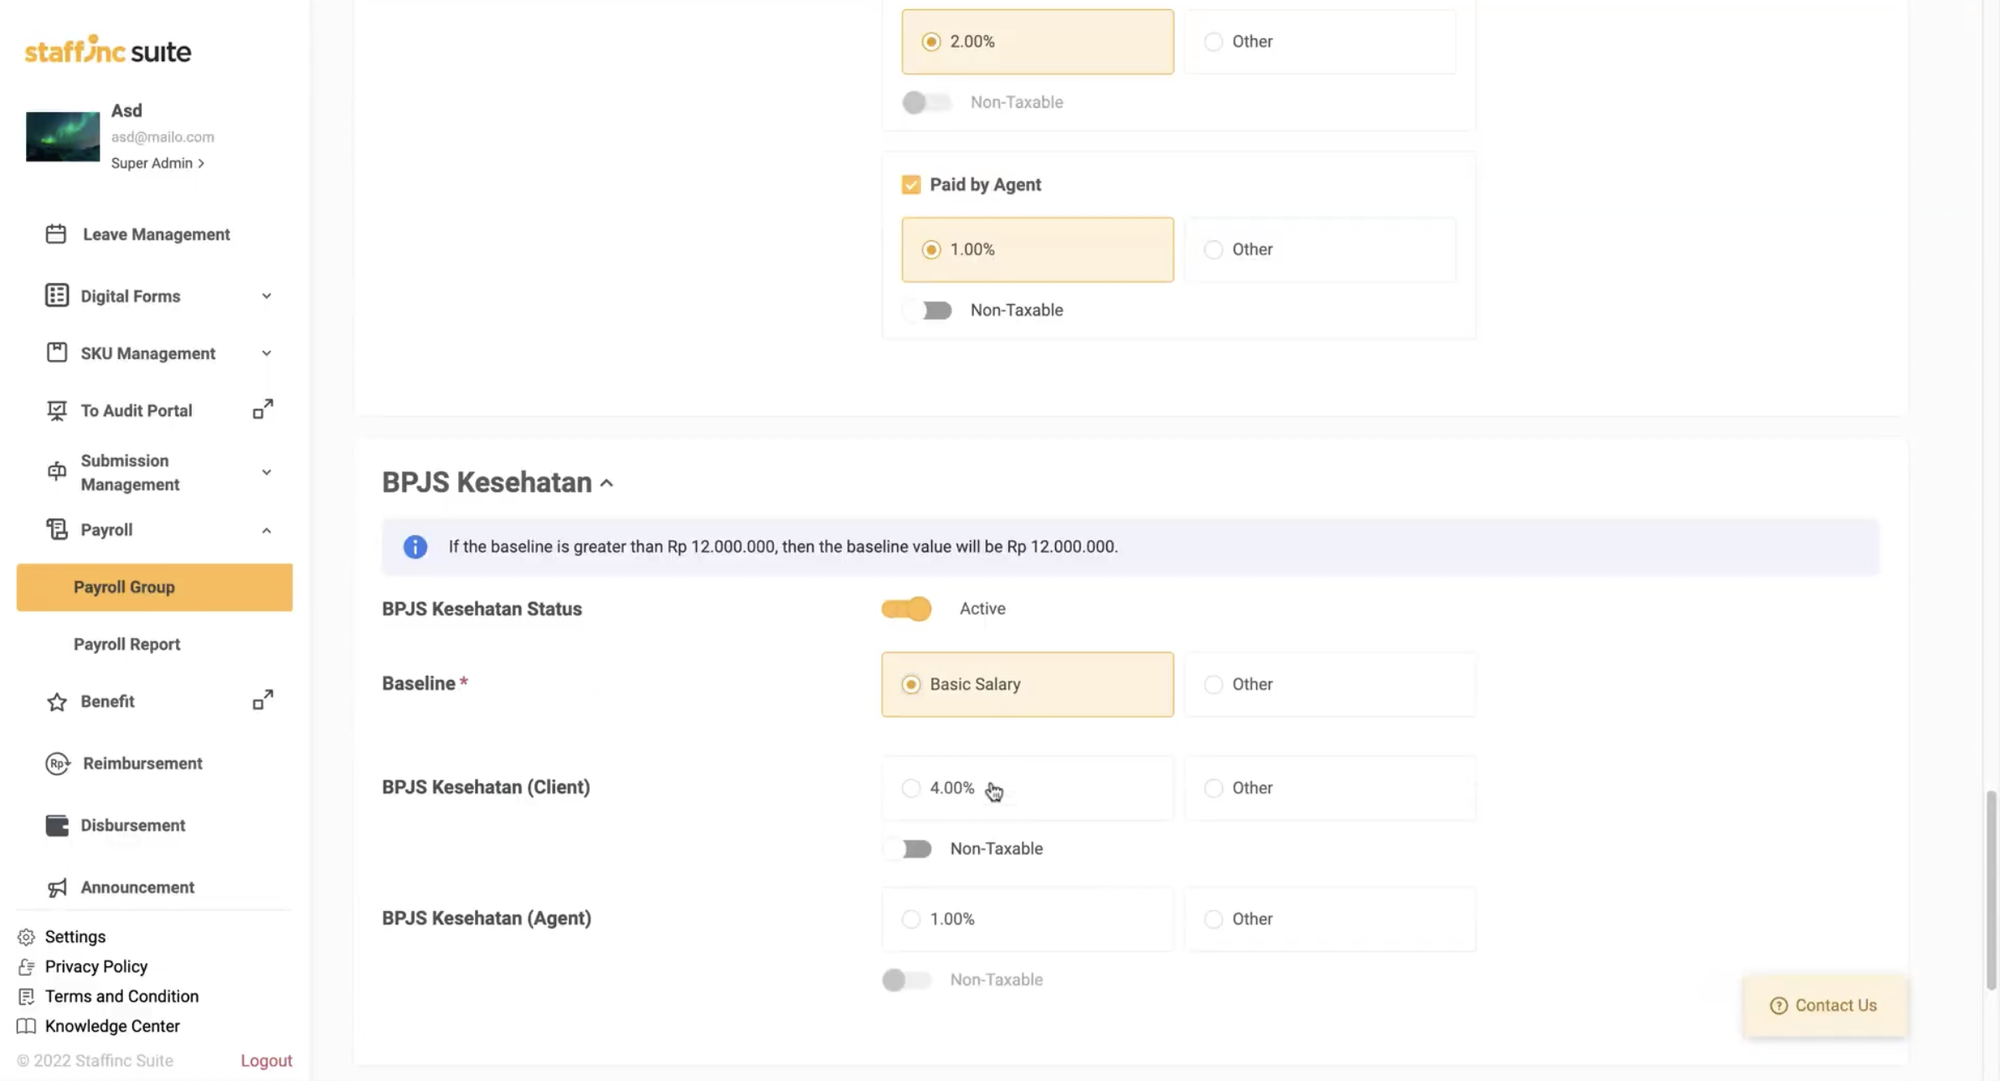
- BPJS Kesehatan: BPJS Health information. This data includes information such as active status, baseline salary, and the percentages for BPJS contributions by clients and agents.
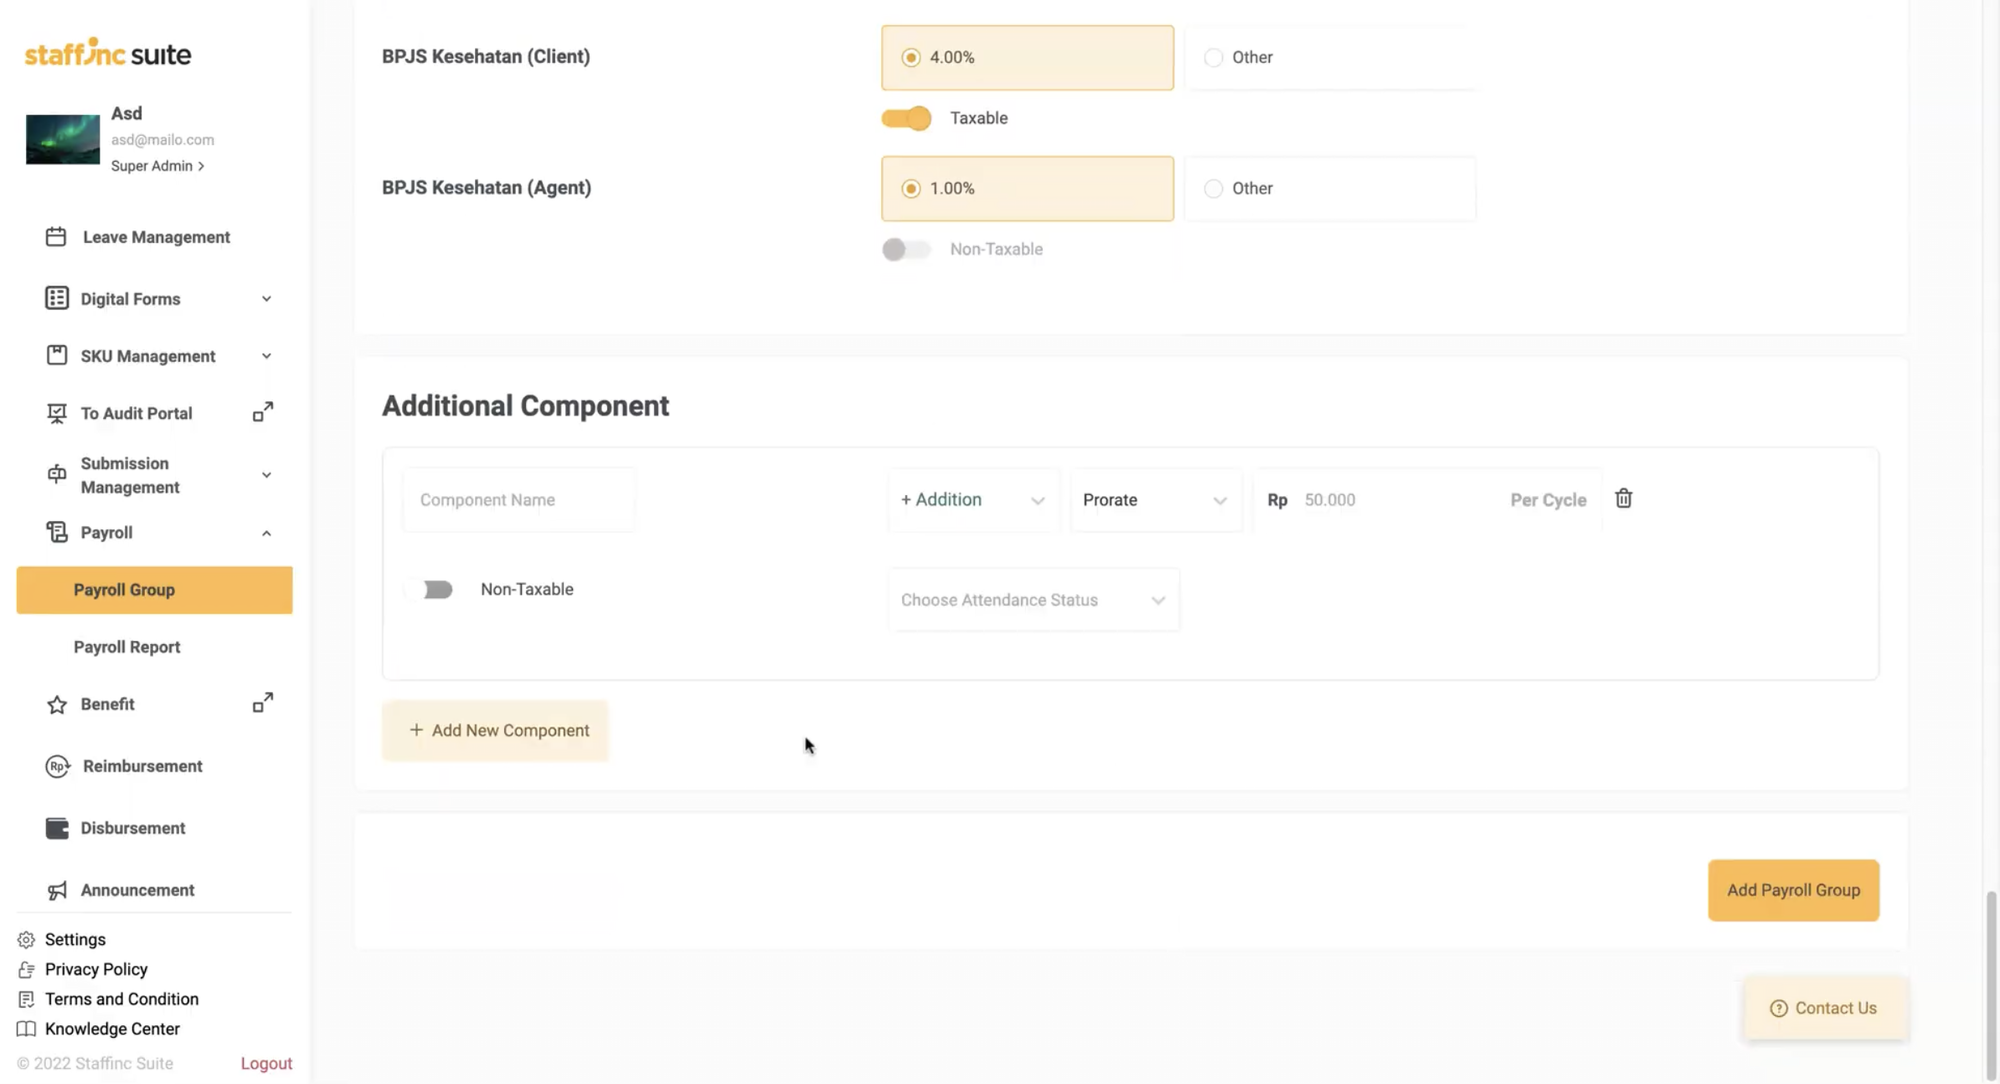
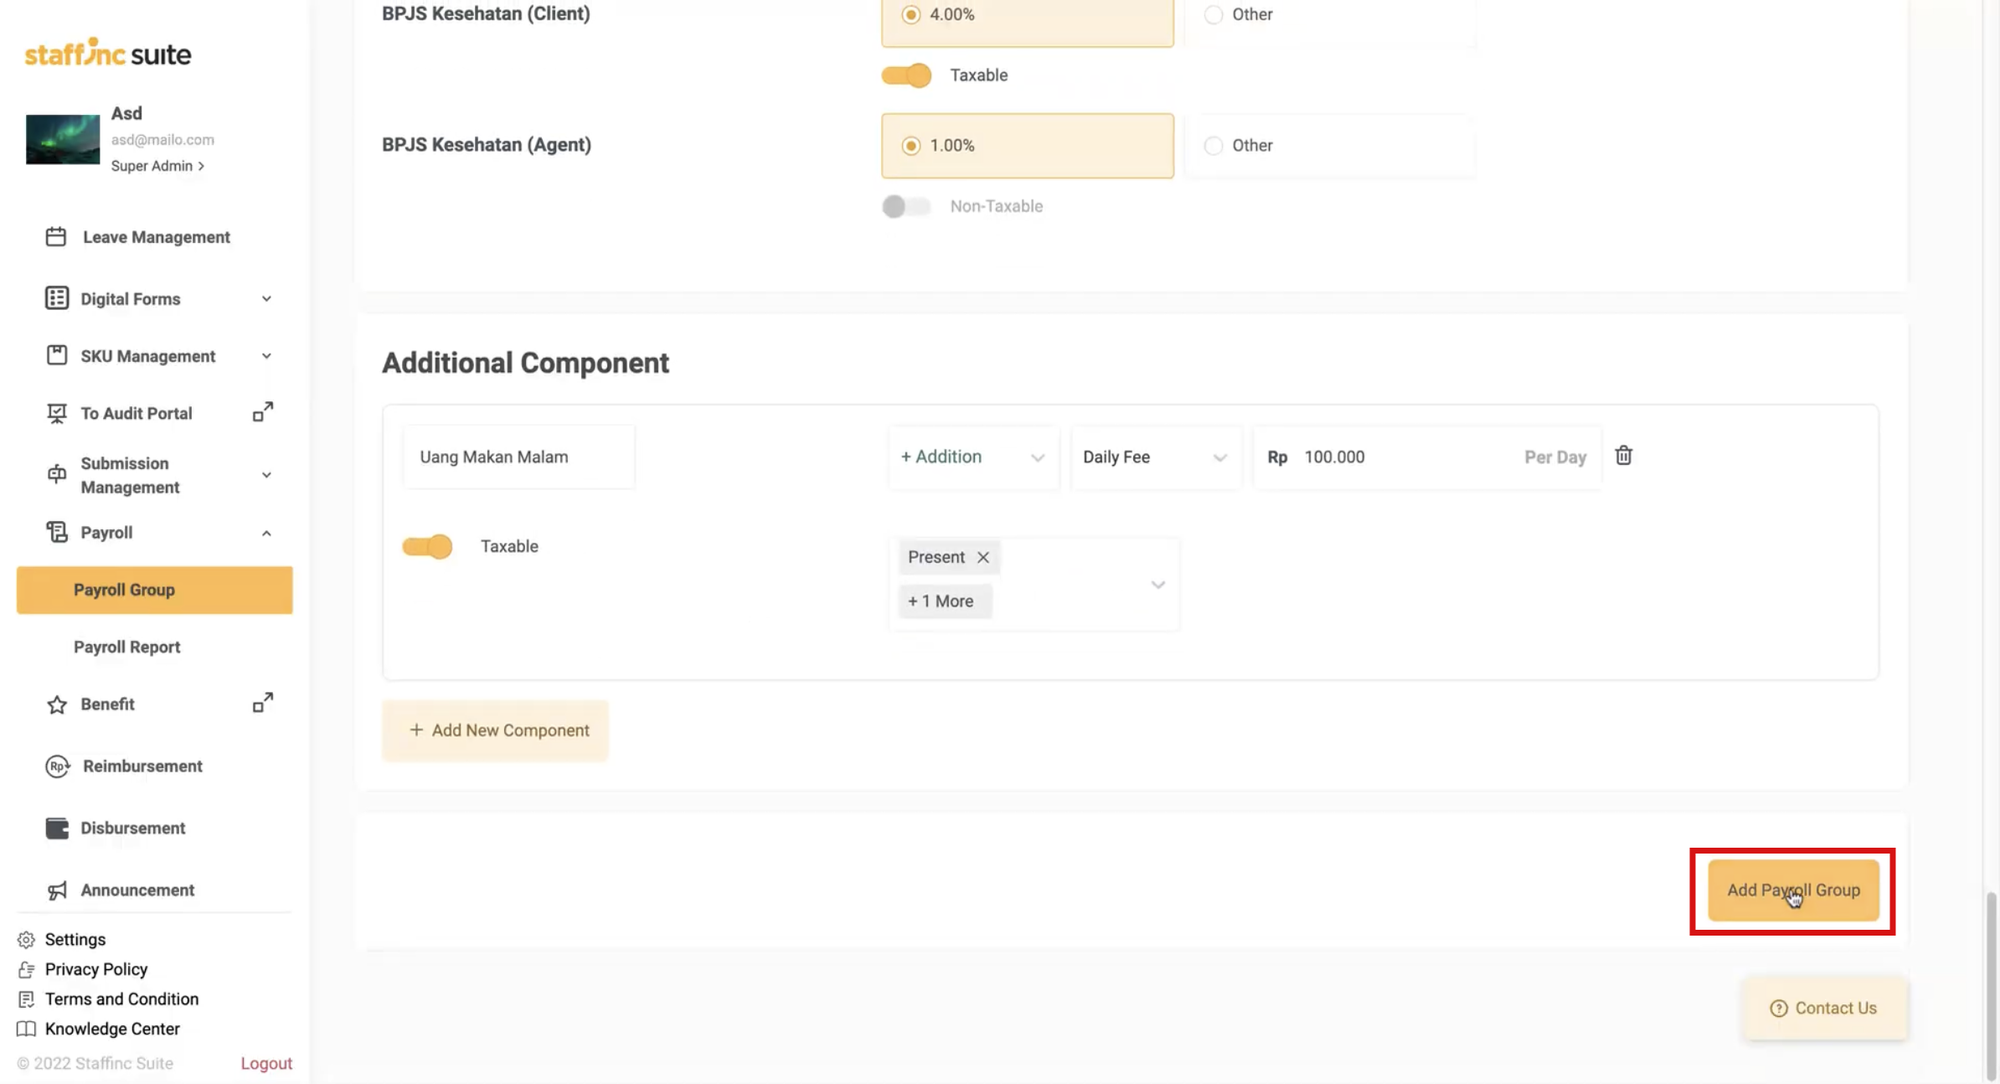
- Additional Component: Other additional components.
- Tax: Tax information.
- Click the desired data field to fill in other optional data. Some data fields that can be filled in include:
-
6. Save the New Payroll Group
- After filling in all the data, click Add Payroll Group.
- A notification saying "Successfully Create Payroll Group" will appear if the data has been successfully saved. You will be directed to the Payroll Group Detail page.
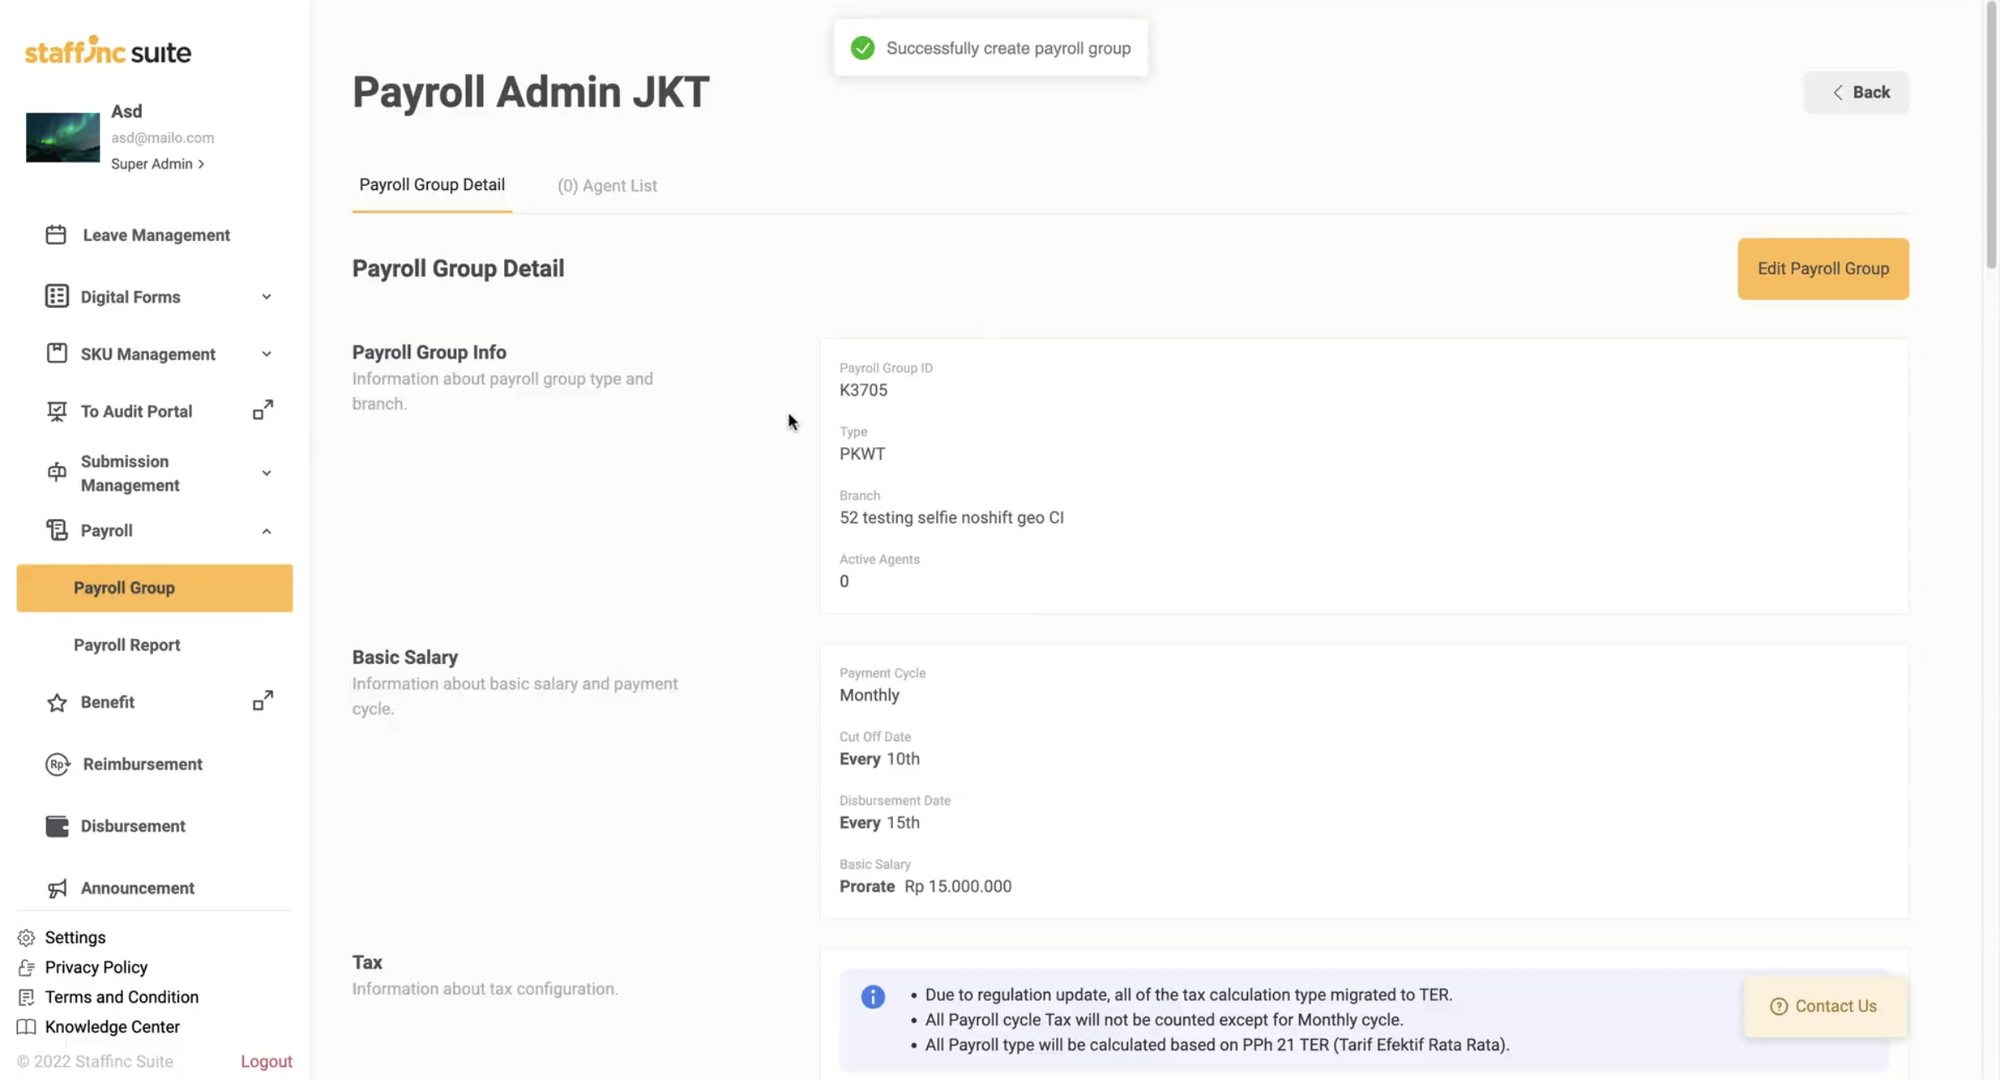
- After filling in all the data, click Add Payroll Group.
Managing Payroll Groups:
-
1. Assign Agents to Payroll Group
- On the Payroll Group Detail page, click the Agent list menu.
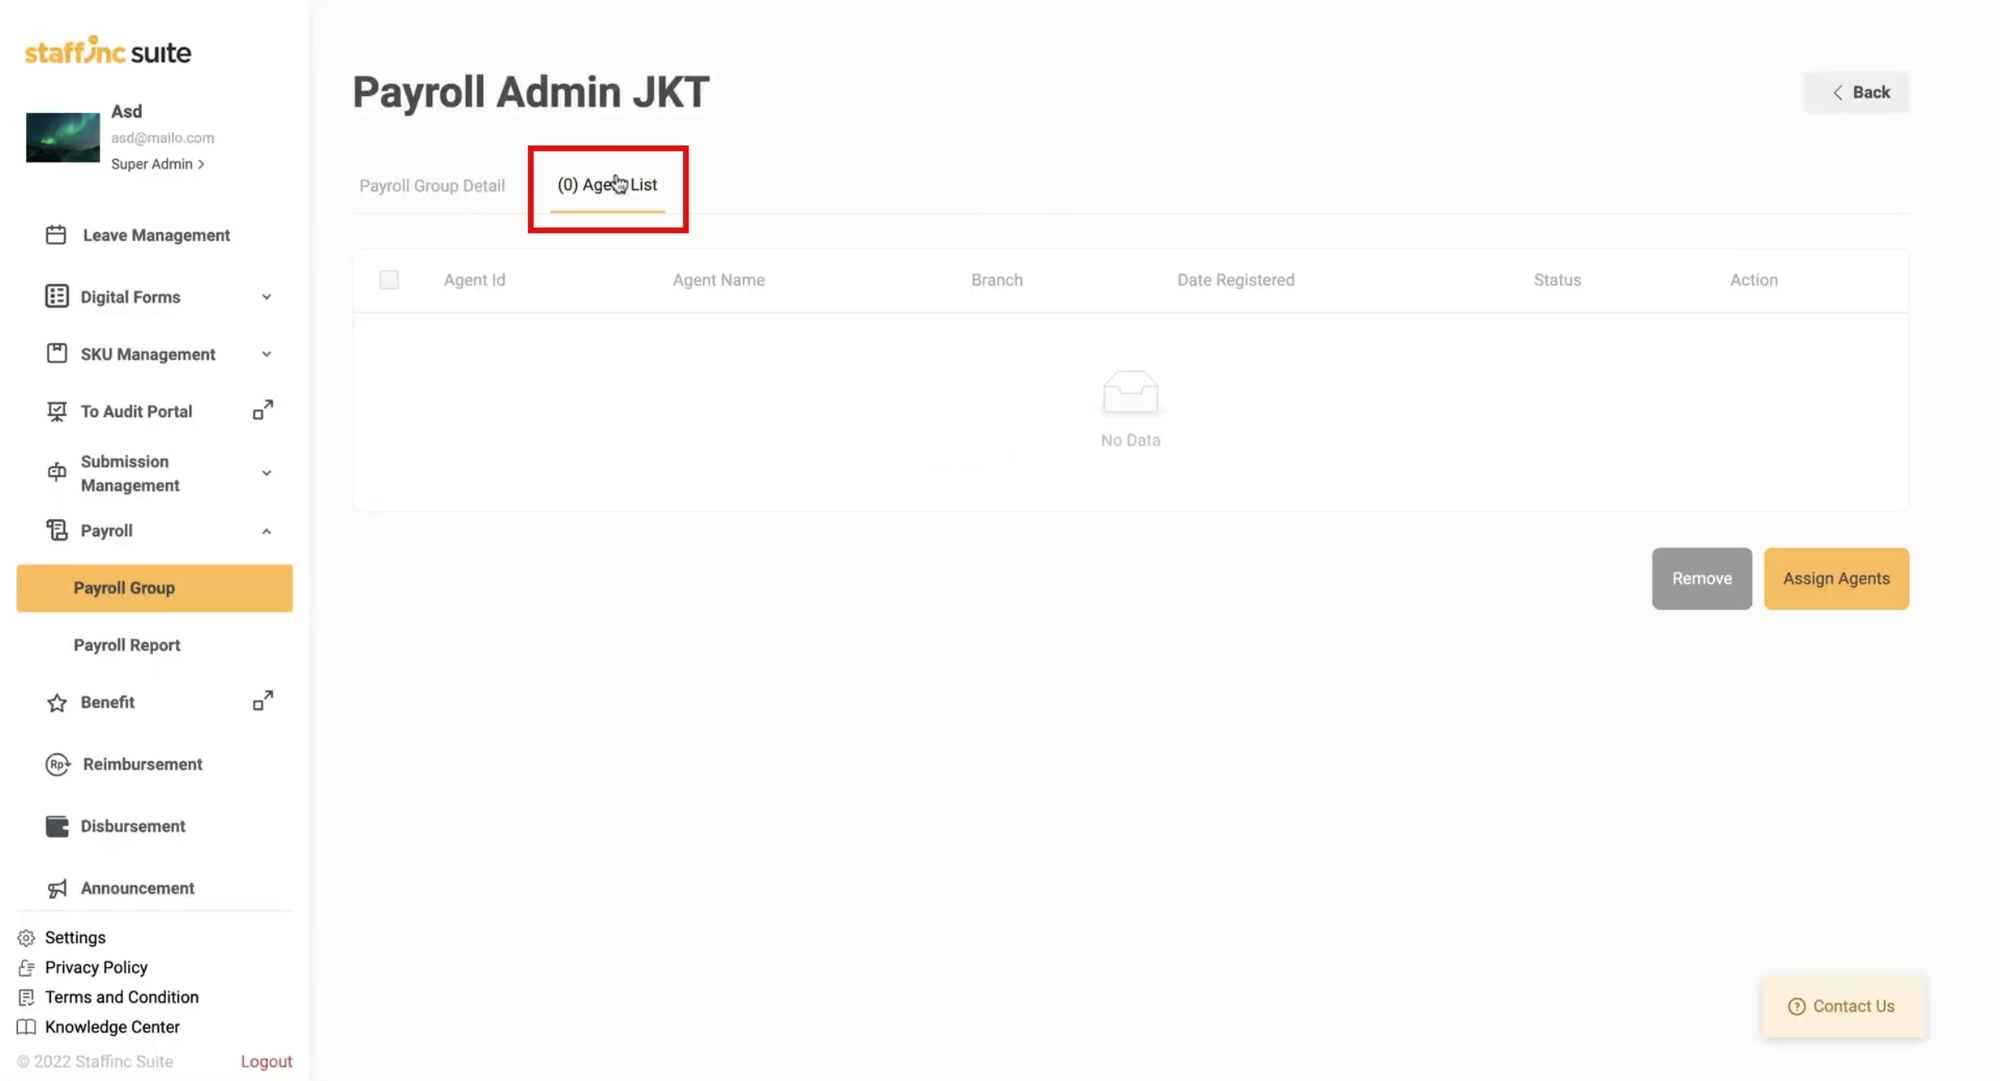
- Click Assign agent.
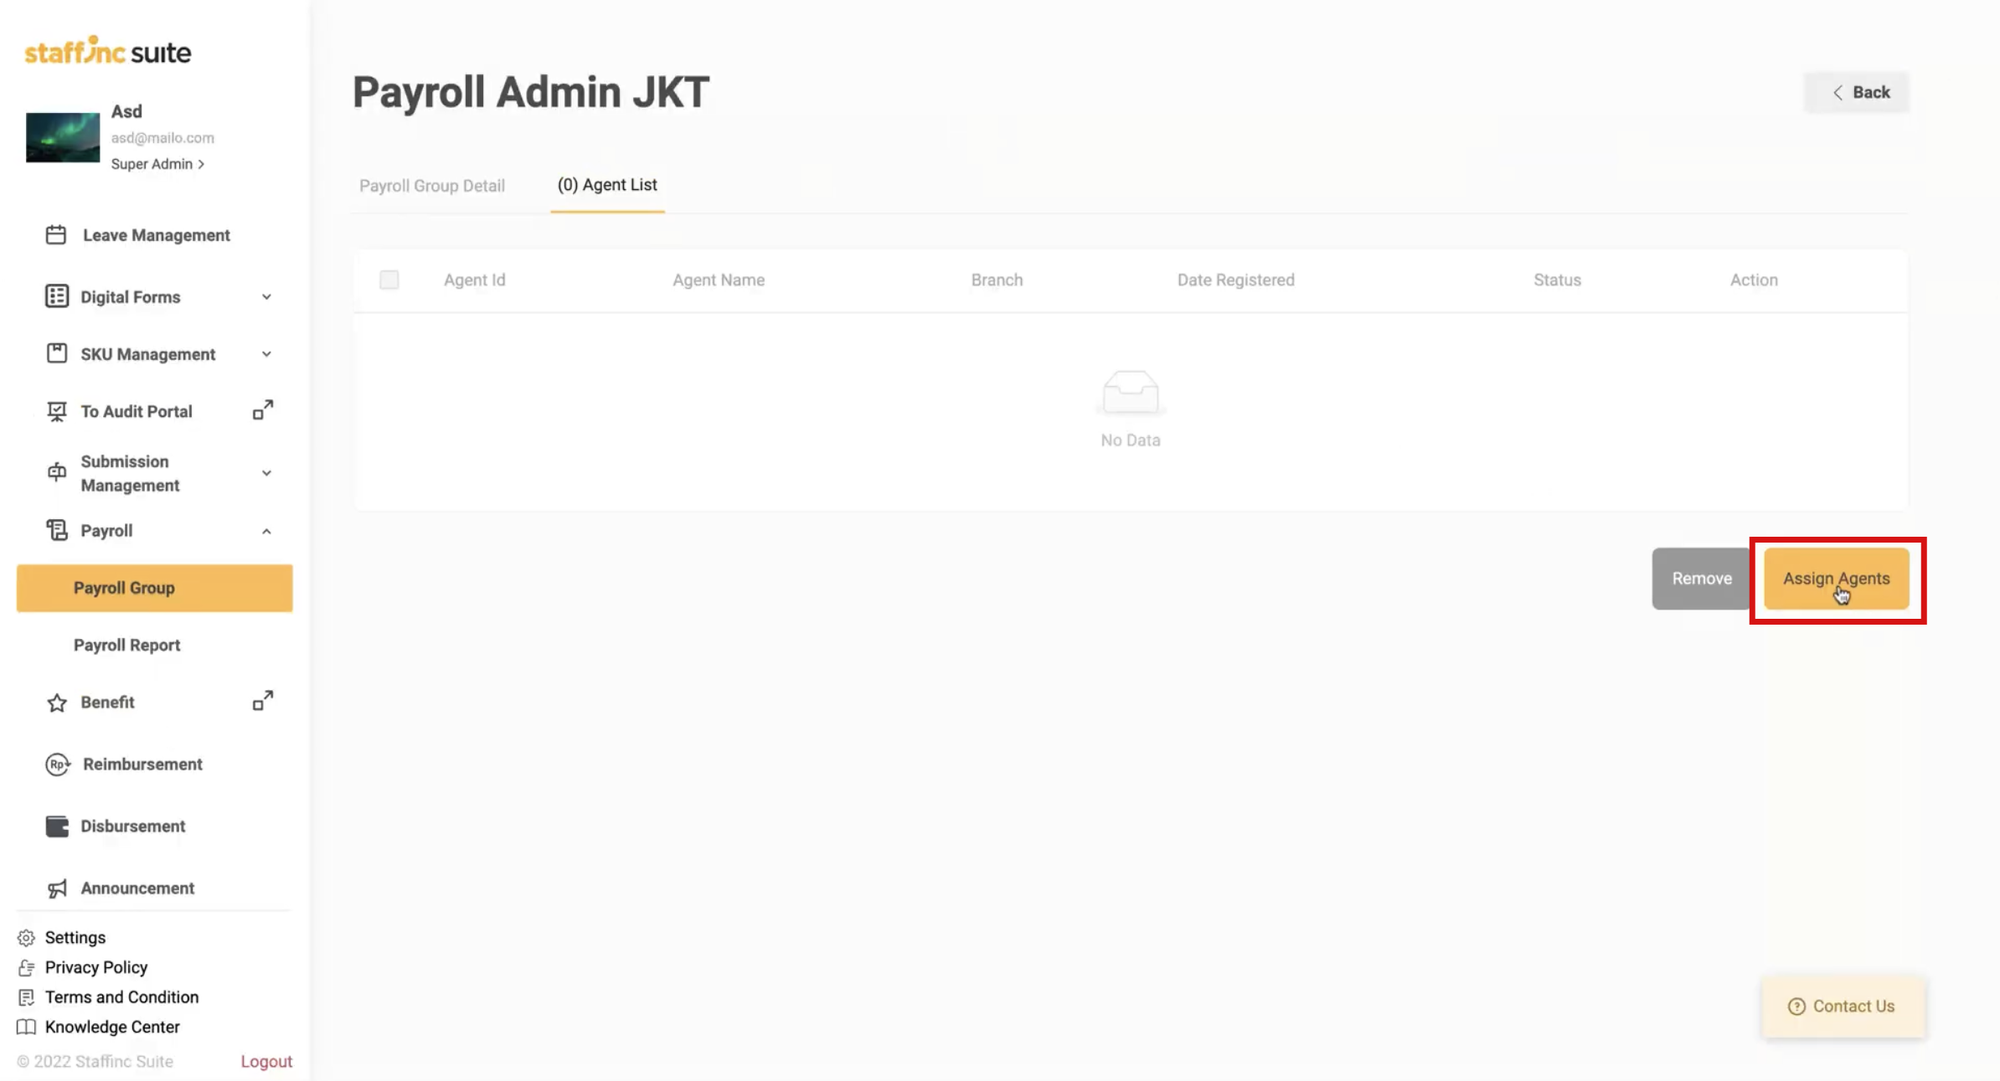
- A window listing agents will appear. Select the desired agents, then click Assign agent.
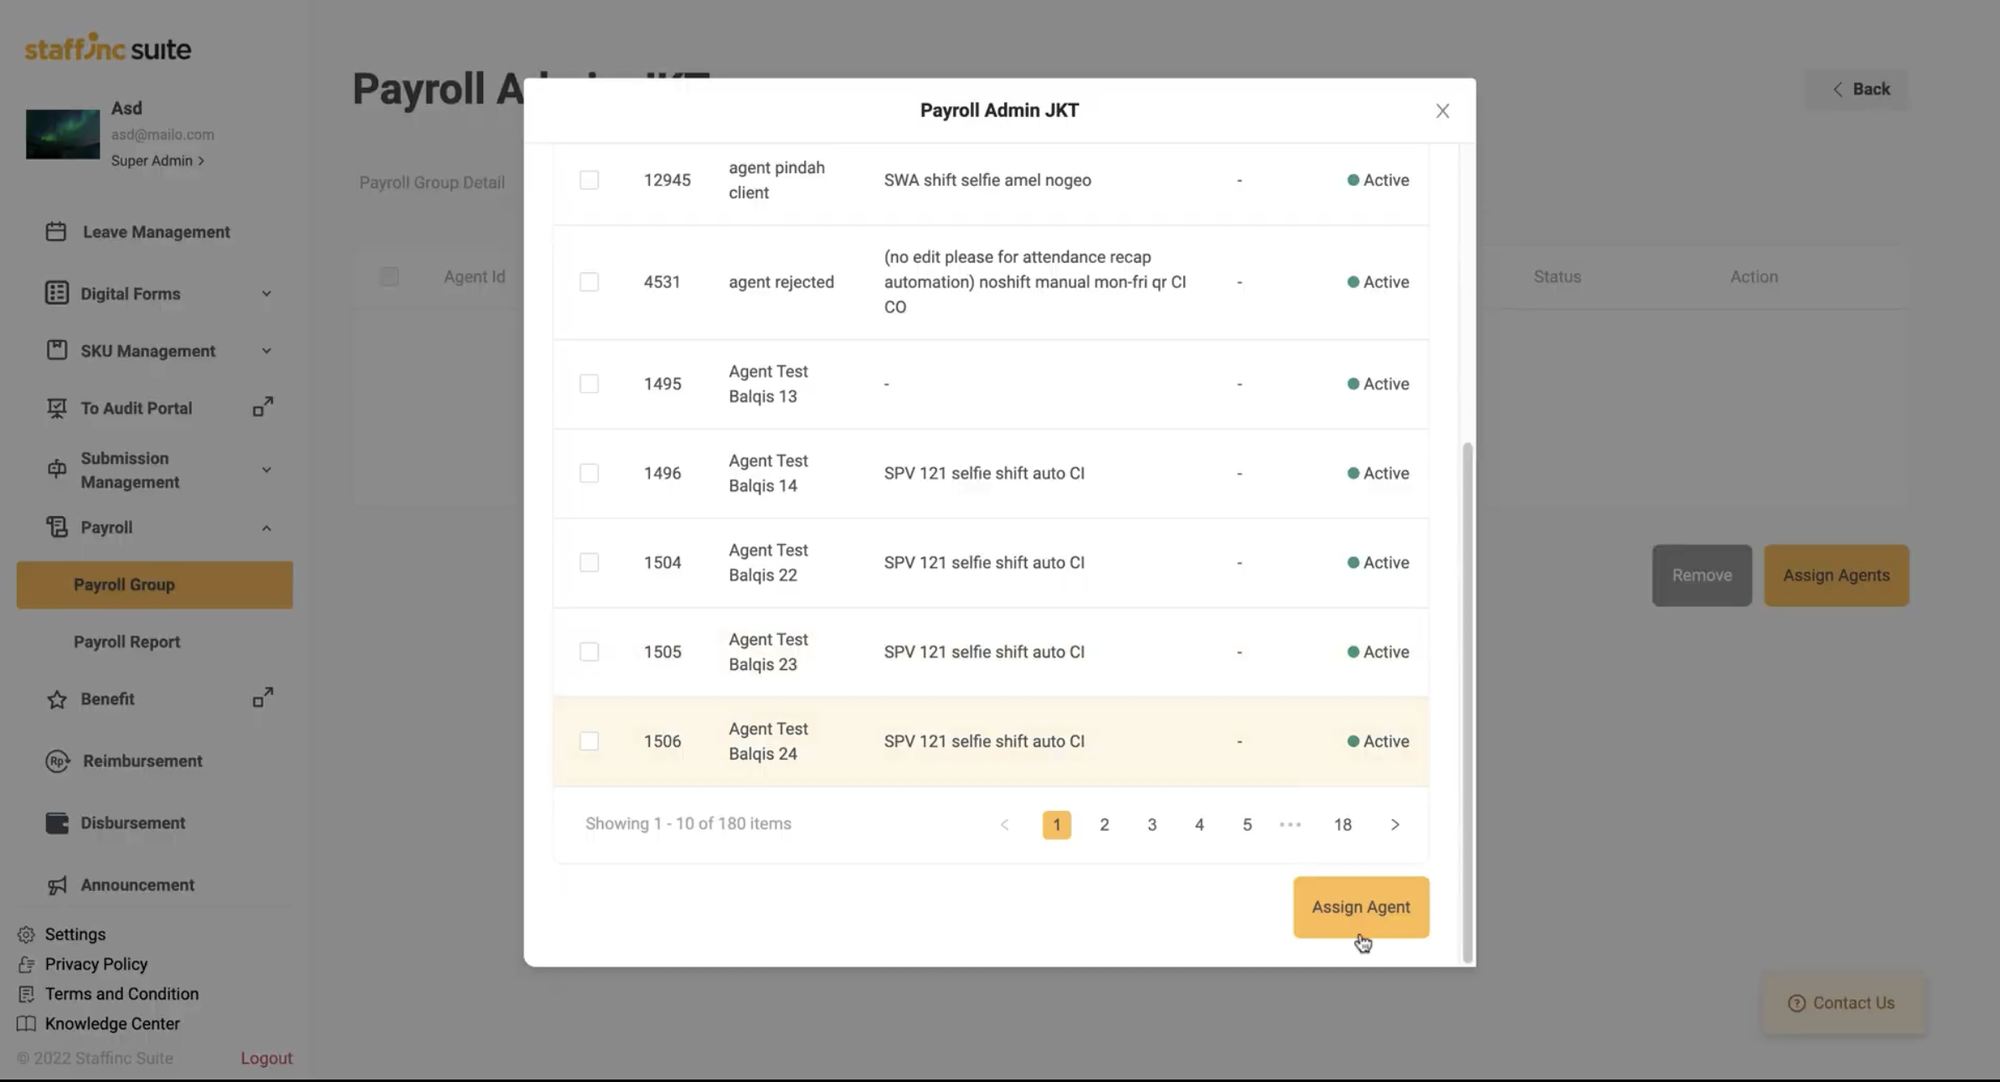
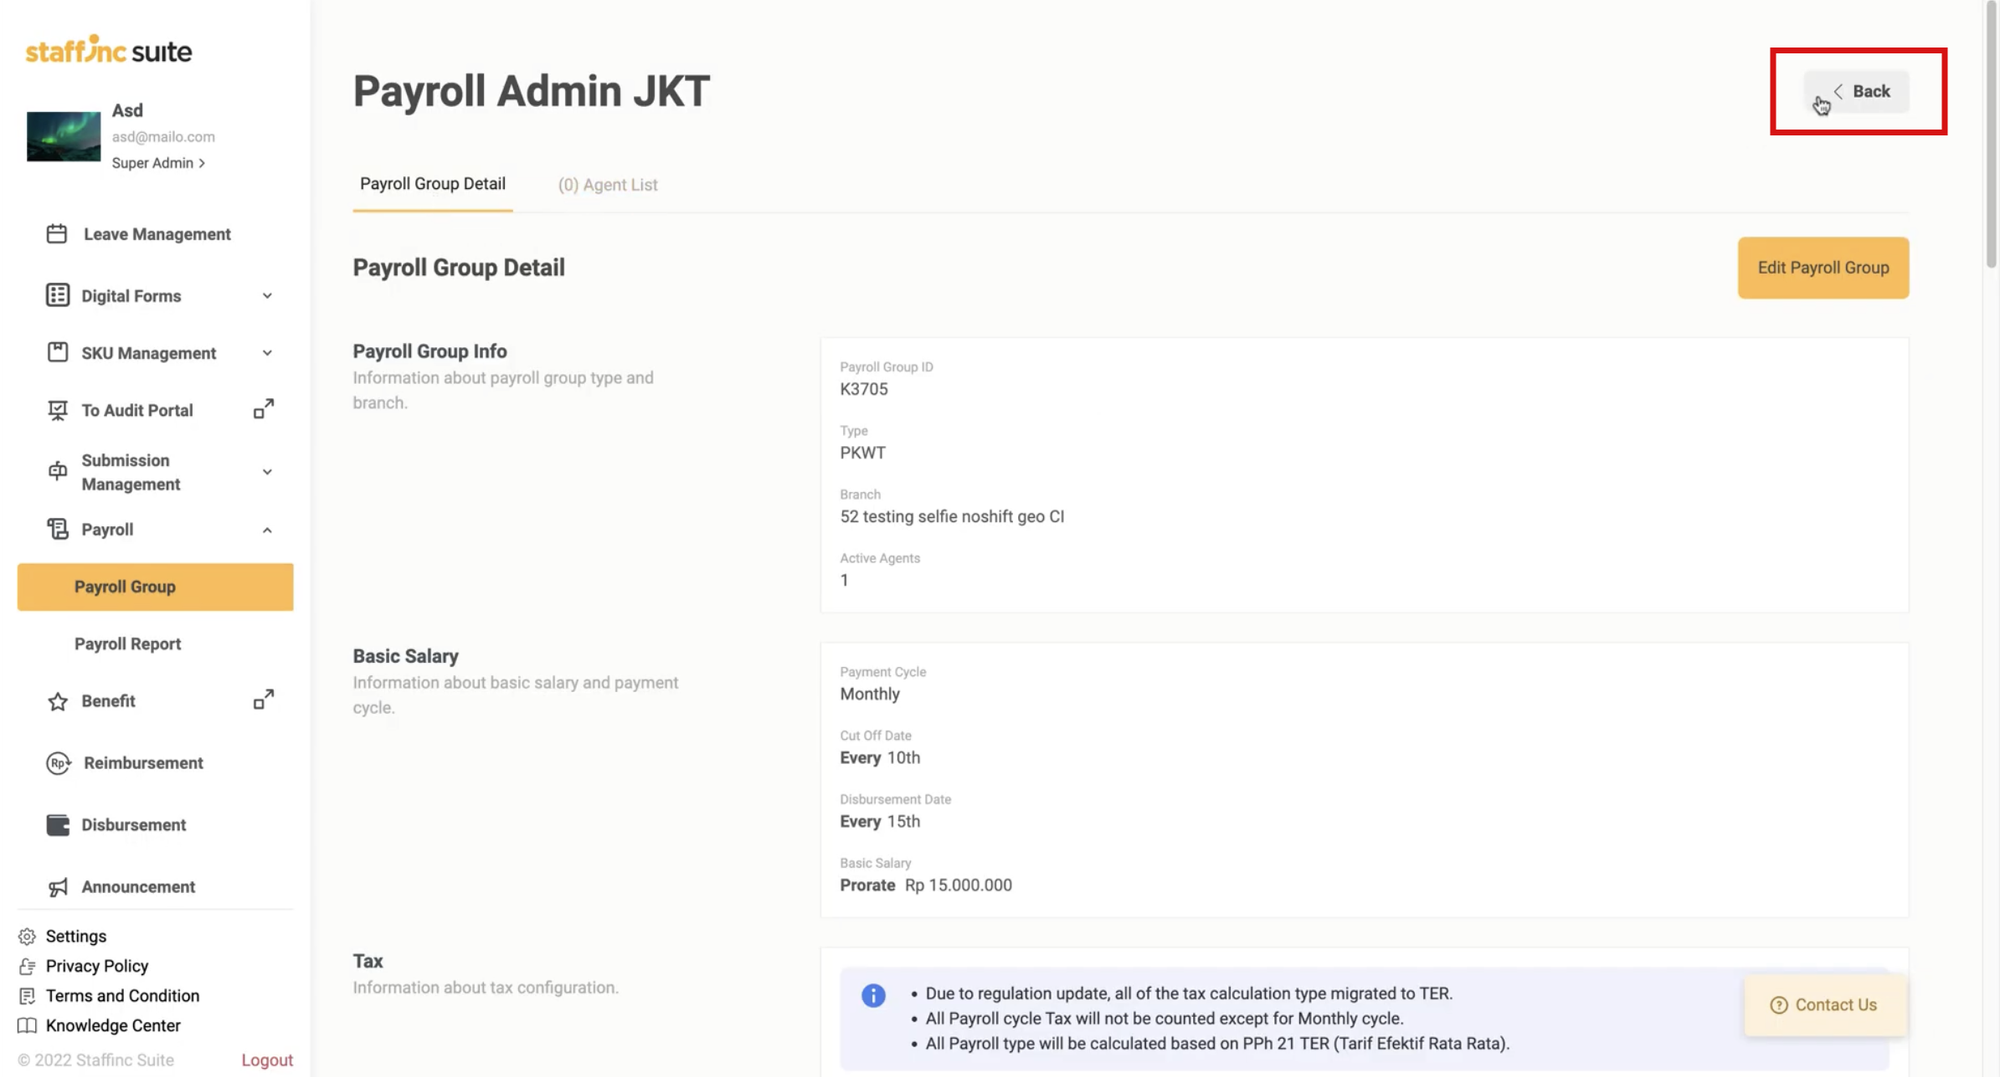
- Click <back to return to the Payroll Group page.
- On the Payroll Group Detail page, click the Agent list menu.
-
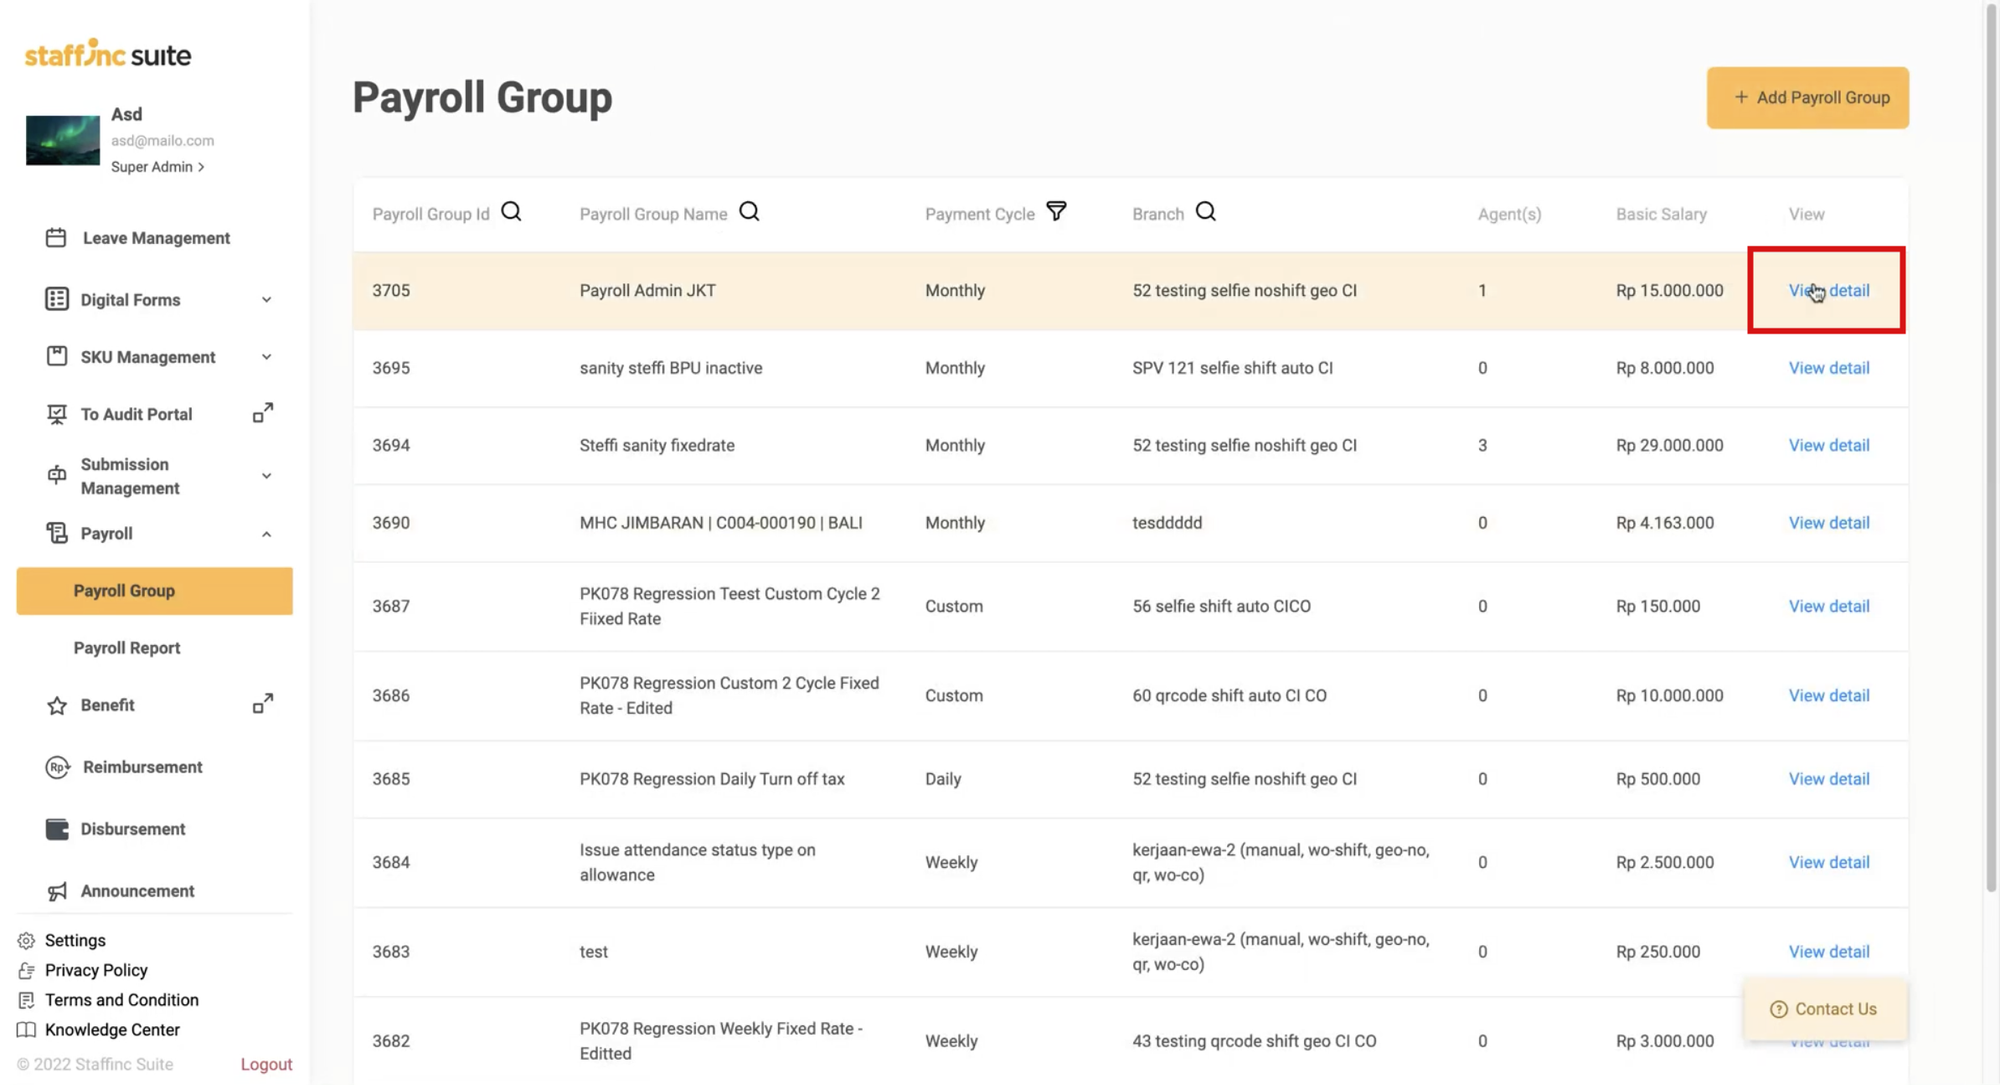
2. Edit Payroll Group Data
- Select the Payroll Group whose data you want to change by clicking View Detail.
- You will be directed to the selected Payroll Group Detail page, then click Edit Payroll Group.
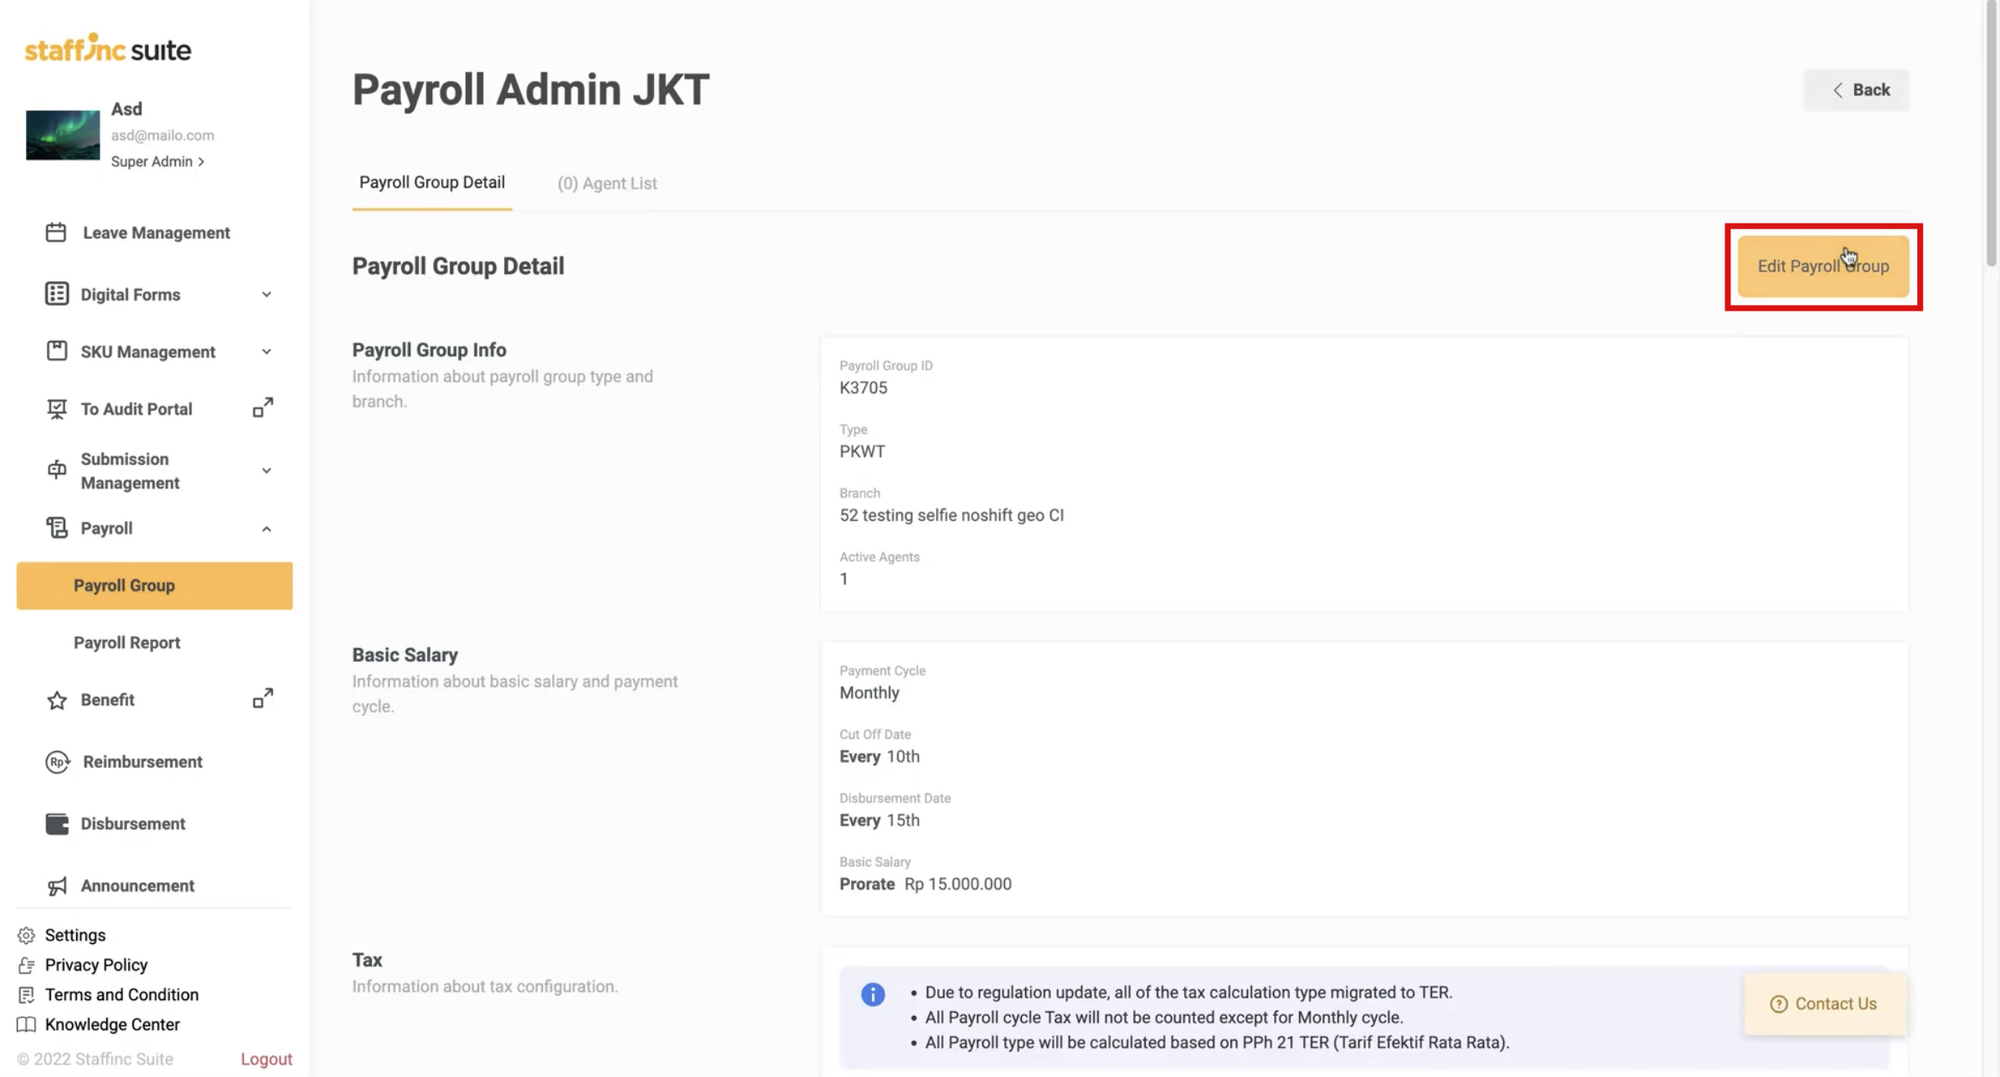
- Fill in the data that needs to be edited, then click Save Edit.
- Select the Payroll Group whose data you want to change by clicking View Detail.
By following the above steps, you can create, manage, and edit Payroll Groups easily, ensuring that all information is correctly saved.